8. OPERATION
Personal preferences/Other settings
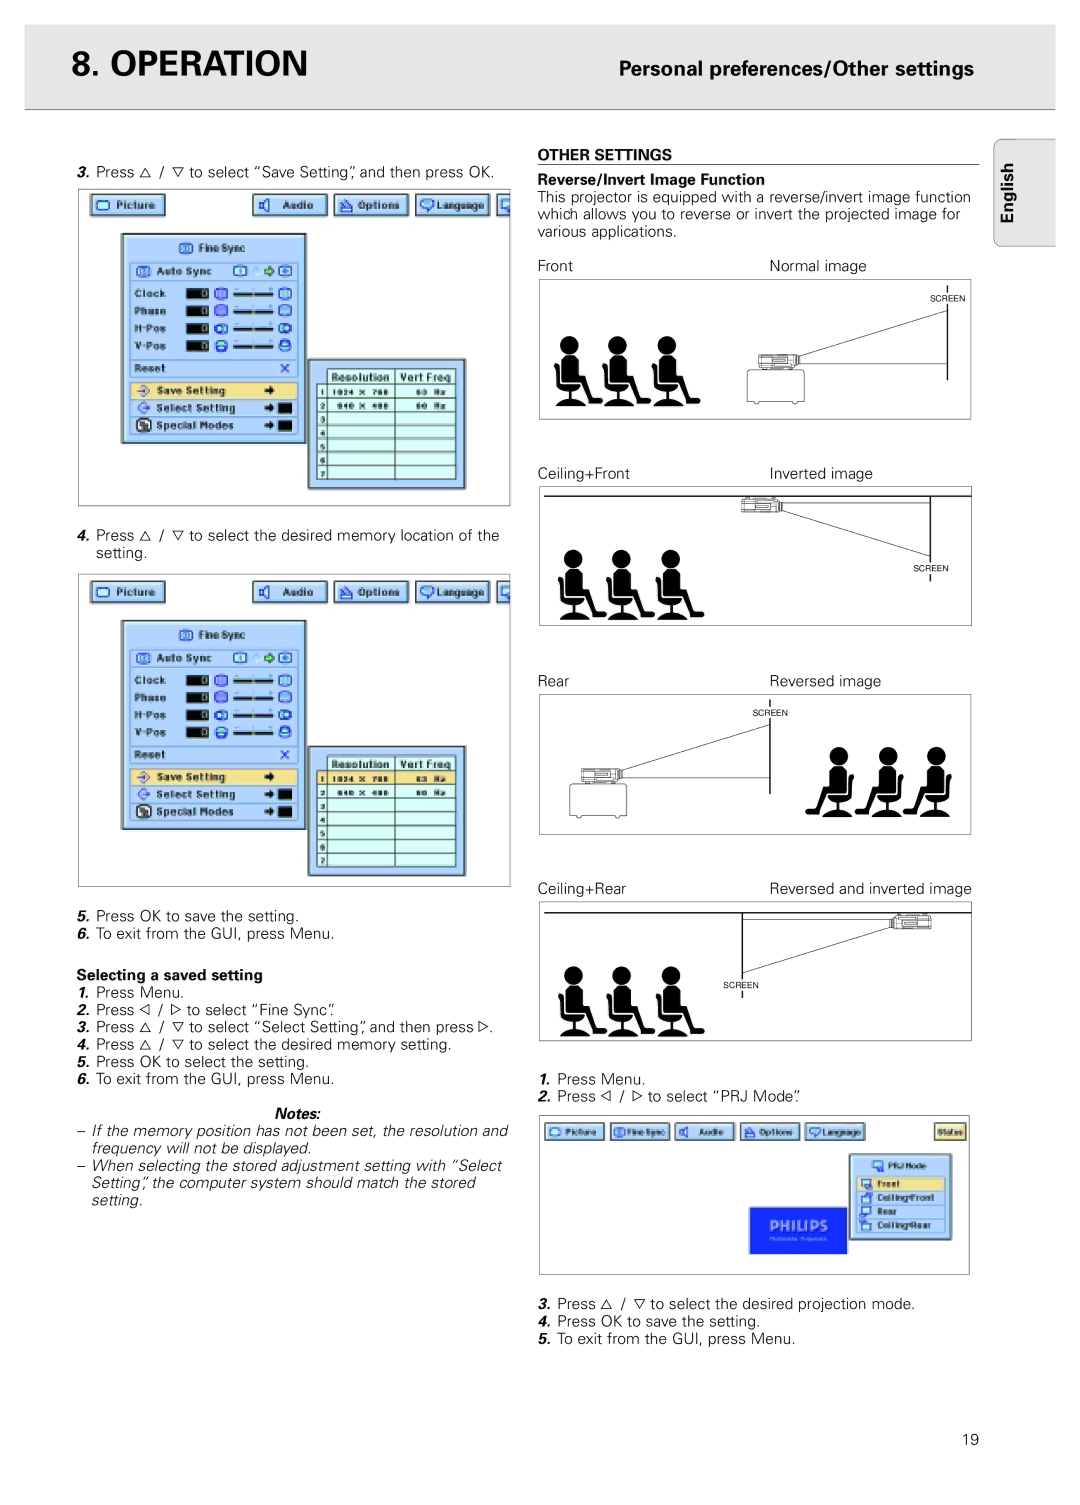
OTHER SETTINGS
3. Press 3 / 4 to select “Save Setting”, and then press OK. |
|
|
|
|
|
|
|
|
|
|
|
| |
Reverse/Invert Image Function |
|
|
|
|
|
|
| ||||||
|
|
|
|
|
|
|
|
| |||||
|
| This projector is equipped with a reverse/invert image function | |||||||||||
|
| which allows you to reverse or invert the projected image for | |||||||||||
|
| various applications. |
|
|
|
|
|
|
| ||||
|
| Front | Normal image | ||||||||||
|
|
|
|
|
|
|
|
|
|
|
|
| |
|
|
|
|
|
|
|
|
|
|
|
|
|
|
|
|
|
|
|
|
|
|
|
|
| SCREEN |
| |
|
|
|
|
|
|
|
|
|
|
|
|
|
|
|
|
|
|
|
|
|
|
|
|
|
|
|
|
|
|
|
|
|
|
|
|
|
|
|
|
|
|
|
|
|
|
|
|
|
|
|
|
|
|
|
|
|
|
|
|
|
|
|
|
|
|
|
|
|
|
English
4.Press 3 / 4 to select the desired memory location of the setting.
Ceiling+Front | Inverted image | |||
|
|
|
|
|
SCREEN
5.Press OK to save the setting.
6.To exit from the GUI, press Menu.
Selecting a saved setting
1.Press Menu.
2.Press 1 / 2 to select “Fine Sync”.
3.Press 3 / 4 to select “Select Setting”, and then press 2.
4.Press 3 / 4 to select the desired memory setting.
5.Press OK to select the setting.
6.To exit from the GUI, press Menu.
Notes:
–If the memory position has not been set, the resolution and frequency will not be displayed.
–When selecting the stored adjustment setting with “Select Setting”, the computer system should match the stored setting.
Rear |
|
| Reversed image | |||||
|
|
|
|
|
|
|
|
|
|
|
|
| SCREEN | ||||
|
|
|
|
|
|
|
|
|
|
|
|
|
|
|
|
|
|
|
|
|
|
|
|
|
|
|
|
|
|
|
|
|
|
|
|
|
|
|
|
|
|
|
|
|
Ceiling+Rear | Reversed and inverted image | ||||
|
|
|
|
|
|
SCREEN
1.Press Menu.
2.Press 1 / 2 to select “PRJ Mode”.
3.Press 3 / 4 to select the desired projection mode.
4.Press OK to save the setting.
5.To exit from the GUI, press Menu.
19