9. ADDITIONAL INFORMATION
Maintenance
English
|
|
|
|
Maintenance Indicator | Condition | Problem | Possible Solution |
TEMP. | The internal | • Blocked air intake. | • Relocate the projector to an area with |
WARNING indicator | temperature is |
| proper ventilation. |
(Temp) | abnormally high. | • Clogged air filter. | • Clean the filter. |
|
|
| (see page 25.) |
|
| • Cooling fan breakdown. | • Take the projector to your nearest |
|
| • Internal circuit failure. | Authorized Philips Industrial LCD |
|
|
| Products Dealer or Service Center for |
|
|
| repair. |
LAMP indicator | The lamp does not | • | • Carefully replace the lamp. |
(Lamp) | light up | • Lamp circuit failure. | (See page 26.) |
|
|
| • Take the projector to your nearest |
|
|
| Authorized Philips Industrial LCD |
|
|
| Products Dealer or Service Center for |
|
|
| repair. |
POWER INDICATOR | The POWER indicator | • The bottom filter cover | • Securely install the bottom filter cover. |
z / y | flashes in red when the | is open. |
|
| projector is on. |
|
|
|
|
|
|
|
|
|
|
Notes:
–If the Temperature warning indicator lights up, follow the above possible solutions and then wait until the projector has cooled down completely before turning the power back on. (At least 5 minutes.)
–If the power is turned off and then turned on again, as during a brief rest, the Lamp indicator may be triggered, preventing the power from going on. Should this occur, take the power cord out of the wall outlet and put it back in again.
Lamp (LCA 3110; 8670 931 10009)
The lamp in this projector operates for approximately 2000 cumulative hours, depending on the usage environment. It is recommended that the lamp be replaced after 1900 cumulative hours of use or when you notice a significant deterioration of the picture and colour quality. The lamp usage time can be checked with the
(see page 23).
CAUTION!
–Intense light hazard. Do not attempt to look into the aperture and lens while the projector is operating.
–As the usage environment can vary significantly, the projector lamp may not operate for 2000 hours.
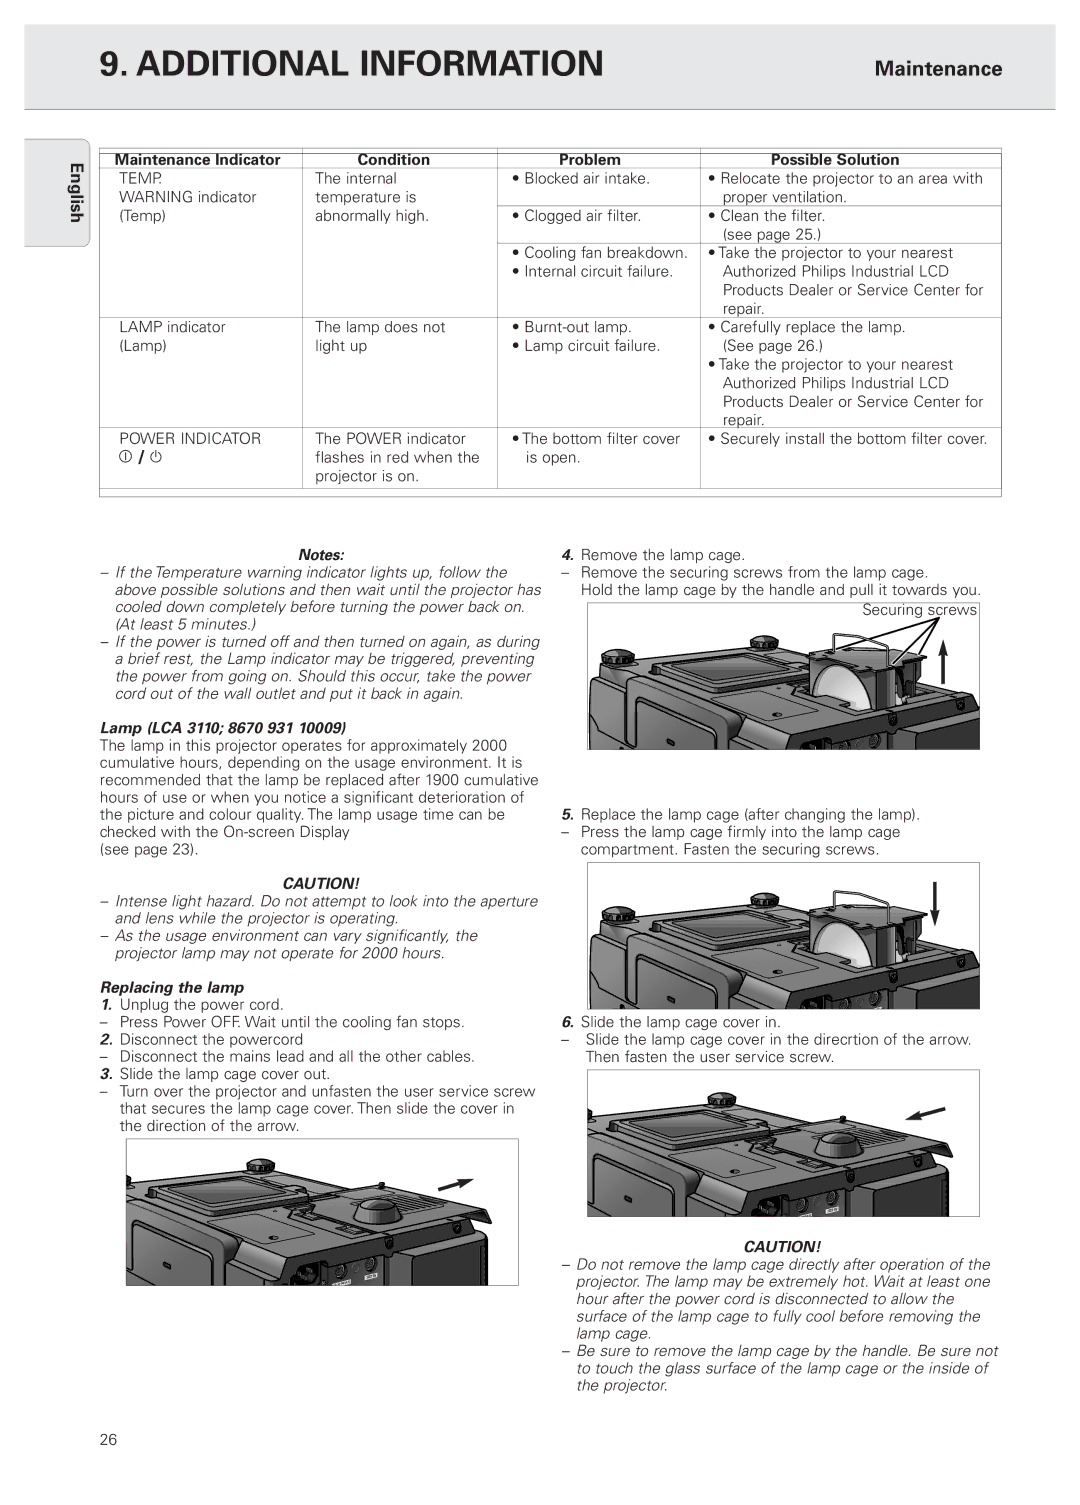
Replacing the lamp
1.Unplug the power cord.
–Press Power OFF. Wait until the cooling fan stops.
2. Disconnect the powercord
–Disconnect the mains lead and all the other cables.
3. Slide the lamp cage cover out.
–Turn over the projector and unfasten the user service screw that secures the lamp cage cover. Then slide the cover in the direction of the arrow.
4.Remove the lamp cage.
–Remove the securing screws from the lamp cage.
Hold the lamp cage by the handle and pull it towards you.
Securing screws |
5.Replace the lamp cage (after changing the lamp).
– Press the lamp cage firmly into the lamp cage compartment. Fasten the securing screws.
6.Slide the lamp cage cover in.
–Slide the lamp cage cover in the direcrtion of the arrow. Then fasten the user service screw.
CAUTION!
–Do not remove the lamp cage directly after operation of the projector. The lamp may be extremely hot. Wait at least one hour after the power cord is disconnected to allow the surface of the lamp cage to fully cool before removing the lamp cage.
–Be sure to remove the lamp cage by the handle. Be sure not to touch the glass surface of the lamp cage or the inside of the projector.
26