Setup
Initial setup is required before playing DVDs.
Setting the TV system
The default setting of this player is AUTO, and unless you notice that the picture is distorted when playing some discs, you should leave it set to AUTO.
If you experience picture distortion with some discs, set the TV system to match your country or region’s system. Doing this, however, may restrict the kinds of disc you can watch. The table below shows what kinds of disc are compatible with each set- ting (AUTO, PAL and NTSC).
Disc |
|
| Output format | |||
|
|
|
|
|
| |
Type |
| Format |
| Player setting | ||
|
|
|
| |||
NTSC | PAL | AUTO | ||||
|
|
| ||||
|
|
|
|
|
| |
DVD |
| NTSC | NTSC | MOD. PAL | NTSC | |
|
|
|
|
| ||
| PAL | PAL | PAL | |||
|
| |||||
|
|
|
|
|
| |
CD, No disc |
|
| NTSC | PAL | NTSC or PAL | |
|
|
|
|
|
| |
To change the TV system setting, turn on the power while hold- ing the TITLE+ button depressed, then continue holding the but- ton depressed for 2 seconds.
The TV system changes as follows:
Preparations (Setup)
About MOD. (Modulation) PAL |
|
|
¶ SHRINK |
|
|
Most models of the newly developed countdown PAL TV system |
|
|
| ||
detect 50 Hz (PAL)/60 Hz (NTSC) and automatically switch vertical |
| English |
amplitude, resulting in a display without vertical shrinkage. |
| |
|
| |
¶ If your PAL TV does not have a |
|
|
to view NTSC disc because the picture may roll. If the TV has a V- |
|
|
Hold control, adjust it until the picture stops rolling. On some TVs, |
|
|
the picture may shrink vertically, leaving black bands at the top and |
|
|
bottom of the screen. This is not a malfunction; it is caused by the |
|
|
NTSC \ PAL conversion. |
|
|
|
|
|
Using the Setup Navigator
The “Setup Navigator” uses a dialog format to make basic tel- evision and amplifier settings. The various settings are made au- tomatically as the user responds to displayed questions. The Setup Navigator function cannot be used during playback.
When Setup Navigator is started, setup questions appear in the following order:
Language (OSD Language) \ TV Connection (TV type) \ Amp Connection
1.Set POWER switch to ON.
If a disc is already loaded, remove it.
2.Press SETUP button.
The Setup Navigator screen will appear.
AUTO \ NTSC
NTSC \ PAL
PAL \ AUTO
The display indicates the new setting.
Note that you have to switch the player into power off before each change.
How to perform setup
Audio1 | A2 | Video1 | V2 |
| Language | General |
| |
| Setup Navigator |
|
|
|
| |||
|
|
|
|
|
|
|
|
|
|
|
|
| Start | ||||
|
| Setup Navigator | ||||||
|
|
|
|
|
| Auto Start Off | ||
| Setup using the Setup Navigator | |||||||
|
|
|
|
|
|
|
|
|
|
|
| Move | ENTER Select SETUP Exit | ||||
¶When [Auto Start Off] is selected, the next time the SETUP button is pressed the manual Setup Menu will appear. For details, see pages 19- 30.
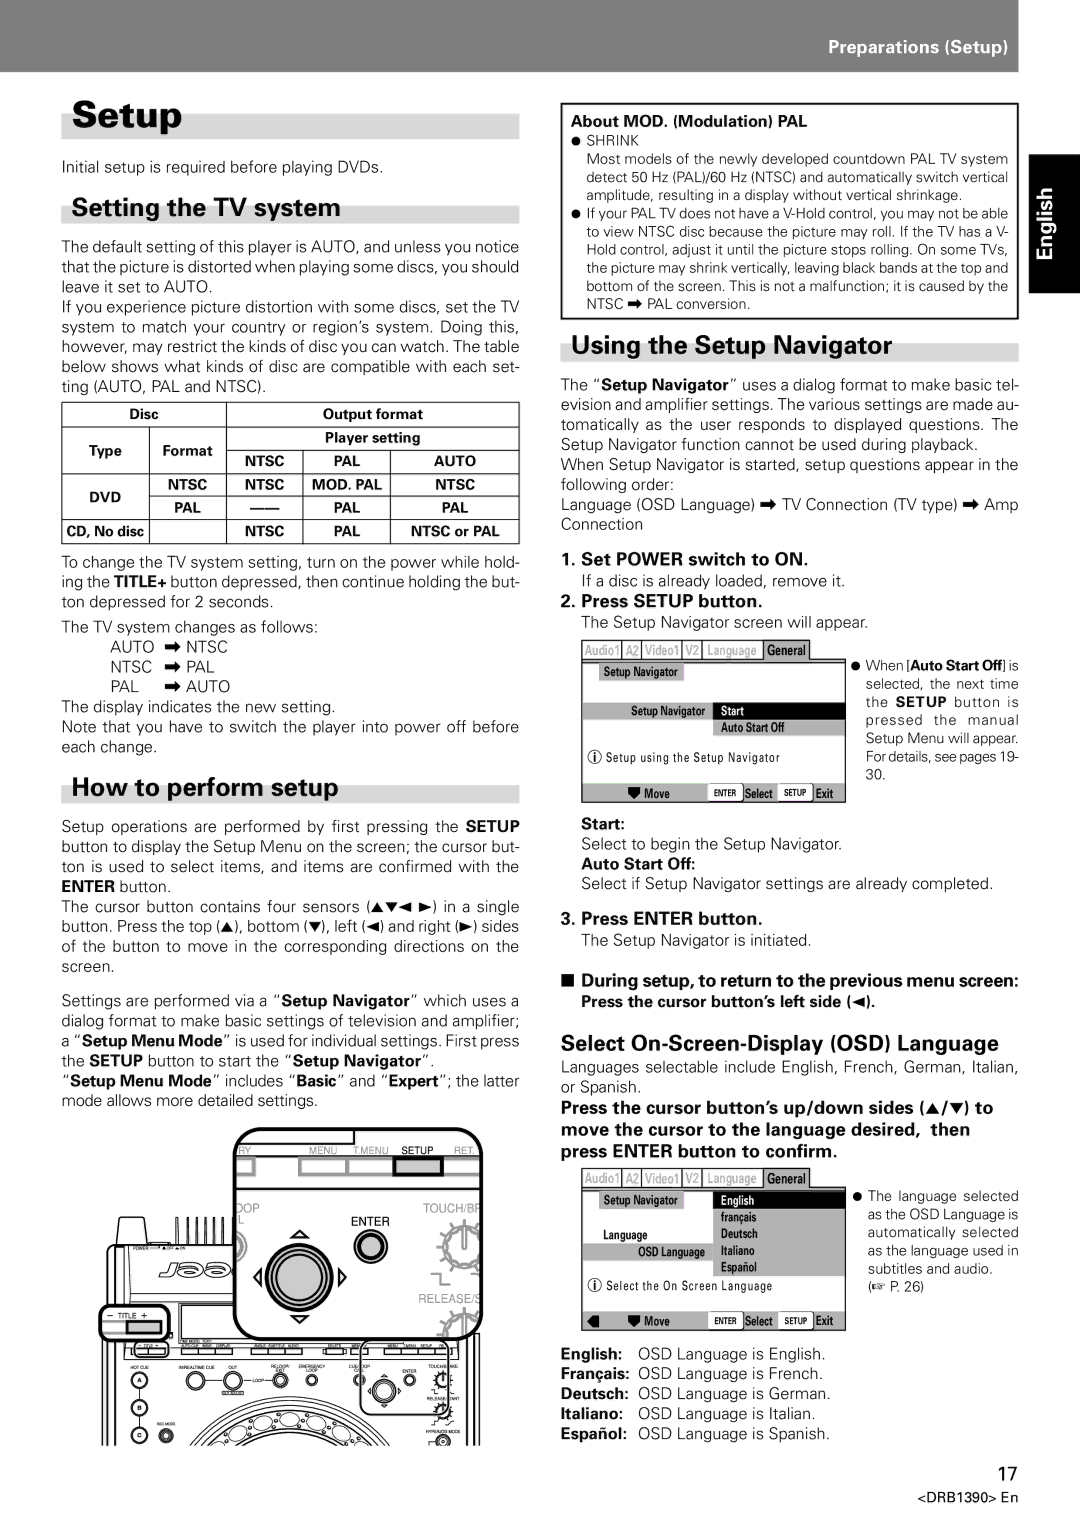
Setup operations are performed by first pressing the SETUP button to display the Setup Menu on the screen; the cursor but- ton is used to select items, and items are confirmed with the ENTER button.
The cursor button contains four sensors (5∞2 3) in a single button. Press the top (5), bottom (∞), left (2) and right (3) sides of the button to move in the corresponding directions on the screen.
Settings are performed via a “Setup Navigator” which uses a dialog format to make basic settings of television and amplifier; a “Setup Menu Mode” is used for individual settings. First press the SETUP button to start the “Setup Navigator”.
“Setup Menu Mode” includes “Basic” and “Expert”; the latter mode allows more detailed settings.
Start:
Select to begin the Setup Navigator.
Auto Start Off:
Select if Setup Navigator settings are already completed.
3.Press ENTER button.
The Setup Navigator is initiated.
■During setup, to return to the previous menu screen:
Press the cursor button’s left side (2).
Select On-Screen-Display (OSD) Language
Languages selectable include English, French, German, Italian, or Spanish.
Press the cursor button’s up/down sides (5/∞) to move the cursor to the language desired, then press ENTER button to confirm.
Audio1 A2 Video1 V2 | Language | General |
| |
Setup Navigator | English |
|
|
|
| français |
|
|
|
Language | Deutsch |
|
|
|
OSD Language | Italiano |
|
|
|
| Español |
|
|
|
Select the On Screen Language |
|
| ||
Move | ENTER Select | SETUP | Exit | |
¶The language selected as the OSD Language is automatically selected as the language used in subtitles and audio.
(☞ P. 26)
English: OSD Language is English.
Français: OSD Language is French.
Deutsch: OSD Language is German.
Italiano: OSD Language is Italian.
Español: OSD Language is Spanish.
17
<DRB1390> En