PRO1150- HD
Ventilation Caution
Operating Environment
Information to User
For Canadian model
Standby
Contents
Enjoying through External Equipment
Adjustments and Settings
TV Guide On Screen System Operation
Appendix 103
Using the Hdmi Control
Useful Remote Control Features
Usage guidelines
Installation guidelines
Important User Guidance Information
Information of pixel defect
When not using the product for a long period of time
Cleaning the cabinet
Plasma display protection function
Image Retention
About the menu window size following video format switch
Fan motor noise
To use this product for a long period of time
Safety Precautions
Side view
Installation Precautions
When using the optional brackets or equivalent items
When using other items
For PRO-1150HD only Speaker cables ×
Supplied Accessories
Speaker accessories
Speaker Mounting Fittings
Plasma display
Part Names
Terminal position sheet located
PRO-1150HD
Rear
For exact terminal positions, refer to
Favorite CH A, B, C, D
Remote control unit
Mode switch With TV selected
Moving the plasma display
Installing the plasma display
Installing the Pioneer speaker
Preparation
Attach the speaker mounting fittings to the speakers
Mounting
Preparation
Attach falling prevention bolts hooks to the plasma display
Using a wall for stabilization
Preventing the plasma display from falling over
Stabilizing on a table or rack
Remove the stand from the plasma display
Attaching/detaching the Pioneer stand
Detaching the stand
Attaching the stand again
Preparation
Inserting the CableCARD
Connecting VHF/UHF antennas and a Cable
Attaching and removing speed clamps
Connecting the power cord
Routing cables
Attaching speed clamps to the main unit
Close the battery cover
Preparing the remote control unit
Allowed operation range of the remote control unit
Battery disposal
Basic Operations
Turning on the power
Turning off the power
Example
Watching TV channels
Selecting the antenna
Changing channels
Changing the language
Changing the volume and sound
Volume +
Volume adjustment display
When receiving Stereo + SAP sound signals
Setting MTS/SAP mode
When receiving Stereo sound signals
When receiving Mono + SAP sound signals
Viewing a channel banner
Using the multiscreen functions
Using the POD service
Press Split to select the display mode
Press Freeze
Press Freeze again to cancel the function
Freezing images
Welcome Screen
TV Guide On Screen System Setup
Setting up the TV Guide On Screen system
About the TV Guide On Screen system
Screen 2 Enter ZIP or Postal Code
System Setup Screens
Screen 3 Select services
Screen 1 Select Country
Screen 6 Congratulations
Screen 5 Are the settings correct?
For PC source For AV source
Using the Home Menu
Home Menu
Home Menu overview
Setting up TV channels
Tuner Setup
Voluntary movie rating system Mpaa
Changing the password
Parental Control
Checking the CableCARD ID
Activating the Parental Control
Setting the voluntary movie rating system Mpaa
Clearing the password
Setting the TV ratings
Canadian English ratings
Setting the TV Parental Guidelines TV Guidelines
Blocking Not Rated TV programs
Canadian rating systems
Canadian French ratings
Setting Canadian English ratings
Setting Canadian French ratings
Setting new ratings
Antenna a or antenna B
Select a for Accept or D for Cancel
Deleting new ratings
Temporarily deactivating the Parental Control
Selecting the type of conventional closed captions
Setting your favorite channels
Setting up closed captions
Activating the closed caption
Selection
Clock Setting
Selecting digital closed caption parameters
TV Guide On Screen icons
Using the TV Guide On Screen system
TV Guide On Screen System Operation
Screen components
Press TV Guide to display the Listings screen
Setting program reminders
Listings screen
TV Guide On Screen navigation
Press a to make the Timer Alert screen disappear
When scheduled reminder is due auto-tune is OFF
When scheduled reminder is due auto-tune is on
Searching by category
Searching for programs
Alphabetical search
Searching by keyword
Navigation and search tips
Scheduling reminders
Search Episode Options menu
Schedule Optios menu
Changing setup options
Using the reminder To Do list
Changing the system settings
From the channel display settings you can set/change
Changing the channel display settings
Press Enter to display the current settings
No, repeat setup process displays Screen 1 shown on
Displaying setup progress
Changing the default options
For PC source
Adjustments and Settings
AV Selection
For AV source
Screen appears. Press / to select Yes, and then press
Basic picture adjustments
For PC source, the following screen appears
Select the desired level
Using the Picture Detail
Advanced picture adjustments
Using PureCinema
Using Intelligent Mode
Using Color Management
Using Color Temp
Using CTI and Color Space
You can select 3DNR, Field NR, Block NR or Mosquito NR
Using the 3DYC and I-P Mode
Eliminating noise from images
Each press of the button toggles between Before and After
Comparing picture adjustments on the screen
Sound adjustments
Energy Save
Power Control
No Signal off AV source only
Sound Effect
About Option menus
Sleep Timer
Power Management PC source only
No Operation off AV source only
Reducing video noise
Image position adjustment AV source only
Manual image position and clock adjustments PC source only
Perform adjustment / or
AV source
Selecting a game mode
Selecting a screen size manually
PC source
Full and wide screen
Selecting a screen size automatically
Detecting side masks
Orbiter
Language setting
Room Light Sensor
Blue LED Dimmer
Watching a DVD image
Enjoying through External Equipment
About External Equipment
Watching a VCR image
Deep Color supported
Using Hdmi Input
Connecting Hdmi equipment
Hdmi Control supported
ItemDescription
To specify the type of input signals
To specify the type of digital video signals
To specify the type of audio signals
Enjoying a game console or watching camcorder images
Connecting other audio equipment
Connecting a game console or camcorder
Connecting an AV receiver
Displaying an image from a personal computer
Computer compatibility chart
Connecting a personal computer
Watching an image from a personal computer
Plasma display
Connecting control cords
About SR+
Dlna Certified Audio/Video/Image Player
Enjoying the Home Media Gallery
Usable free media servers
PlaysForSure
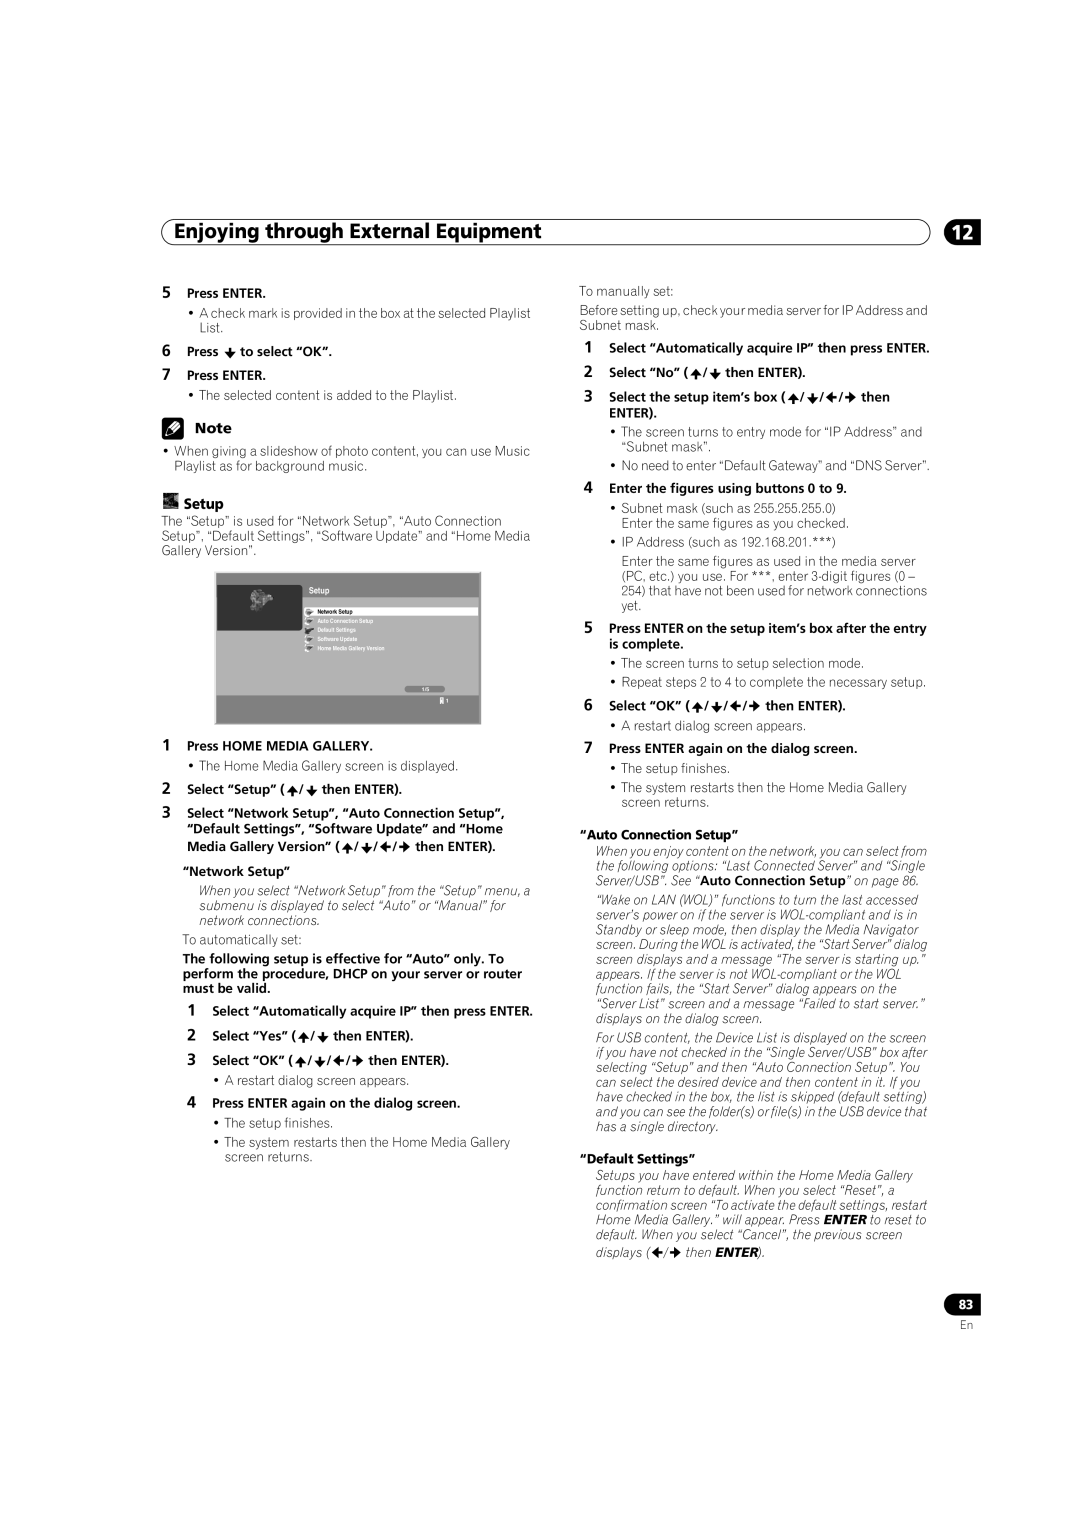
Press Home Media Gallery
Connecting via an Ethernet hub
Connecting directly to a Media Server
Making network connections
Readable data files
Starting the Home Media Gallery function
Removing a USB device
Readable USB devices
Thumbnail List screen
Using the Tool Menu
Selectable screen display
Thumbnail screen
USB
Enjoying movie files
Media Navigator
Screen Components
Select Hour and/or Minute for Input Time / then Enter
Movie Player key guide
Time Search
Forward/Reverse 15 sec
Repeat Mode
Random Mode
Fast Forward/Fast Reverse
RWD
Enjoying music files
Screen Components Music Player key guide
FF
All titles in the folder or Playlist are played repeatedly
Enjoying photo files
Select Media Navigator / then Enter Press D
Setting up the slideshow
Setting up BGM for the slideshow
Photo Player key guide
Playing the slideshow at random
Starting the slideshow
Rotating the image
Repeating the slideshow
Sort
Press Return to cancel the search mode
Other useful functions
Search
Setup
Switching the server
Screen changes to Media Navigator on the selected server
Resetting to default
Other convenient features
Select the desired server / then Enter
Dialog Screen Message
Auto Connection Setup
Message Problem
Glossary
Function Description Usable Devices
Using the Hdmi Control
Using the Hdmi Control functions
Hdmi Control functions
BD player
Making the Hdmi Control connections
On-screen control panel
AV amp
BD player
Setting the Hdmi Control
Connecting a BD player
Selecting the input terminal
Using the Hdmi Control menus
Presetting manufacturer codes to control other devices
Useful Remote Control Features
Learning function of the remote control unit
Press D yellow to reset the remote control
Manufacturing Reset
Cable
Programming codes
VCR
TMK
PVR
BD HD-DVD
DVD-R
Receiver VOL +
Mode switch buttons operate at any position
Receiver STANDBY/ON
Receiver Input
CBL/SAT control buttons
VCR control buttons
Mode switch with VCR selected
DVD TOP Menu
DVD/DVR control buttons
DVD Menu
Appendix
Troubleshooting
Problem Possible Solution
104
Appendix
TV-Guide data cannot be obtained
Code Message Check
107
Copyright c 1988-1997 Sam Leffler
Giflib distribution is Copyright c 1997 Eric S. Raymond
Copyright c 1991-1997 Silicon Graphics, Inc
Linux Source Notice
GNU General Public License
Preamble
110
How to Apply These Terms to Your New Programs
No Warranty
GNU Lesser General Public License
113
114
115
How to Apply These Terms to Your New Libraries
Catv
Specifications
Trademarks
Dimensions PRO-1150HD Unit mm inch
PRO-950HD
Disclaimer Notice
Important Notice about software upgrade from Pioneer
License
Patent
Pioneer Europe NV
Pioneer Corporation

 to select “OK”.
 Setup
Setup