Connecting your equipment | 03 |
Chapter 3:
Connecting your equipment
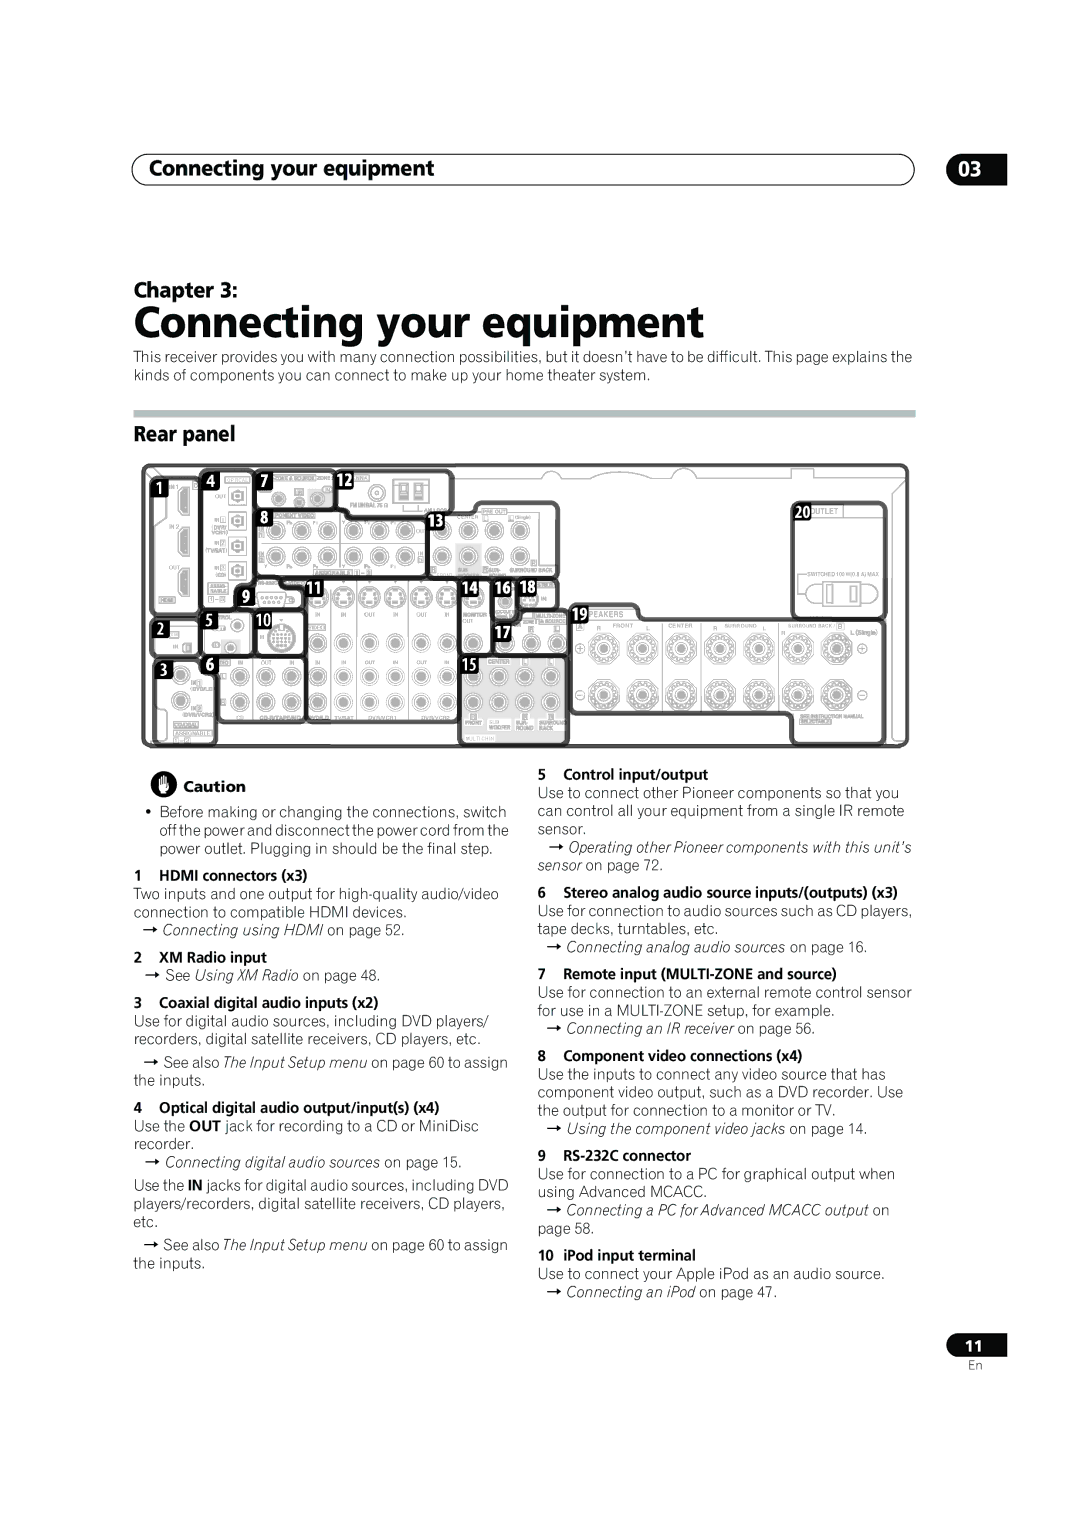
This receiver provides you with many connection possibilities, but it doesn’t have to be difficult. This page explains the kinds of components you can connect to make up your home theater system.
Rear panel
20OUTLET
CENTER L
SWITCHED 100 W(0.8 A) MAX
![]() PEAKERS
PEAKERS
R FRONT | L | CENTER | R SURROUND L | SURROUND BACK |
|
|
|
| R |
IN OUT IN OUT IN
DVR/VCR1 DVR/VCR2
![]() Caution
Caution
•Before making or changing the connections, switch off the power and disconnect the power cord from the power outlet. Plugging in should be the final step.
1 HDMI connectors (x3)
Two inputs and one output for
Connecting using HDMI on page 52.
2XM Radio input
See Using XM Radio on page 48.
3Coaxial digital audio inputs (x2)
Use for digital audio sources, including DVD players/ recorders, digital satellite receivers, CD players, etc.
See also The Input Setup menu on page 60 to assign the inputs.
4 Optical digital audio output/input(s) (x4)
Use the OUT jack for recording to a CD or MiniDisc recorder.
Connecting digital audio sources on page 15.
Use the IN jacks for digital audio sources, including DVD players/recorders, digital satellite receivers, CD players, etc.
See also The Input Setup menu on page 60 to assign the inputs.
5 Control input/output
Use to connect other Pioneer components so that you can control all your equipment from a single IR remote sensor.
Operating other Pioneer components with this unit’s sensor on page 72.
6Stereo analog audio source inputs/(outputs) (x3) Use for connection to audio sources such as CD players, tape decks, turntables, etc.
Connecting analog audio sources on page 16.
7Remote input (MULTI-ZONE and source)
Use for connection to an external remote control sensor for use in a
Connecting an IR receiver on page 56.
8 Component video connections (x4)
Use the inputs to connect any video source that has component video output, such as a DVD recorder. Use the output for connection to a monitor or TV.
Using the component video jacks on page 14.
9 RS-232C connector
Use for connection to a PC for graphical output when using Advanced MCACC.
Connecting a PC for Advanced MCACC output on page 58.
10 iPod input terminal
Use to connect your Apple iPod as an audio source.
Connecting an iPod on page 47.
11
En
