ADJUSTING BLADE GUARD
DISCONNECT MACHINE FROM POWER
SOURCE.
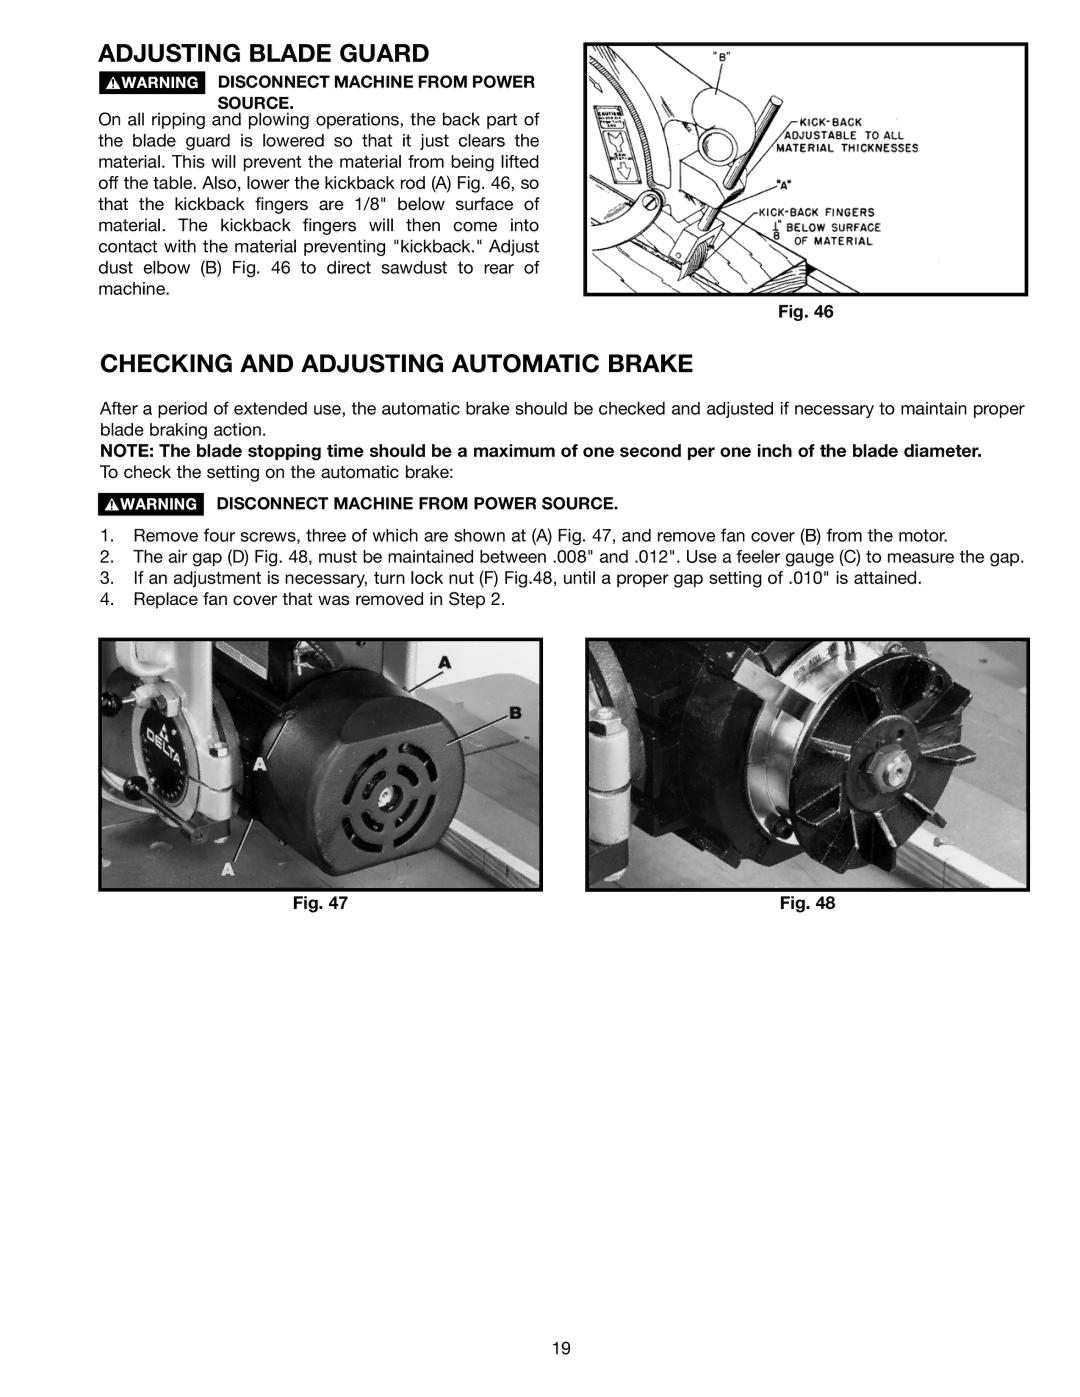
On all ripping and plowing operations, the back part of the blade guard is lowered so that it just clears the material. This will prevent the material from being lifted off the table. Also, lower the kickback rod (A) Fig. 46, so that the kickback fingers are 1/8" below surface of material. The kickback fingers will then come into contact with the material preventing "kickback." Adjust dust elbow (B) Fig. 46 to direct sawdust to rear of machine.
Fig. 46
CHECKING AND ADJUSTING AUTOMATIC BRAKE
After a period of extended use, the automatic brake should be checked and adjusted if necessary to maintain proper blade braking action.
NOTE: The blade stopping time should be a maximum of one second per one inch of the blade diameter. To check the setting on the automatic brake:
DISCONNECT MACHINE FROM POWER SOURCE.
1.Remove four screws, three of which are shown at (A) Fig. 47, and remove fan cover (B) from the motor.
2.The air gap (D) Fig. 48, must be maintained between .008" and .012". Use a feeler gauge (C) to measure the gap.
3.If an adjustment is necessary, turn lock nut (F) Fig.48, until a proper gap setting of .010" is attained.
4.Replace fan cover that was removed in Step 2.
Fig. 47 | Fig. 48 |
19
