Installing the Media Library in a | 47 |
8.Repeat Step 1 through Step 7 for the left outer rail.
9.To install multiple chasses, repeat steps Step 1 through Step 8 for each
Installing the Outer Rails on the Rear-mounted Chassis
The outer rails attach to the server rack and hold the server in place. The outer rails for the Media Library extend between 30 inches and 42 inches. No tools are required to attach the outer rails.
To install the outer rails:
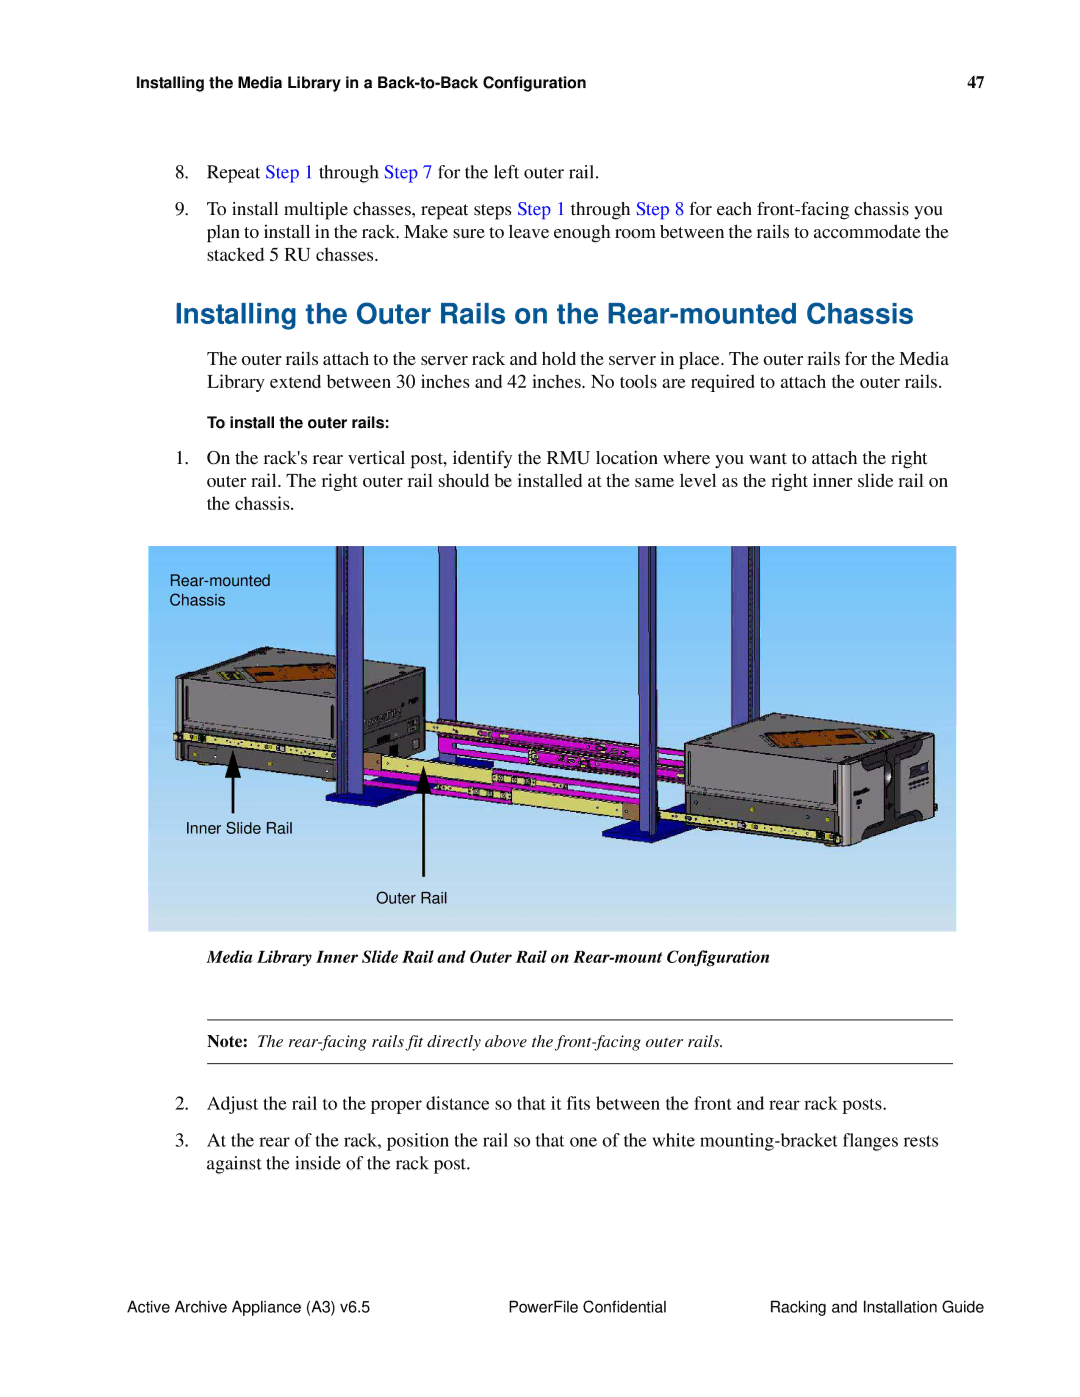
1.On the rack's rear vertical post, identify the RMU location where you want to attach the right outer rail. The right outer rail should be installed at the same level as the right inner slide rail on the chassis.
Chassis
Inner Slide Rail
Outer Rail
Media Library Inner Slide Rail and Outer Rail on
Note: The
2.Adjust the rail to the proper distance so that it fits between the front and rear rack posts.
3.At the rear of the rack, position the rail so that one of the white
Active Archive Appliance (A3) v6.5 | PowerFile Confidential | Racking and Installation Guide |
