Three-Phase Test Run
On the
1.Connect machine to power source and press the start button, shown in Figure 10. (See “Operating Controls” on page 25 for further information on the control switch.)
2.The cutterhead should rotate clockwise as viewed from the front of the machine. If the cutterhead rotation is incorrect, press the stop button (Figure 10) and disconnect machine from power.
3.Switch any two of the three wires at "R,S,T".
Adjustments
Drive Belt Tension
To check or adjust the drive belt tension:
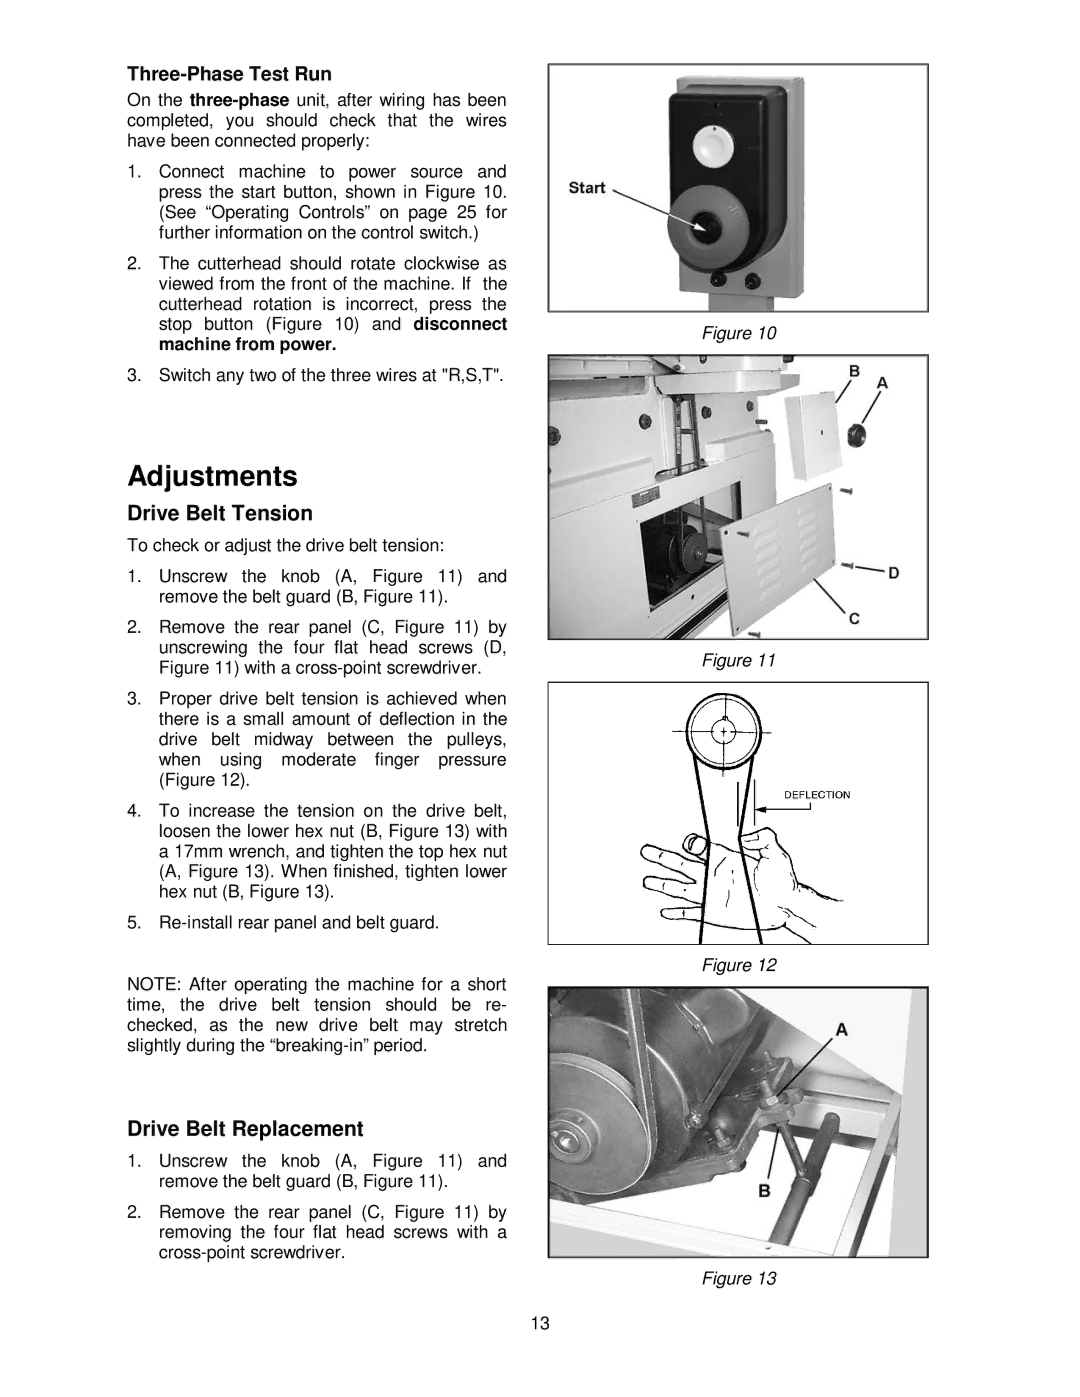
1.Unscrew the knob (A, Figure 11) and remove the belt guard (B, Figure 11).
2.Remove the rear panel (C, Figure 11) by unscrewing the four flat head screws (D, Figure 11) with a
3.Proper drive belt tension is achieved when there is a small amount of deflection in the drive belt midway between the pulleys, when using moderate finger pressure (Figure 12).
4.To increase the tension on the drive belt, loosen the lower hex nut (B, Figure 13) with a 17mm wrench, and tighten the top hex nut (A, Figure 13). When finished, tighten lower hex nut (B, Figure 13).
5.
NOTE: After operating the machine for a short time, the drive belt tension should be re- checked, as the new drive belt may stretch slightly during the
Drive Belt Replacement
1.Unscrew the knob (A, Figure 11) and remove the belt guard (B, Figure 11).
2.Remove the rear panel (C, Figure 11) by removing the four flat head screws with a
Figure 10
Figure 11
Figure 12
Figure 13
13