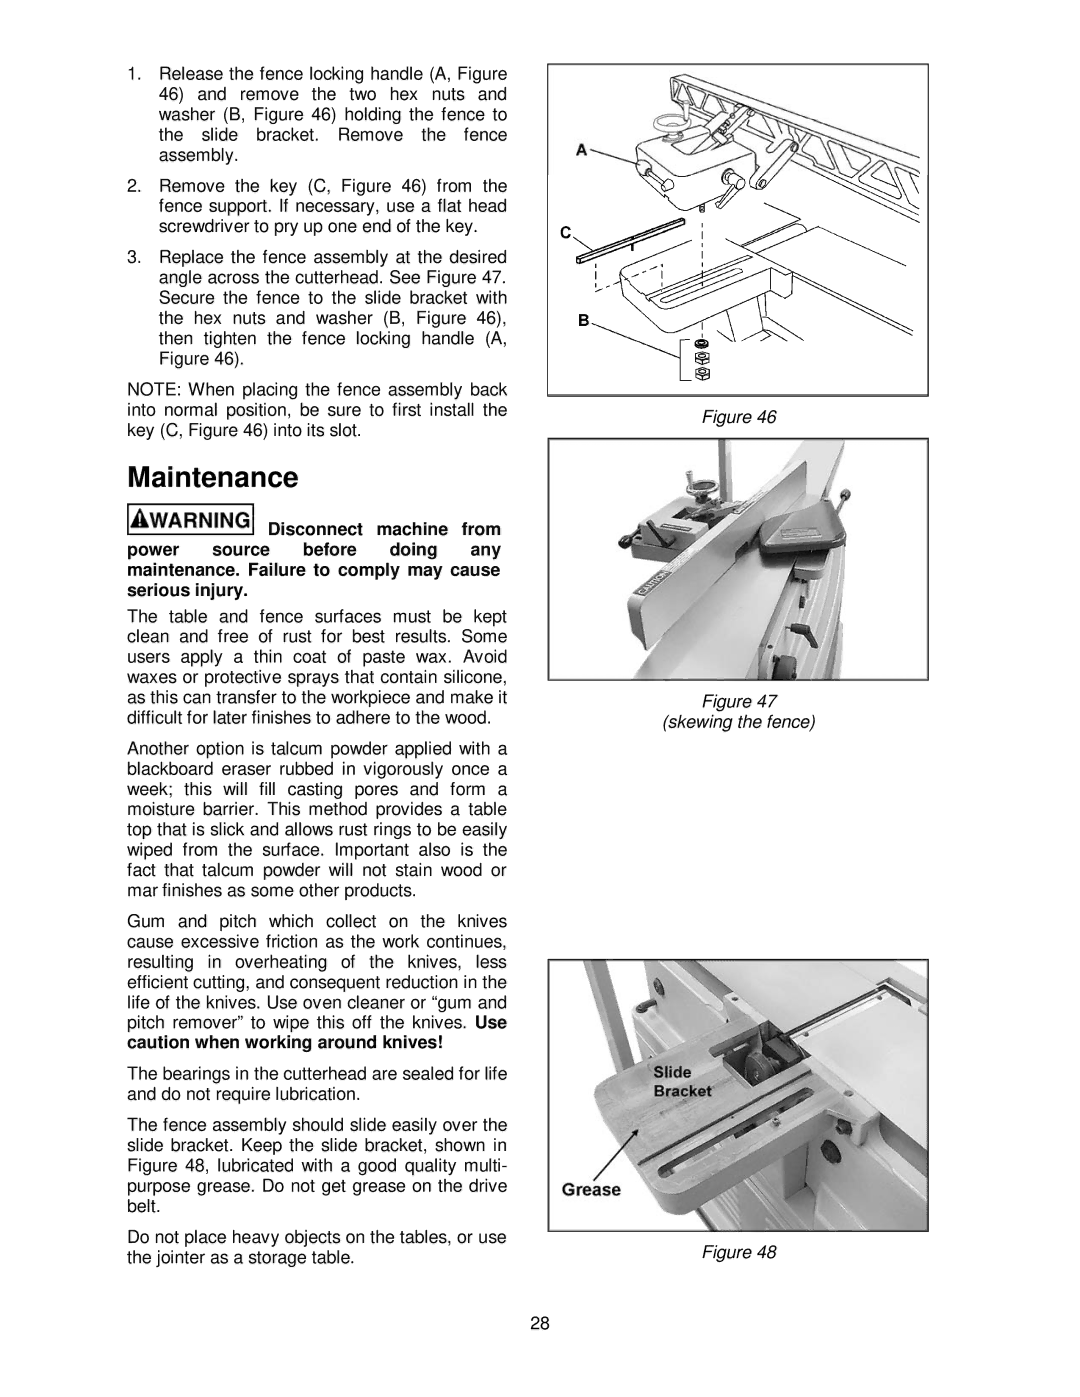
1.Release the fence locking handle (A, Figure
46)and remove the two hex nuts and washer (B, Figure 46) holding the fence to the slide bracket. Remove the fence assembly.
2.Remove the key (C, Figure 46) from the fence support. If necessary, use a flat head screwdriver to pry up one end of the key.
3.Replace the fence assembly at the desired angle across the cutterhead. See Figure 47. Secure the fence to the slide bracket with the hex nuts and washer (B, Figure 46), then tighten the fence locking handle (A, Figure 46).
NOTE: When placing the fence assembly back into normal position, be sure to first install the key (C, Figure 46) into its slot.
Maintenance
![]() Disconnect machine from power source before doing any maintenance. Failure to comply may cause serious injury.
Disconnect machine from power source before doing any maintenance. Failure to comply may cause serious injury.
The table and fence surfaces must be kept clean and free of rust for best results. Some users apply a thin coat of paste wax. Avoid waxes or protective sprays that contain silicone, as this can transfer to the workpiece and make it difficult for later finishes to adhere to the wood.
Another option is talcum powder applied with a blackboard eraser rubbed in vigorously once a week; this will fill casting pores and form a moisture barrier. This method provides a table top that is slick and allows rust rings to be easily wiped from the surface. Important also is the fact that talcum powder will not stain wood or mar finishes as some other products.
Gum and pitch which collect on the knives cause excessive friction as the work continues, resulting in overheating of the knives, less efficient cutting, and consequent reduction in the life of the knives. Use oven cleaner or “gum and pitch remover” to wipe this off the knives. Use caution when working around knives!
The bearings in the cutterhead are sealed for life and do not require lubrication.
The fence assembly should slide easily over the slide bracket. Keep the slide bracket, shown in Figure 48, lubricated with a good quality multi- purpose grease. Do not get grease on the drive belt.
Do not place heavy objects on the tables, or use the jointer as a storage table.
Figure 46
Figure 47
(skewing the fence)
Figure 48
28