Outfeed Table Stop Screws
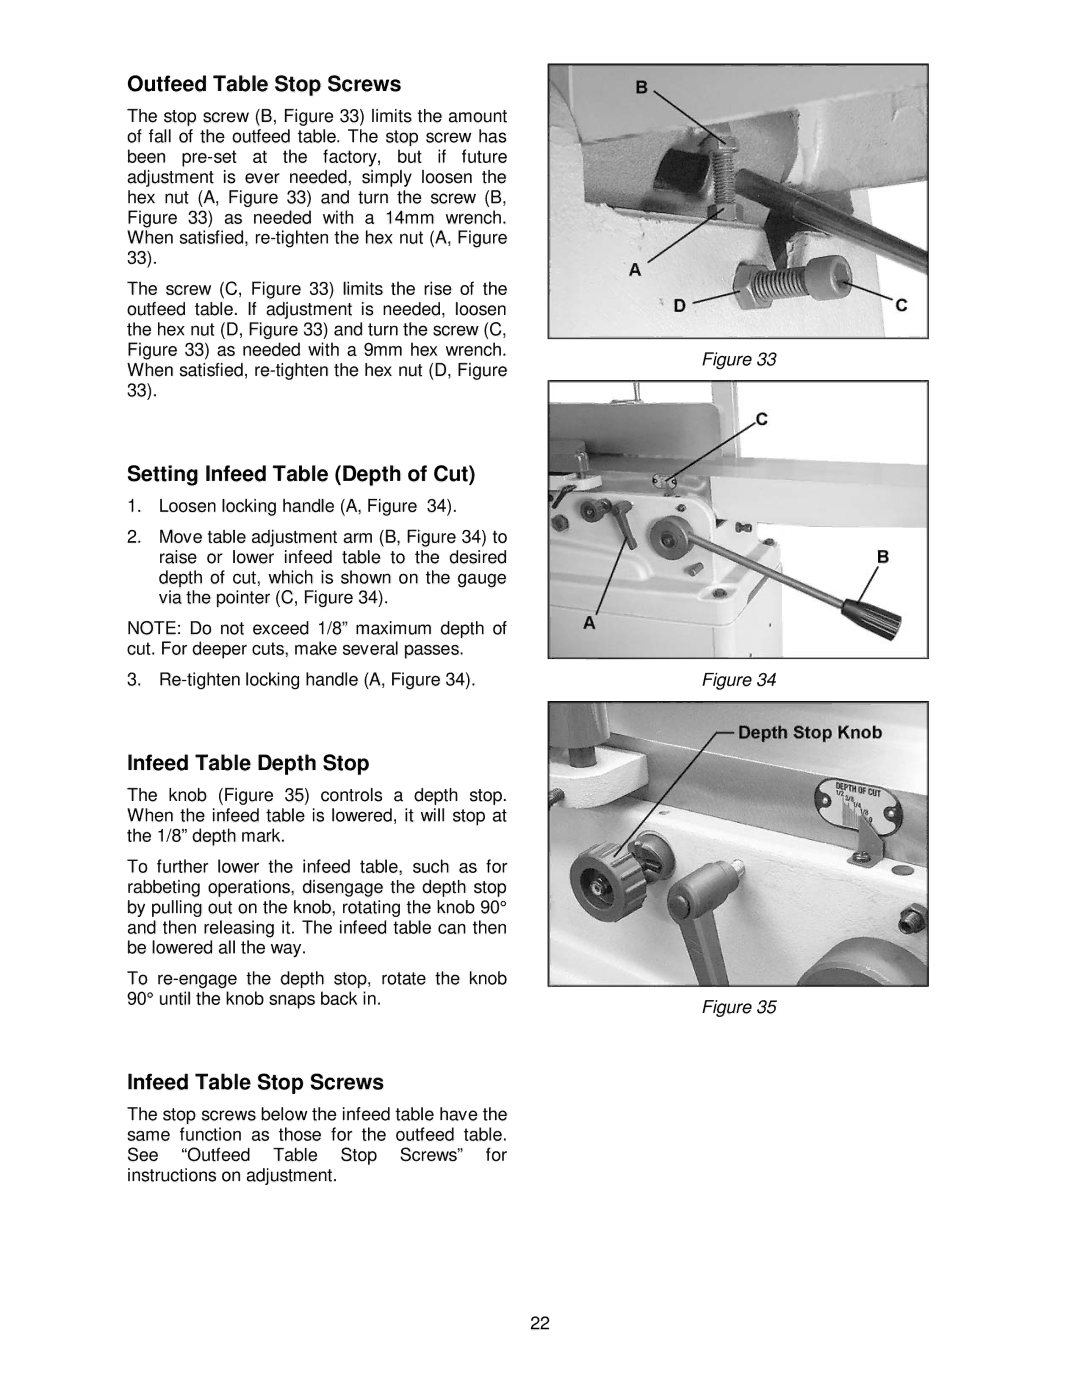
The stop screw (B, Figure 33) limits the amount of fall of the outfeed table. The stop screw has been
The screw (C, Figure 33) limits the rise of the outfeed table. If adjustment is needed, loosen the hex nut (D, Figure 33) and turn the screw (C, Figure 33) as needed with a 9mm hex wrench. When satisfied,
Setting Infeed Table (Depth of Cut)
1.Loosen locking handle (A, Figure 34).
2.Move table adjustment arm (B, Figure 34) to raise or lower infeed table to the desired depth of cut, which is shown on the gauge via the pointer (C, Figure 34).
NOTE: Do not exceed 1/8” maximum depth of cut. For deeper cuts, make several passes.
3.
Infeed Table Depth Stop
The knob (Figure 35) controls a depth stop. When the infeed table is lowered, it will stop at the 1/8” depth mark.
To further lower the infeed table, such as for rabbeting operations, disengage the depth stop by pulling out on the knob, rotating the knob 90° and then releasing it. The infeed table can then be lowered all the way.
To
Infeed Table Stop Screws
The stop screws below the infeed table have the same function as those for the outfeed table. See “Outfeed Table Stop Screws” for instructions on adjustment.
Figure 33
Figure 34
Figure 35
22