EST150
Cable Routing (Optional)
1)Remove the plastic cover(s) from the cable routing openings.
2)Route cables and wiring through the openings then out the back or bottom near the wall.
Proceed to the “Securing the Projector (Optional)” section.
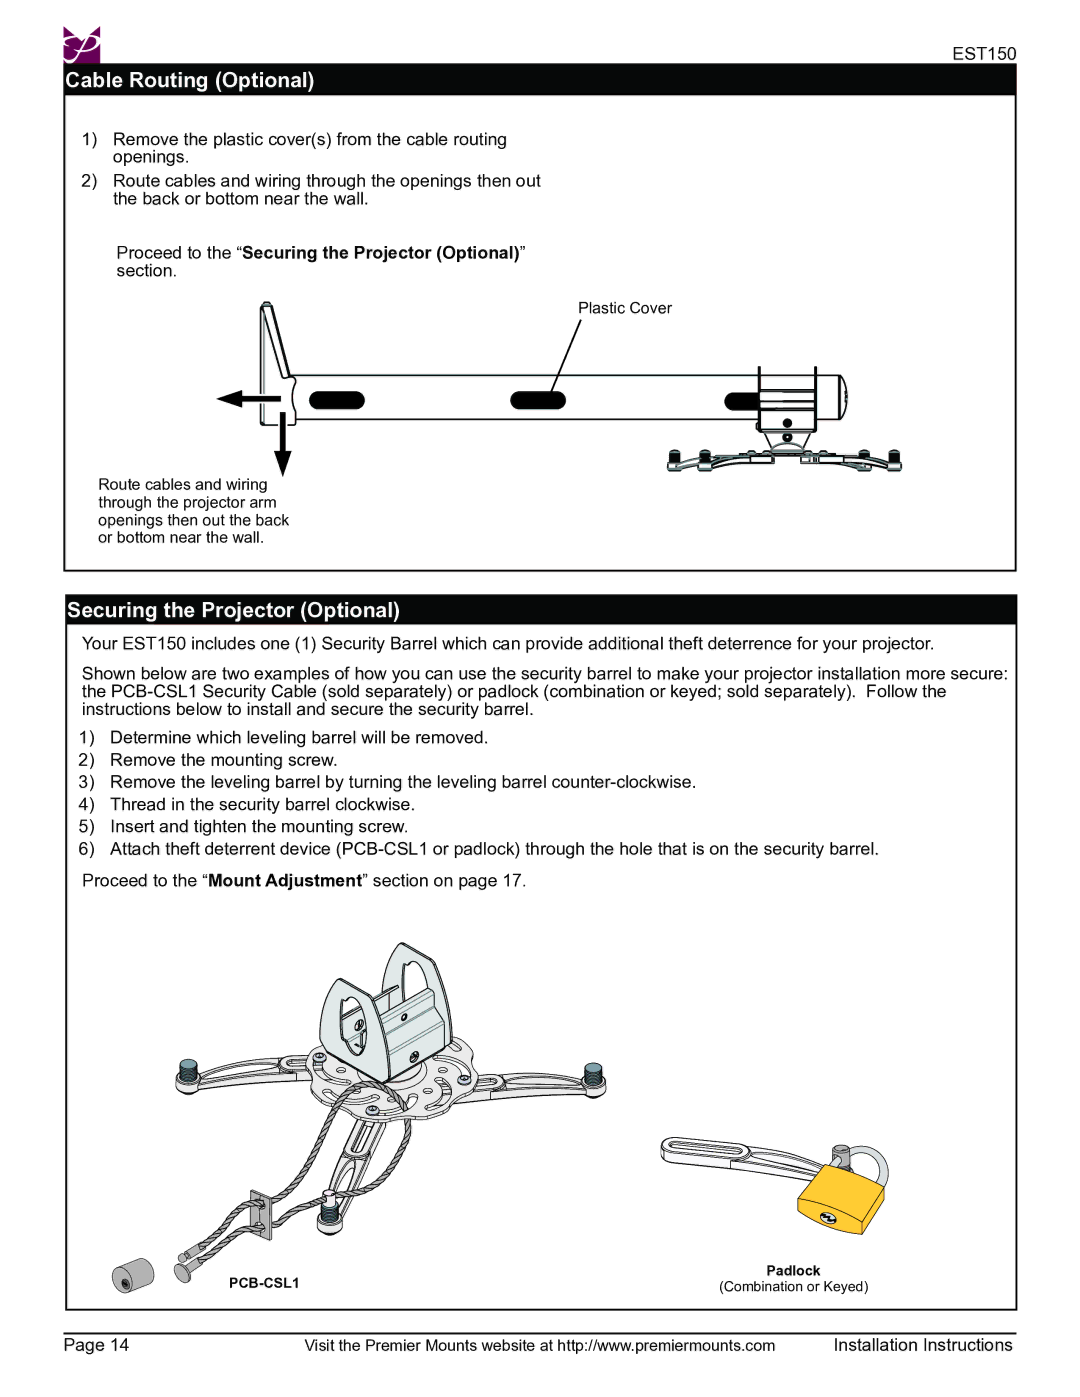
Plastic Cover
Route cables and wiring through the projector arm openings then out the back or bottom near the wall.
Securing the Projector (Optional)
Your EST150 includes one (1) Security Barrel which can provide additional theft deterrence for your projector.
Shown below are two examples of how you can use the security barrel to make your projector installation more secure: the
1)Determine which leveling barrel will be removed.
2)Remove the mounting screw.
3)Remove the leveling barrel by turning the leveling barrel
4)Thread in the security barrel clockwise.
5)Insert and tighten the mounting screw.
6)Attach theft deterrent device
Proceed to the “Mount Adjustment” section on page 17.
| Padlock |
| |
| (Combination or Keyed) | ||
|
|
|
|
|
|
|
|
Page 14 | Visit the Premier Mounts website at http://www.premiermounts.com | Installation Instructions | |