EST150
Throw Distance Calculation
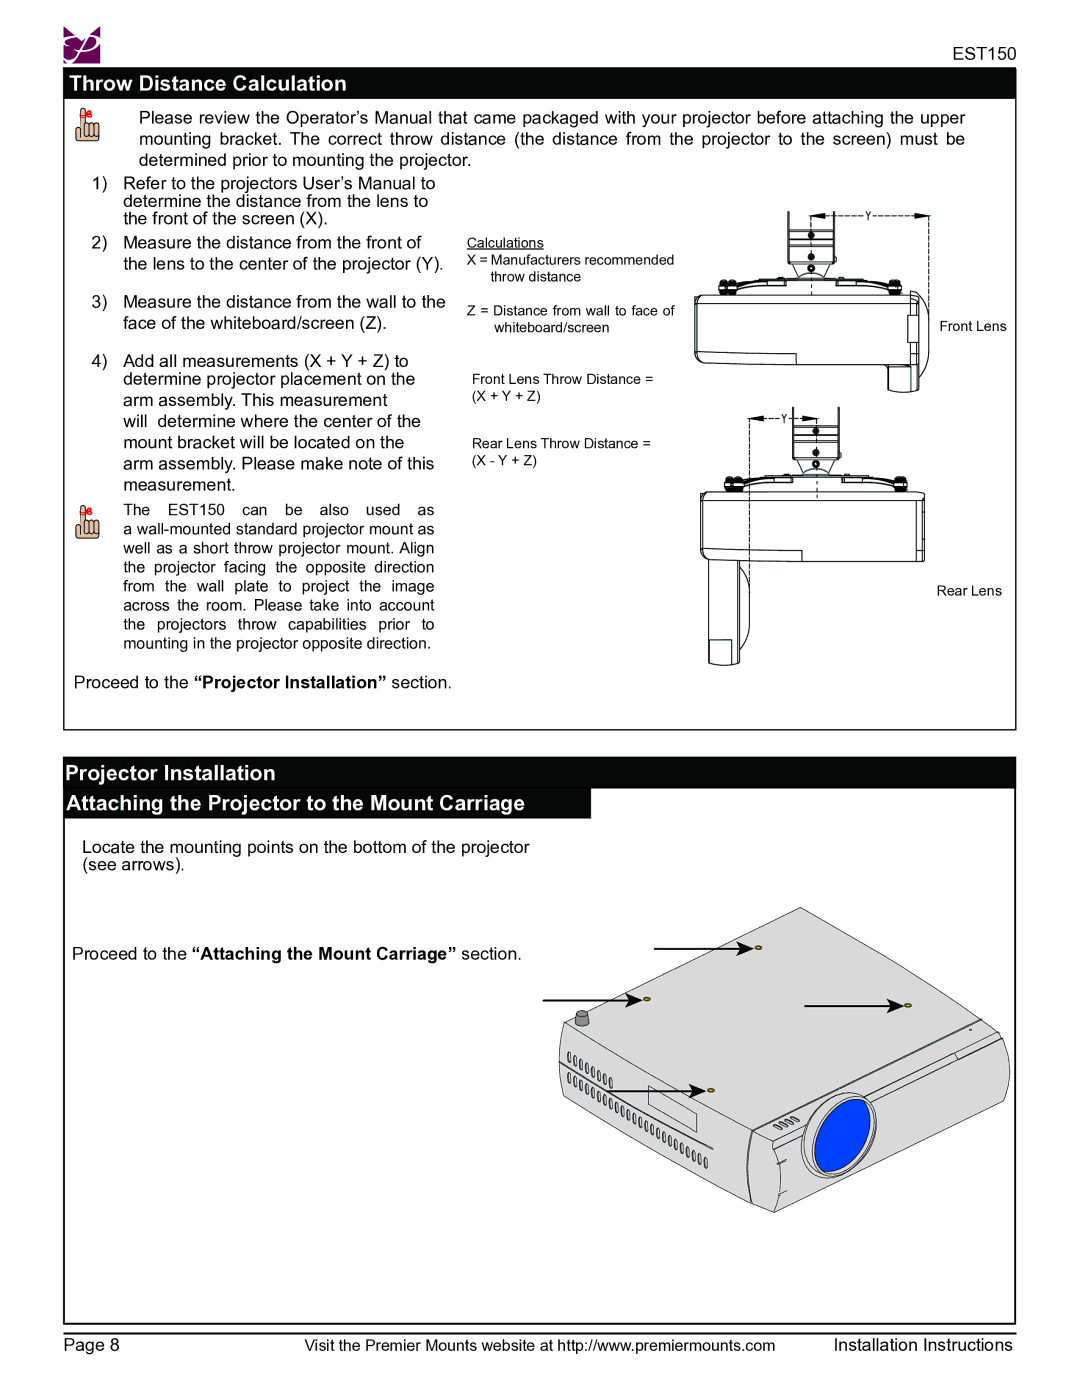
Please review the Operator’s Manual that came packaged with your projector before attaching the upper mounting bracket. The correct throw distance (the distance from the projector to the screen) must be determined prior to mounting the projector.
1)Refer to the projectors User’s Manual to determine the distance from the lens to the front of the screen (X).
2)Measure the distance from the front of the lens to the center of the projector (Y).
3)Measure the distance from the wall to the face of the whiteboard/screen (Z).
4)Add all measurements (X + Y + Z) to determine projector placement on the arm assembly. This measurement will determine where the center of the mount bracket will be located on the arm assembly. Please make note of this measurement.
The EST150 can be also used as a
Calculations
X = Manufacturers recommended throw distance
Z = Distance from wall to face of whiteboard/screen
Front Lens Throw Distance =
(X + Y + Z)
Rear Lens Throw Distance =
(X - Y + Z)
Front Lens
Rear Lens
Proceed to the “Projector Installation” section.
Projector Installation
Attaching the Projector to the Mount Carriage
Locate the mounting points on the bottom of the projector (see arrows).
Proceed to the “Attaching the Mount Carriage” section.
Page 8 | Visit the Premier Mounts website at http://www.premiermounts.com | Installation Instructions |