I I I . Y O U R W H E E L C H A I R
Shell Assembly and Mobility Base (Kids FAST)
The shell assembly and mobility base can be separated for ease of lifting and transporting the wheelchair.
WARNING! Never remove the shell assembly from the mobility base with the child in the wheelchair or use either assembly when it is not properly attached.
WARNING! Ensure that the shell assembly is properly attached to the mobility base before placing the child in the wheelchair.
To remove the shell assembly:
1.Engage the attendant wheel locks.
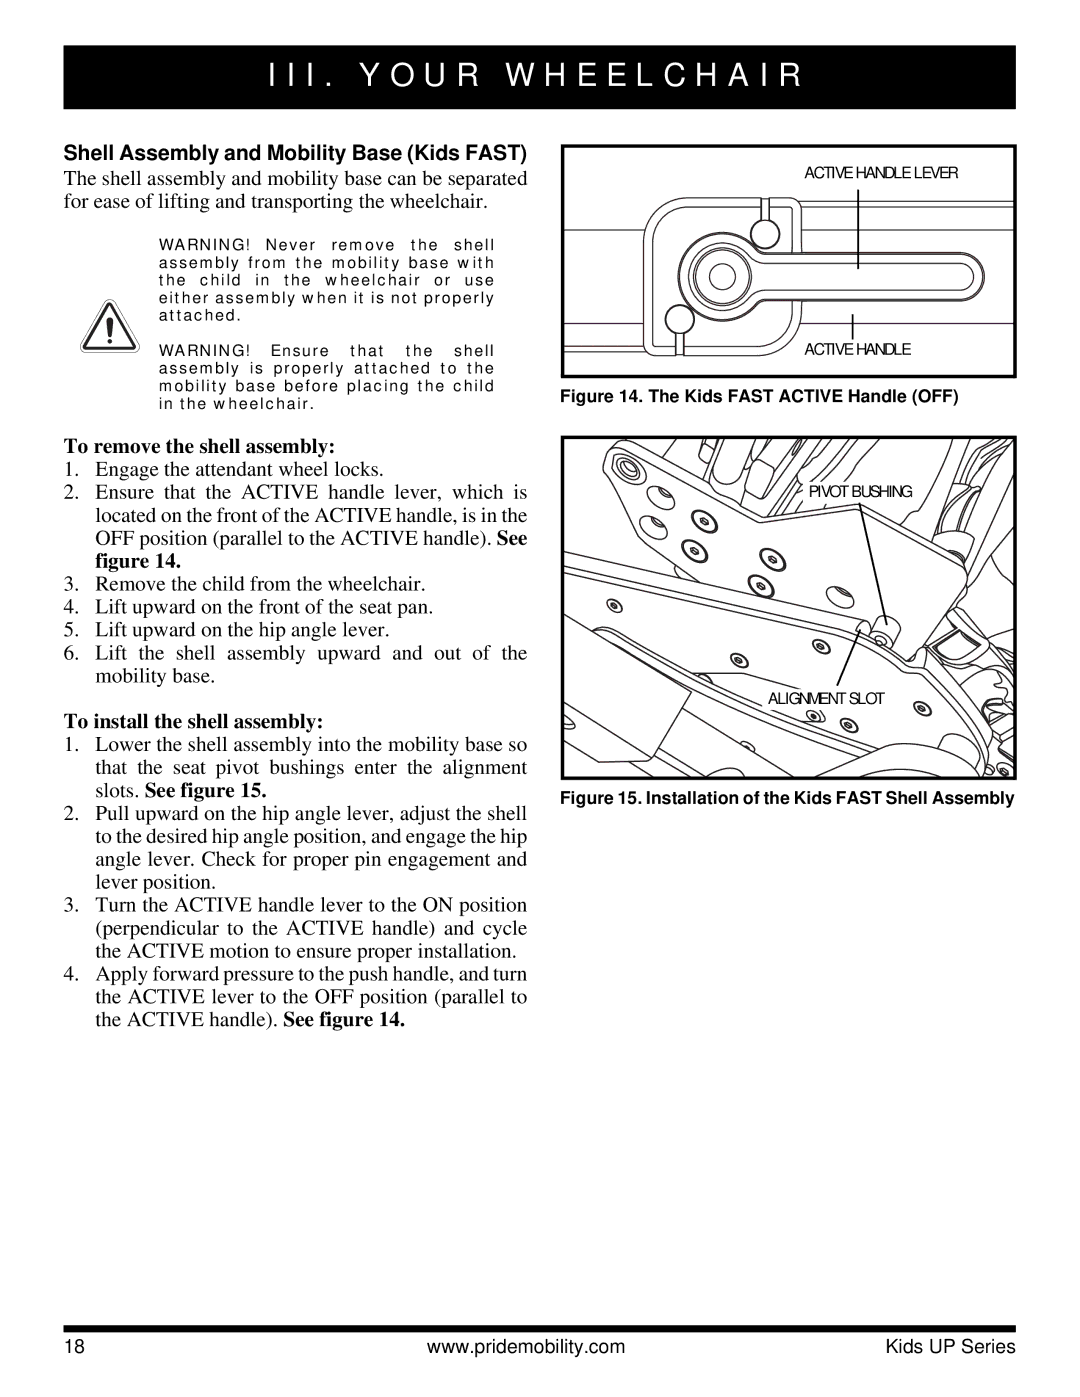
2.Ensure that the ACTIVE handle lever, which is located on the front of the ACTIVE handle, is in the OFF position (parallel to the ACTIVE handle). See figure 14.
3.Remove the child from the wheelchair.
4.Lift upward on the front of the seat pan.
5.Lift upward on the hip angle lever.
6.Lift the shell assembly upward and out of the mobility base.
To install the shell assembly:
1.Lower the shell assembly into the mobility base so that the seat pivot bushings enter the alignment slots. See figure 15.
2.Pull upward on the hip angle lever, adjust the shell to the desired hip angle position, and engage the hip angle lever. Check for proper pin engagement and lever position.
3.Turn the ACTIVE handle lever to the ON position (perpendicular to the ACTIVE handle) and cycle the ACTIVE motion to ensure proper installation.
4.Apply forward pressure to the push handle, and turn the ACTIVE lever to the OFF position (parallel to the ACTIVE handle). See figure 14.
ACTIVE HANDLE LEVER
![]()
![]()
![]()
![]()
![]() ACTIVE HANDLE
ACTIVE HANDLE
Figure 14. The Kids FAST ACTIVE Handle (OFF)
PIVOT BUSHING |
ALIGNMENT SLOT |
Figure 15. Installation of the Kids FAST Shell Assembly
18 | www.pridemobility.com | Kids UP Series |
