I V . A S S E M B L Y
ACTIVE Handle Lever Installation Instructions
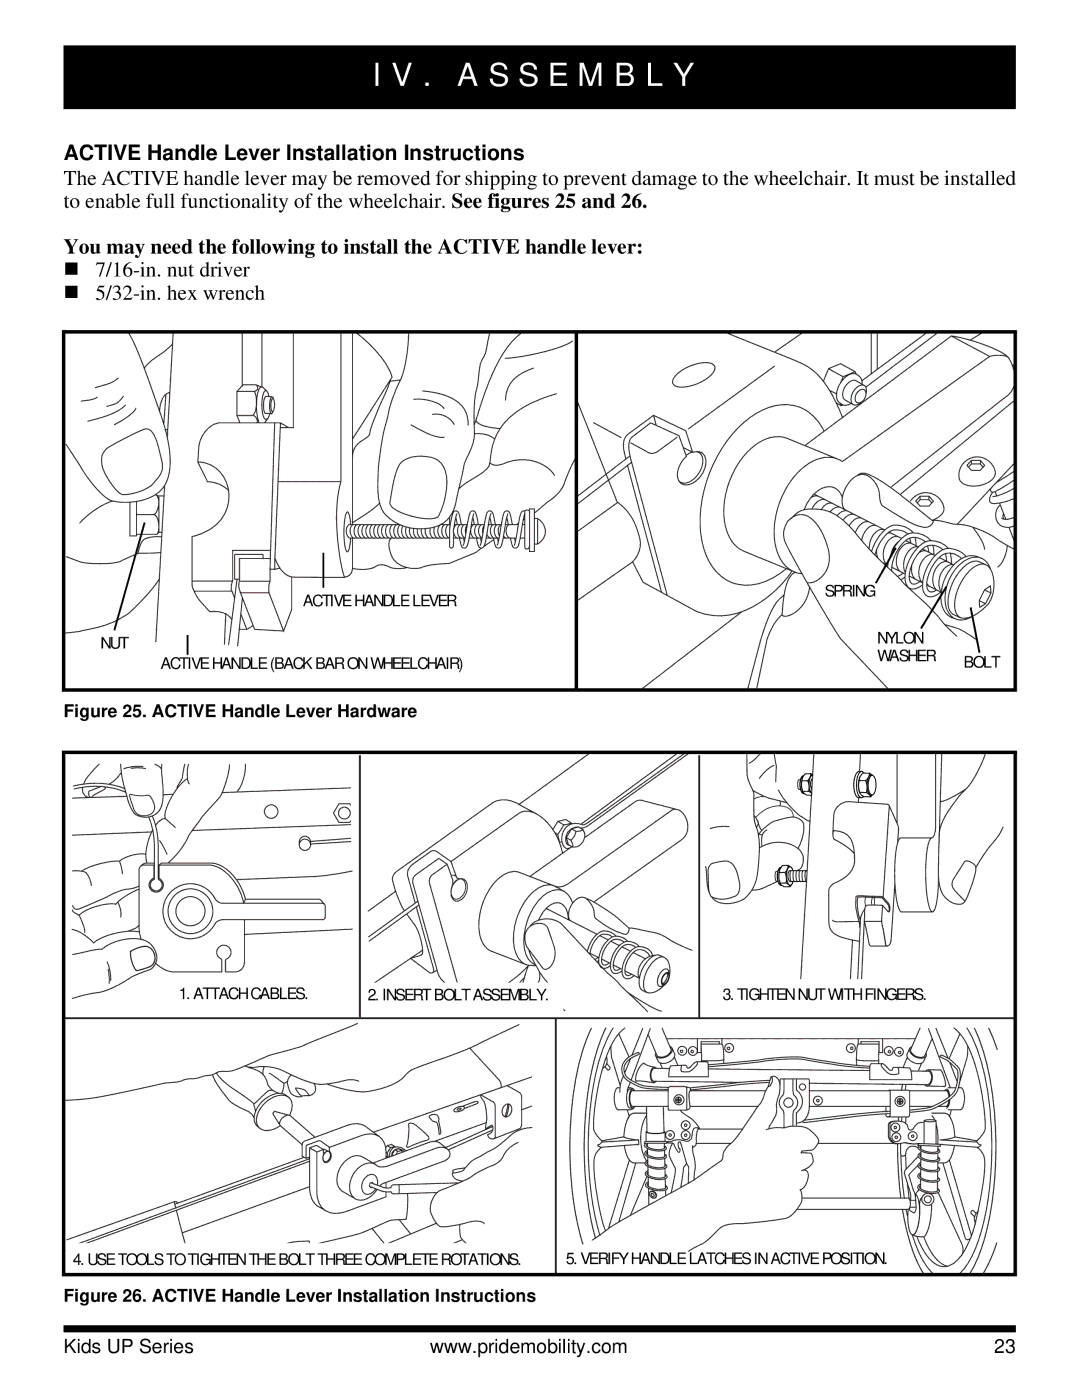
The ACTIVE handle lever may be removed for shipping to prevent damage to the wheelchair. It must be installed to enable full functionality of the wheelchair. See figures 25 and 26.
You may need the following to install the ACTIVE handle lever:
7/16-in. nut driver
5/32-in. hex wrench
ACTIVE HANDLE LEVER | SPRING |
|
|
| |
NUT | NYLON |
|
ACTIVE HANDLE (BACK BAR ON WHEELCHAIR) | WASHER | BOLT |
|
Figure 25. ACTIVE Handle Lever Hardware
1. ATTACH CABLES. | 2. INSERT BOLT ASSEMBLY. | 3. TIGHTEN NUT WITH FINGERS. |
4. USE TOOLS TO TIGHTEN THE BOLT THREE COMPLETE ROTATIONS. | 5. VERIFY HANDLE LATCHES IN ACTIVE POSITION. | |
Figure 26. ACTIVE Handle Lever Installation Instructions
Kids UP Series | www.pridemobility.com | 23 |