V . C O M F O R T A D J U S T M E N T S
Extension Limit and Force Adjustment (Kids FAST)
1.Engage attendant wheel lock. See figure 7.
2.Remove the child from the wheelchair.
3.Remove shell assembly from mobility base. See III. “Your Wheelchair.”
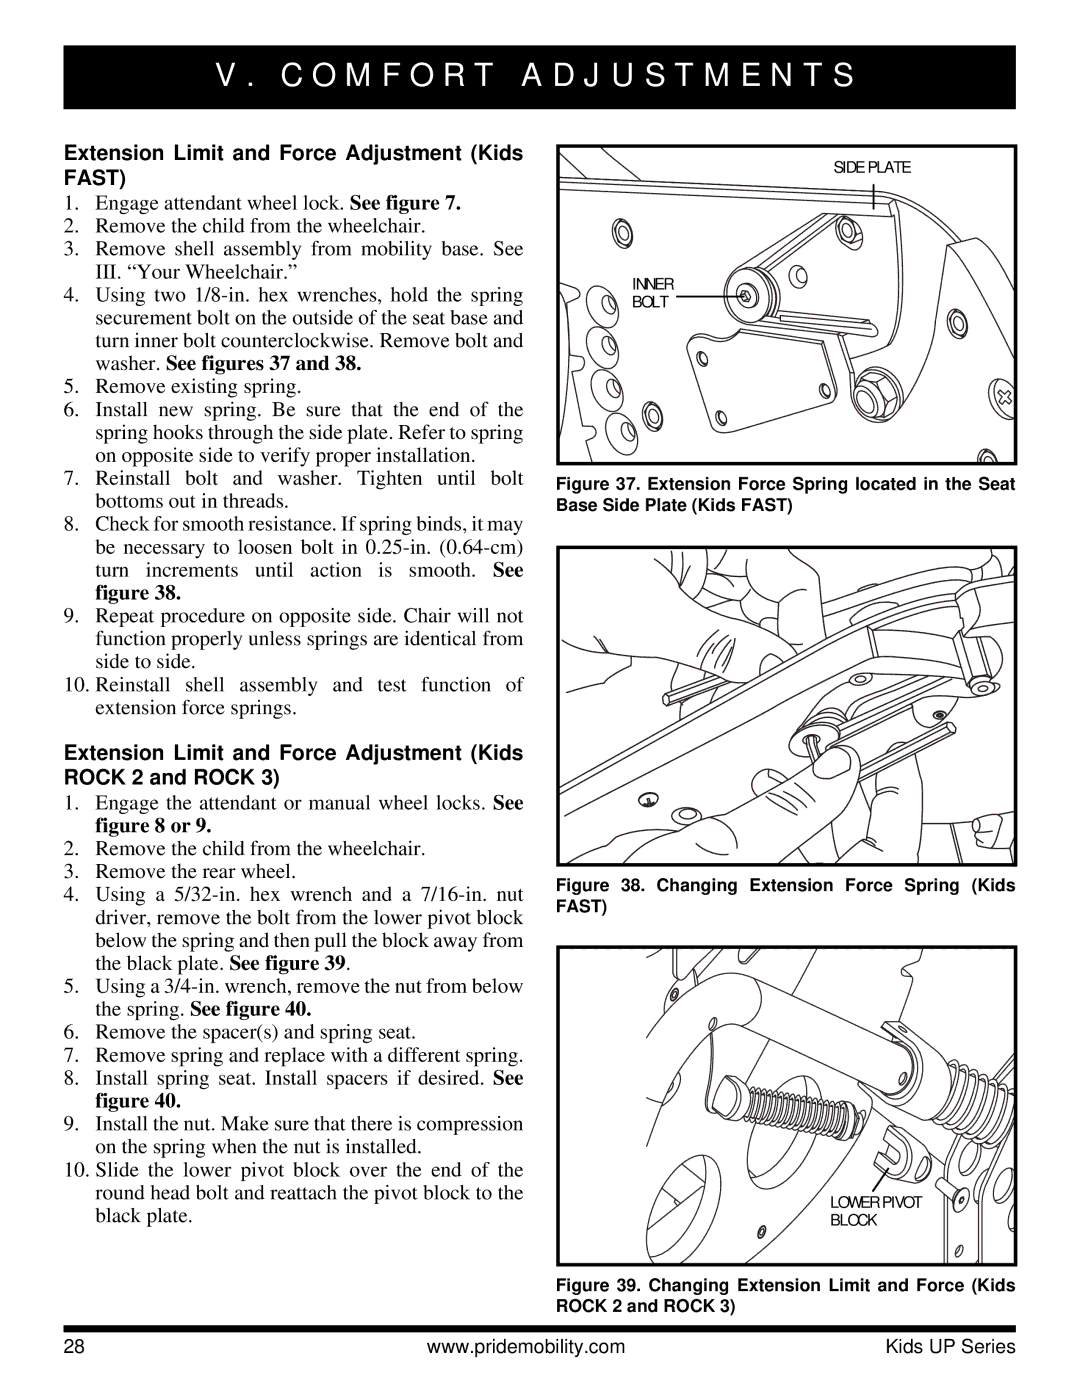
4.Using two
5.Remove existing spring.
6.Install new spring. Be sure that the end of the spring hooks through the side plate. Refer to spring on opposite side to verify proper installation.
7.Reinstall bolt and washer. Tighten until bolt bottoms out in threads.
8.Check for smooth resistance. If spring binds, it may be necessary to loosen bolt in
9.Repeat procedure on opposite side. Chair will not function properly unless springs are identical from side to side.
10.Reinstall shell assembly and test function of extension force springs.
Extension Limit and Force Adjustment (Kids ROCK 2 and ROCK 3)
1.Engage the attendant or manual wheel locks. See figure 8 or 9.
2.Remove the child from the wheelchair.
3.Remove the rear wheel.
4.Using a
5.Using a
6.Remove the spacer(s) and spring seat.
7.Remove spring and replace with a different spring.
8.Install spring seat. Install spacers if desired. See figure 40.
9.Install the nut. Make sure that there is compression on the spring when the nut is installed.
10.Slide the lower pivot block over the end of the round head bolt and reattach the pivot block to the black plate.
SIDE PLATE |
INNER |
BOLT |
Figure 37. Extension Force Spring located in the Seat Base Side Plate (Kids FAST)
Figure 38. Changing Extension Force Spring (Kids FAST)
LOWER PIVOT |
BLOCK |
Figure 39. Changing Extension Limit and Force (Kids ROCK 2 and ROCK 3)
28 | www.pridemobility.com | Kids UP Series |
