V . C O M F O R T A D J U S T M E N T S
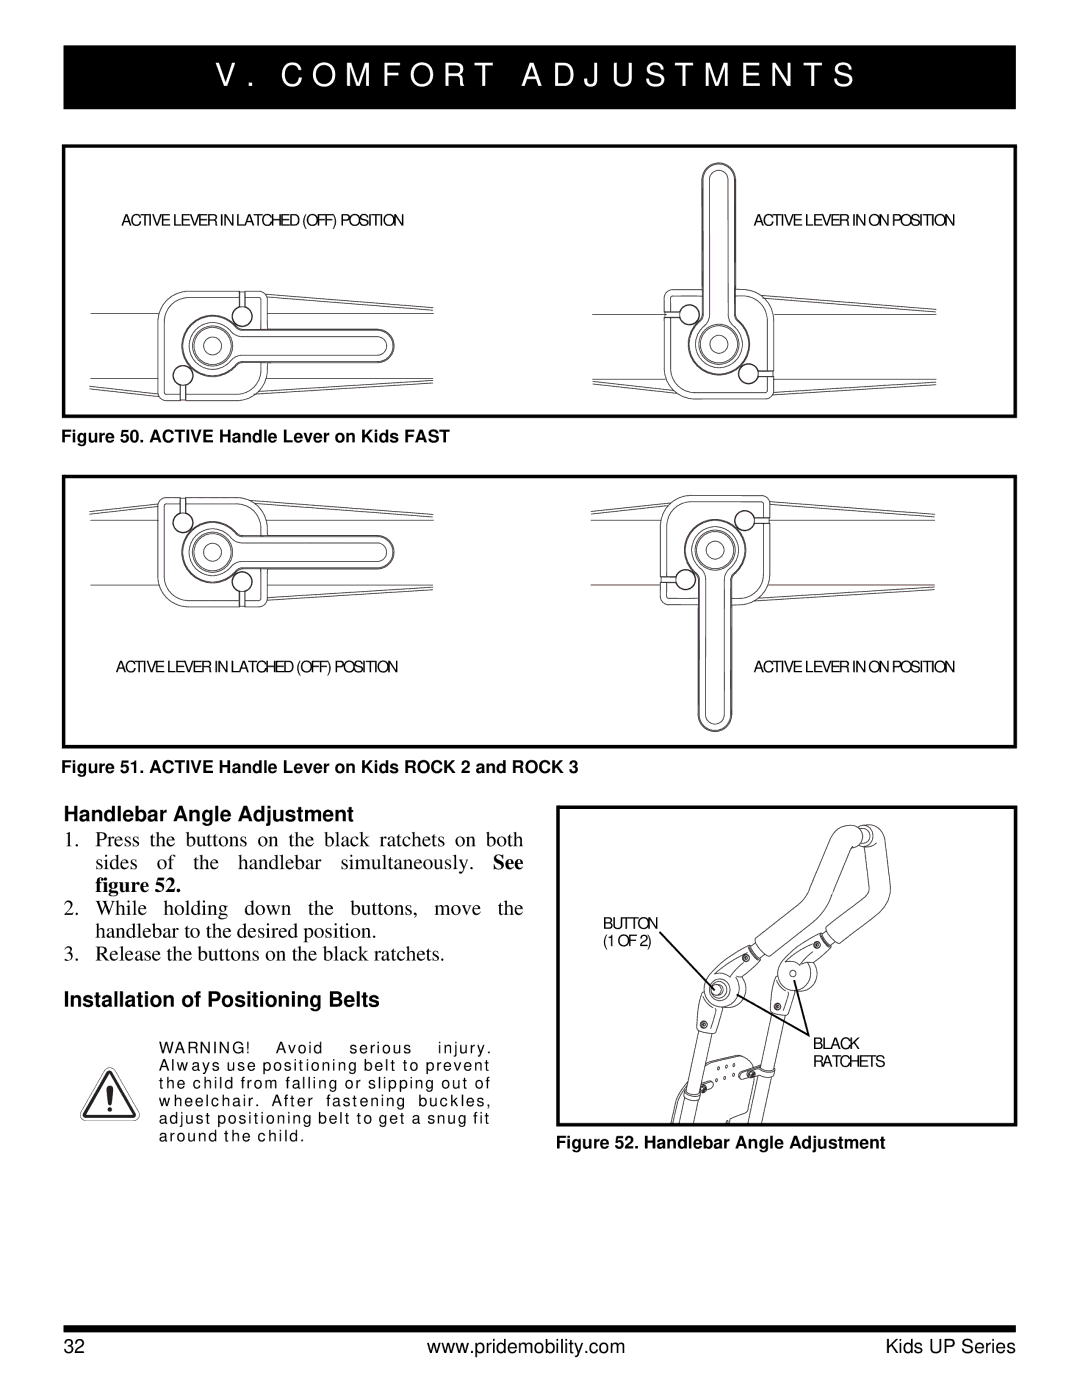
| ACTIVE LEVER IN LATCHED (OFF) POSITION |
|
| ACTIVE LEVER IN ON POSITION | ||||||||||||||
|
|
|
|
|
|
|
|
|
|
|
|
|
|
|
|
|
|
|
|
|
|
|
|
|
|
|
|
|
|
|
|
|
|
|
|
|
|
|
|
|
|
|
|
|
|
|
|
|
|
|
|
|
|
|
|
|
|
|
|
|
|
|
|
|
|
|
|
|
|
|
|
|
|
|
|
|
|
|
|
|
|
|
|
|
|
|
|
|
|
|
|
|
|
|
|
|
|
|
|
|
|
|
|
|
|
|
|
|
|
|
|
|
|
|
|
|
|
|
|
|
|
|
|
|
|
|
|
|
|
|
|
|
|
|
|
|
|
|
|
|
|
|
|
|
|
|
|
|
|
|
|
|
|
|
|
|
|
|
|
|
|
|
|
|
|
|
|
|
|
|
|
|
|
|
|
|
|
|
|
|
|
|
|
|
|
|
|
|
|
|
|
|
|
|
|
|
|
|
|
|
|
|
|
|
|
|
|
|
|
|
|
|
|
|
|
|
|
|
|
|
|
|
|
|
|
|
|
|
|
|
|
|
|
|
|
|
|
|
|
|
|
|
|
|
|
|
|
|
|
|
|
|
|
|
|
|
|
|
|
|
|
|
|
|
|
|
|
|
|
|
|
|
|
|
|
|
|
|
|
|
|
|
|
|
Figure 50. ACTIVE Handle Lever on Kids FAST
ACTIVE LEVER IN LATCHED (OFF) POSITION | ACTIVE LEVER IN ON POSITION |
Figure 51. ACTIVE Handle Lever on Kids ROCK 2 and ROCK 3
Handlebar Angle Adjustment
1.Press the buttons on the black ratchets on both sides of the handlebar simultaneously. See figure 52.
2.While holding down the buttons, move the handlebar to the desired position.
3.Release the buttons on the black ratchets.
Installation of Positioning Belts
WARNING! Avoid serious injury. Always use positioning belt to prevent the child from falling or slipping out of wheelchair. After fastening buckles, adjust positioning belt to get a snug fit around the child.
BUTTON (1 OF 2)
BLACK
RATCHETS
Figure 52. Handlebar Angle Adjustment
32 | www.pridemobility.com | Kids UP Series |
