V . C O M F O R T A D J U S T M E N T S
11.Repeat procedure on opposite side. Chair will not function properly unless springs are identical from side to side.
12.Install the wheels and make sure that the quick release axles are fully engaged.
Extension Limit and Force Adjustment (only Reaction Active Leg Rest)
SPRING
1. | Remove the calf protector to expose the lower end |
| of the knee angle tensioning device. |
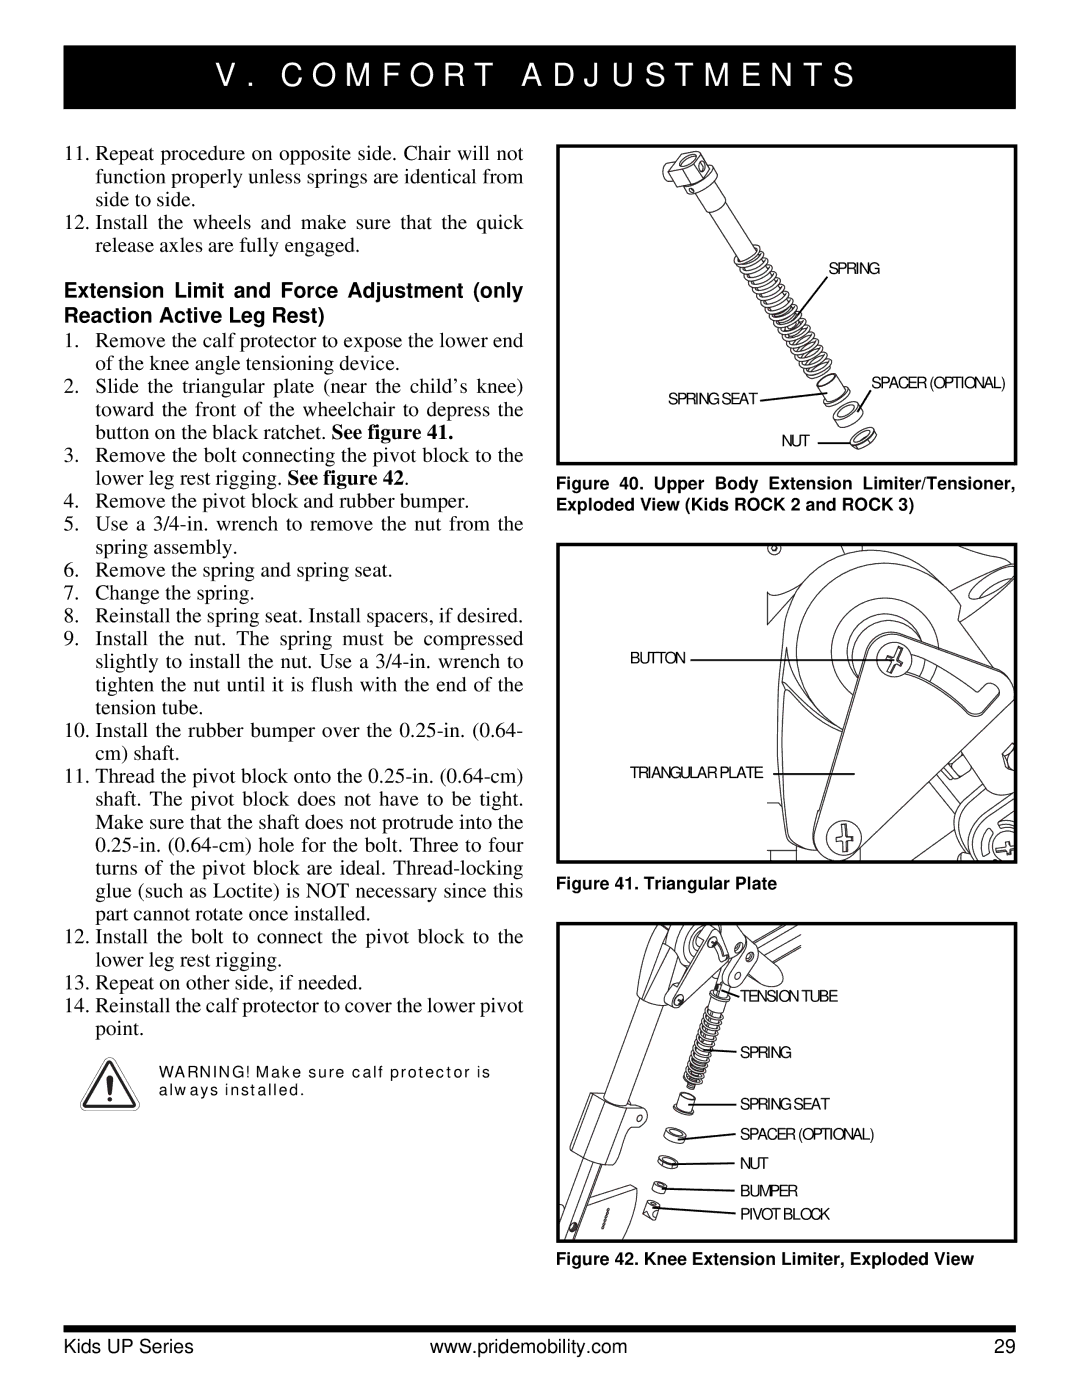
2. | Slide the triangular plate (near the child’s knee) |
| toward the front of the wheelchair to depress the |
| button on the black ratchet. See figure 41. |
3. | Remove the bolt connecting the pivot block to the |
SPRING SEAT ![]()
NUT
SPACER (OPTIONAL)
| lower leg rest rigging. See figure 42. |
4. | Remove the pivot block and rubber bumper. |
5. | Use a |
| spring assembly. |
6. | Remove the spring and spring seat. |
7. | Change the spring. |
8. | Reinstall the spring seat. Install spacers, if desired. |
9. | Install the nut. The spring must be compressed |
| slightly to install the nut. Use a |
| tighten the nut until it is flush with the end of the |
| tension tube. |
10. | Install the rubber bumper over the |
| cm) shaft. |
11. | Thread the pivot block onto the |
| shaft. The pivot block does not have to be tight. |
| Make sure that the shaft does not protrude into the |
| |
| turns of the pivot block are ideal. |
| glue (such as Loctite) is NOT necessary since this |
| part cannot rotate once installed. |
12. | Install the bolt to connect the pivot block to the |
| lower leg rest rigging. |
13. | Repeat on other side, if needed. |
14. | Reinstall the calf protector to cover the lower pivot |
| point. |
WARNING! Make sure calf protector is always installed.
Figure 40. Upper Body Extension Limiter/Tensioner, Exploded View (Kids ROCK 2 and ROCK 3)
BUTTON
TRIANGULAR PLATE
Figure 41. Triangular Plate
![]()
![]()
![]() TENSION TUBE
TENSION TUBE
![]()
![]()
![]()
![]()
![]()
![]() SPRING
SPRING
![]()
![]() SPRING SEAT
SPRING SEAT
![]() SPACER (OPTIONAL)
SPACER (OPTIONAL)
![]()
![]()
![]() NUT
NUT
![]() BUMPER
BUMPER
![]() PIVOT BLOCK
PIVOT BLOCK
Figure 42. Knee Extension Limiter, Exploded View
Kids UP Series | www.pridemobility.com | 29 |