5.3 SETTING MENU
Pan/Tilt/Zoom cameras will be covered in
Chapter 6 while Alarms will be covered in
Pack Duration – Rather than creating
DVR No. – If you are controlling more than one DVR with a single remote, this allows you to give each DVR a separate numerical ID.
Video Standard – This DVR operates using the NTSC standard common to North America.
Auto Logout – This sets the duration of inactivity before the DVR will automatically log a user out of the system.
Snapshot – When you enable snapshots in the Schedule menu (Section 4.6), this determines how much time will pass between snapshots. You can set the interval from 1 to 600 seconds (10 minutes).
their entirety in Chapter 7.
PICTURE
GENERAL
This window is where the basic settings for the DVR are configured. Your settings will only be saved if you click the Save button before exiting the window.
System Time – The date and time
Date Format – Choose from Year-
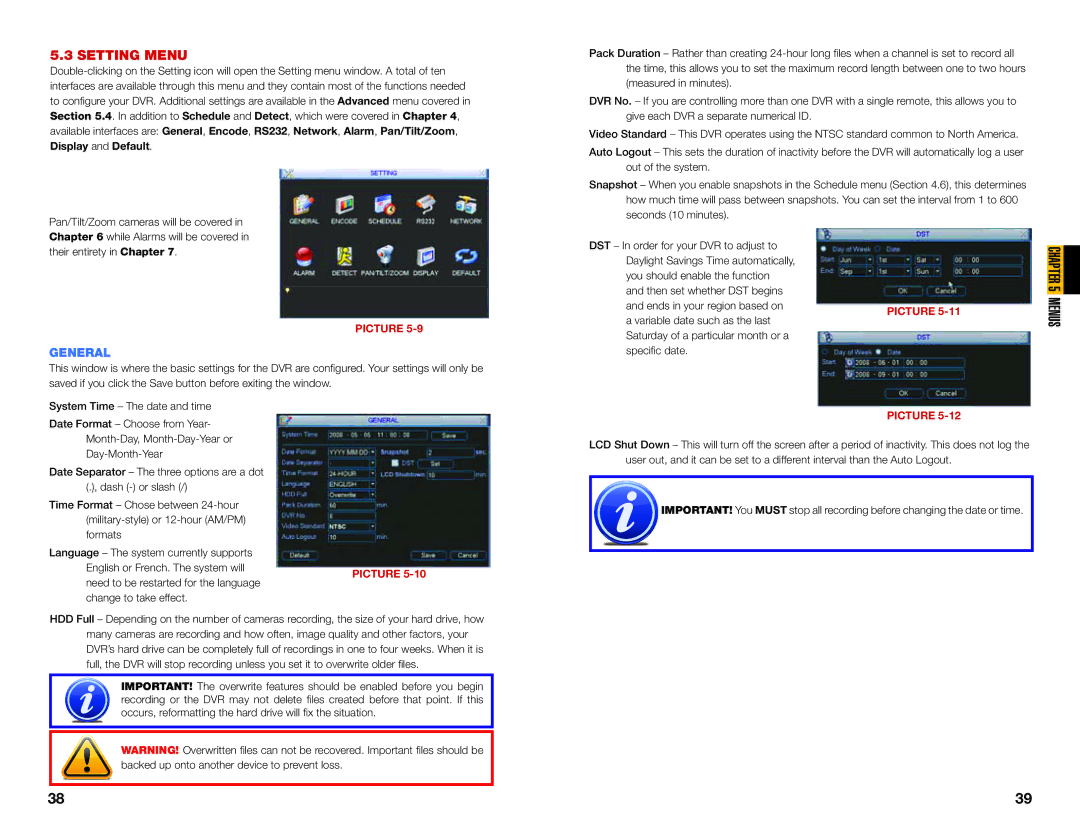
DST – In order for your DVR to adjust to Daylight Savings Time automatically, you should enable the function and then set whether DST begins and ends in your region based on a variable date such as the last Saturday of a particular month or a specific date.
PICTURE
PICTURE
CHAPTER 5 MENUS
Date Separator – The three options are a dot (.), dash
Time Format – Chose between
Language – The system currently supports
English or French. The system willPICTURE
change to take effect.
HDD Full – Depending on the number of cameras recording, the size of your hard drive, how many cameras are recording and how often, image quality and other factors, your DVR’s hard drive can be completely full of recordings in one to four weeks. When it is full, the DVR will stop recording unless you set it to overwrite older files.
IMPORTANT! The overwrite features should be enabled before you begin recording or the DVR may not delete files created before that point. If this occurs, reformatting the hard drive will fix the situation.
WARNING! Overwritten files can not be recovered. Important files should be backed up onto another device to prevent loss.
LCD Shut Down – This will turn off the screen after a period of inactivity. This does not log the user out, and it can be set to a different interval than the Auto Logout.
IMPORTANT! You MUST stop all recording before changing the date or time.
38 | 39 |