Chapter 1: Connections and Setup
DVD+Rewritable | DVD+R |
Some discs may not be compatible due to laser pickup and disc design.
Types of Discs
RECORDING: TYPES OF DISCS YOU CAN USE FOR RECORDING
DVD+R 2.4x, 4x, or 8x ONLY; DVD+RW 2.4x and 4x ONLY.
NOTES:
It is NOT possible to record on
IMPORTANT: It is NOT possible to record content that is
PLAYBACK: TYPES OF DISCS YOU CAN PLAY
•DVD discs – DVD movie discs
•CDs (Audio CDs,
•Video CD (VCD) and Super Video CD
Things to consider before you connect
Protect components from overheating
•Don’t block ventilation holes on any of the components. Arrange the components so that air can circulate freely.
•Don’t stack components.
•When you place components in a stand, make sure you allow adequate ventilation.
•If you connect an audio receiver or amplifier, place it on the top shelf.
Position cables properly to avoid audio interference
•Insert each cable firmly into the designated jack.
•If you place components above the TV, route all cables down the side of the back of the TV instead of straight down the middle of the back of the TV.
•If your TV has an antenna that uses
Connection Pictures
Audio/video cables are usually bundled together. For better visibility, the connection pictures in this book show each cable separately (audio left, audio right, and video). Graphics contained within this publication are for representation only.
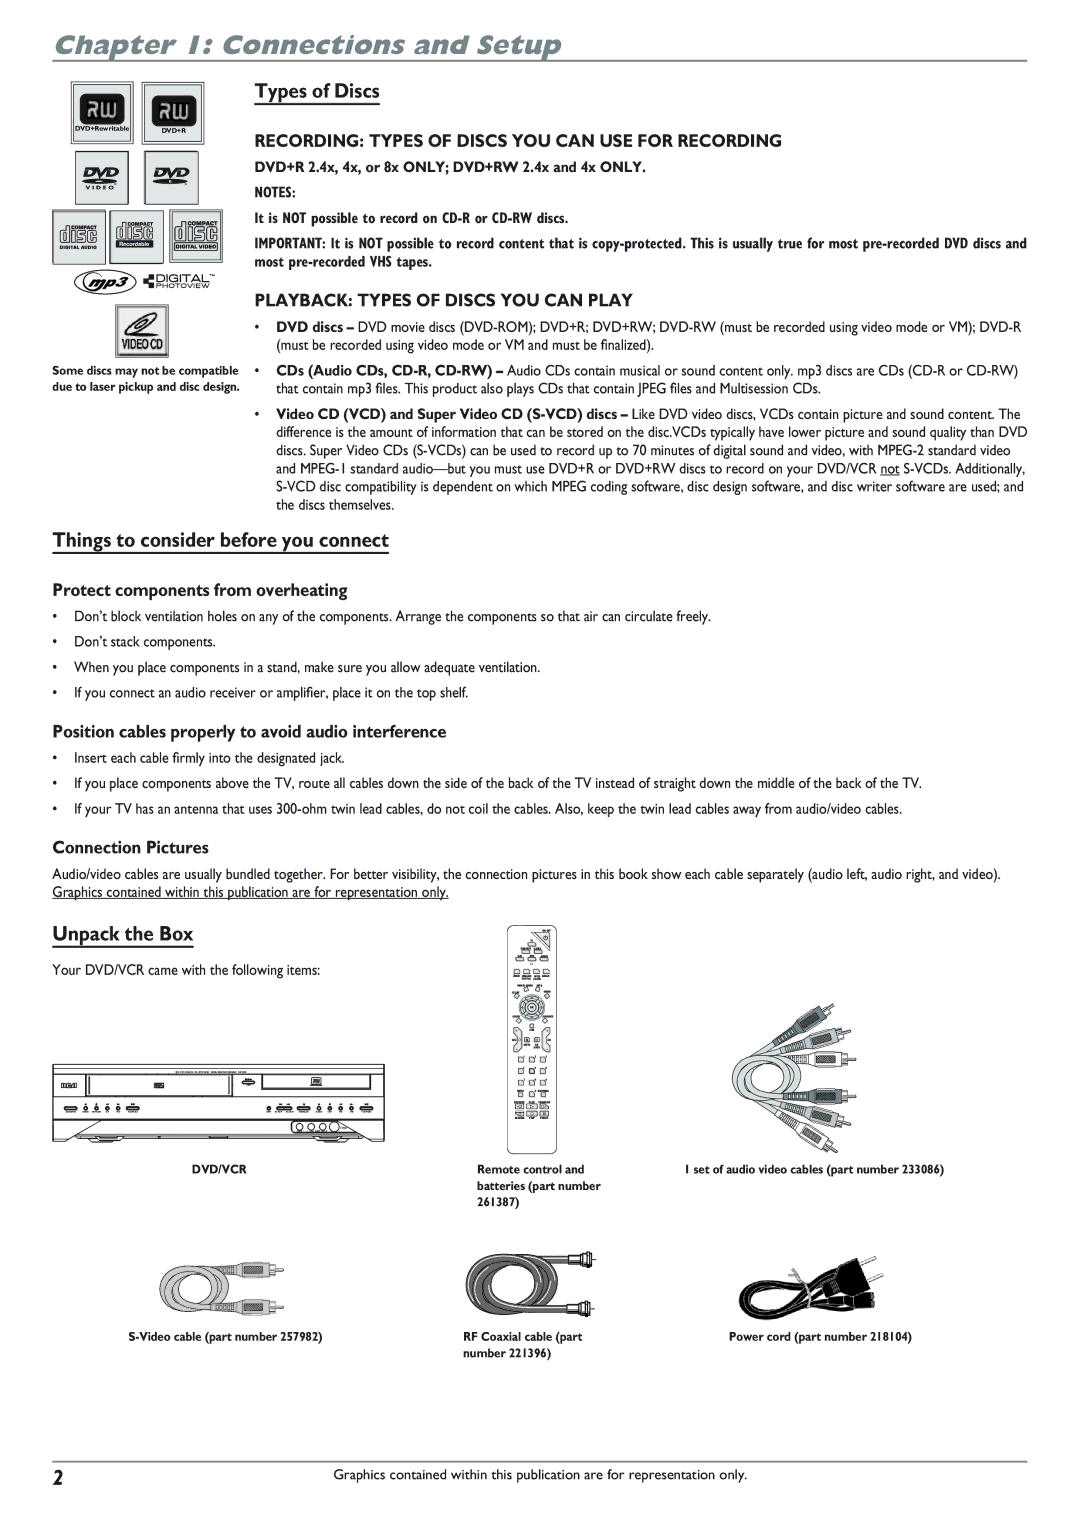
Unpack the Box
Your DVD/VCR came with the following items:
|
|
|
| DVD / VCR / VIDEO CD / CD / MP3 PLAYER | DIGITAL VIDEO DISC RECORDER DRC 8300 |
|
|
|
|
|
|
|
|
|
|
|
|
| COPY |
|
|
|
|
|
|
|
|
STANDBY/ON | RECORD STOP/EJECT | REV | FWD | PLAY/PAUSE | INPUT | OPEN/CLOSE | RECORD | STOP | REV | FWD | PLAY/PAUSE | ||
|
|
|
|
|
|
|
|
|
|
|
|
| |
|
|
|
|
|
|
| VIDEO | L | AUDIO | R |
|
|
|
TV
DVD/VCR CABLE
SAT AUX AUDIO
ZOOM ANALOG OPEN ANGLE
DIGITAL CLOSE TIMER•GUIDE INFO
CLEAR ![]()
![]() MENU
MENU
OK
AGAINADVANCE
| LIVE |
|
VOL |
| CH |
MUTE GO | ||
| BACK | |
1 | 2 | 3 |
4 | 5 | 6 |
7 | 8 | 9 |
INPUT | 0 | ANTENNA |
REVERSE | PLAY | FORWARD |
RECORD STOP PAUSE
DVD/VCR | Remote control and | 1 set of audio video cables (part number 233086) | ||||||||
| batteries (part number |
| ||||||||
| 261387) |
|
|
|
|
|
|
|
|
|
|
|
|
|
|
|
|
|
|
|
|
|
|
|
|
|
|
|
|
|
|
|
|
|
|
|
|
|
|
|
|
|
|
RF Coaxial cable (part | Power cord (part number 218104) | |
| number 221396) |
|
2 | Graphics contained within this publication are for representation only. |