1210 Oil-less Threading Machine

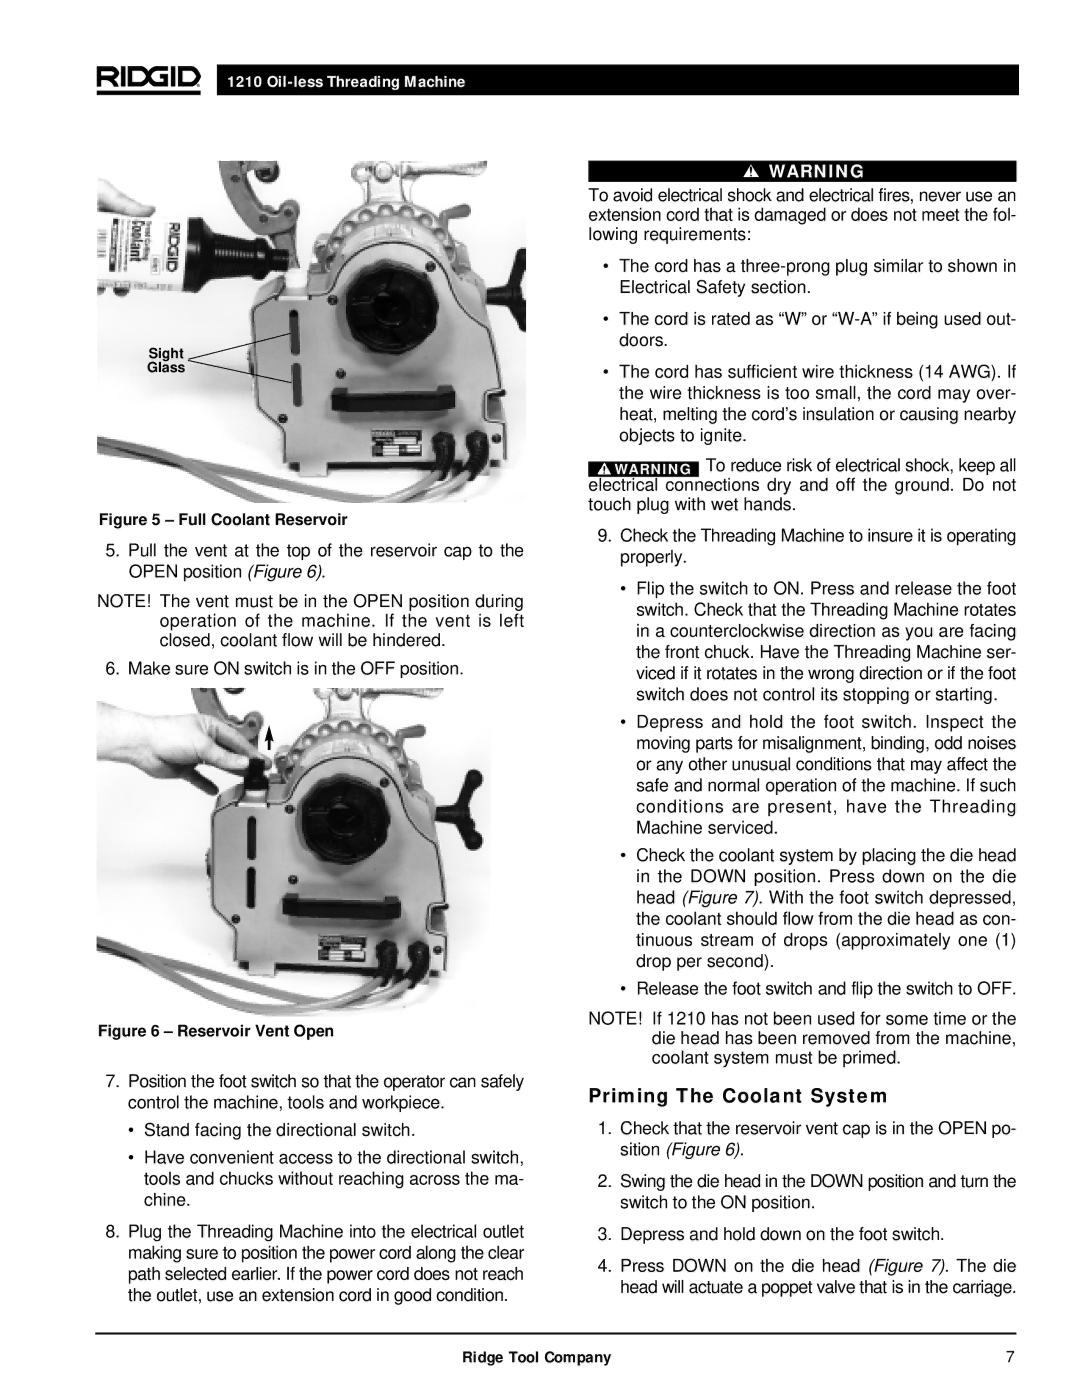
Sight

Glass

Figure 5 – Full Coolant Reservoir

5.Pull the vent at the top of the reservoir cap to the OPEN position (Figure 6).

NOTE! The vent must be in the OPEN position during operation of the machine. If the vent is left closed, coolant flow will be hindered.

6. Make sure ON switch is in the OFF position.

Figure 6 – Reservoir Vent Open

7.Position the foot switch so that the operator can safely control the machine, tools and workpiece.

Stand facing the directional switch.

Have convenient access to the directional switch, tools and chucks without reaching across the ma- chine.

8.Plug the Threading Machine into the electrical outlet making sure to position the power cord along the clear path selected earlier. If the power cord does not reach the outlet, use an extension cord in good condition.

WARNING

To avoid electrical shock and electrical fires, never use an extension cord that is damaged or does not meet the fol- lowing requirements:

The cord has a three-prong plug similar to shown in Electrical Safety section.

The cord is rated as “W” or “W-A” if being used out- doors.

The cord has sufficient wire thickness (14 AWG). If the wire thickness is too small, the cord may over- heat, melting the cord’s insulation or causing nearby objects to ignite.

WARNING To reduce risk of electrical shock, keep all electrical connections dry and off the ground. Do not

touch plug with wet hands.

9.Check the Threading Machine to insure it is operating properly.

Flip the switch to ON. Press and release the foot switch. Check that the Threading Machine rotates in a counterclockwise direction as you are facing the front chuck. Have the Threading Machine ser- viced if it rotates in the wrong direction or if the foot switch does not control its stopping or starting.

Depress and hold the foot switch. Inspect the moving parts for misalignment, binding, odd noises or any other unusual conditions that may affect the safe and normal operation of the machine. If such conditions are present, have the Threading Machine serviced.

Check the coolant system by placing the die head in the DOWN position. Press down on the die head (Figure 7). With the foot switch depressed, the coolant should flow from the die head as con- tinuous stream of drops (approximately one (1) drop per second).

Release the foot switch and flip the switch to OFF.

NOTE! If 1210 has not been used for some time or the die head has been removed from the machine, coolant system must be primed.

Priming The Coolant System

1.Check that the reservoir vent cap is in the OPEN po- sition (Figure 6).

2.Swing the die head in the DOWN position and turn the switch to the ON position.

3.Depress and hold down on the foot switch.

4.Press DOWN on the die head (Figure 7). The die head will actuate a poppet valve that is in the carriage.

Ridge Tool Company

7

Page 9
Image 9
RIDGID 1210 manual Priming The Coolant System, Full Coolant Reservoir

1210 specifications

The RIDGID 1210 is an exceptional piece of equipment tailored for plumbing and pipefitting professionals. This compact yet powerful machine provides unparalleled reliability and performance, making it a staple in any contractor's toolkit. Designed to tackle some of the toughest jobs in the field, the RIDGID 1210 combines innovative technology with robust construction to ensure that it meets the demanding needs of users.

One of the standout features of the RIDGID 1210 is its advanced threading system. It boasts a 3-in-1 threading capability that allows users to thread various pipe sizes and materials with ease, including steel, iron, and PVC. This flexibility enhances productivity, as contractors can switch between different tasks without the need for multiple tools.

The machine is powered by a high-torque motor that delivers consistent performance even during heavy-duty applications. This ensures that users can complete their threading tasks with speed and precision. Moreover, the RIDGID 1210 is equipped with a self-oiling system, which significantly reduces maintenance time by keeping critical components lubricated and operating smoothly.

Portability is another key characteristic of the RIDGID 1210. Its lightweight design, coupled with ergonomic handles, allows for easy transport and maneuverability on job sites. This means crews can easily take the machine to various locations, enhancing their efficiency and reducing downtime.

The RIDGID 1210 also prioritizes user safety. It comes with built-in safety features, such as an emergency stop button and protective shields, which protect the user from rotating parts and debris. The thoughtful design extends to its user-friendly controls, which provide intuitive operation, making it accessible even for those who are new to threading machinery.

Furthermore, the RIDGID brand is synonymous with durability and quality. The 1210 is constructed from heavy-duty materials designed to withstand the rigors of both indoor and outdoor job sites. This robustness ensures that it remains a reliable investment for contractors looking for a long-lasting threading solution.

Overall, the RIDGID 1210 is a well-rounded threading machine that combines technology, durability, and user-centric design to deliver outstanding performance. Its versatility, power, and portability make it an essential tool for plumbing and pipefitting professionals, providing them with the capabilities they need to succeed in their projects. Whether you are a seasoned contractor or an aspiring plumber, the RIDGID 1210 is poised to become an invaluable ally in your work.