Mounting Jointer Table to Cabinet
![]() WARNING: This tool is heavy. To reduce the risk of back injury, get help whenever you have to lift the tool.
WARNING: This tool is heavy. To reduce the risk of back injury, get help whenever you have to lift the tool.
1.With help place the bed assembly upside down on two blocks as shown.
2.Place the jointer cabinet on top of the bed assembly as shown.
3.From the hardware pack find the following:
3 Serrated Hex Head Bolts
4.Bolt the table to the cabinet using the 3 hex head bolts and tighten all three bolts. To access third bolt, reach into dust collection port on left side.
5.Slip the belt over both the motor and cutterhead pulleys.
Tensioning Belt and Installing Rear Panel
1.While the jointer is still upside down slide the motor up the motor mount to put tension on the belt. This will require assistance. Once the belt has been tensioned tighten the motor bolts. The belt should have approxi- mately 1" deflection (the measurement of how much you can push in on one side of the belt).
NOTE: An alternate method for tensioning the belt is to turn the unit upright, letting the motor slide down in the slots and allowing the weight of the motor only to tension the belt.
2.Visually check the front to back alignment of the pul- leys and adjust the motor as needed.
3.From the hardware pack locate the following:
6 Carriage Head Bolts
6 Serrated Flange Hex Nuts 5/16"
From among the loose parts find the following: Rear Cabinet Panel
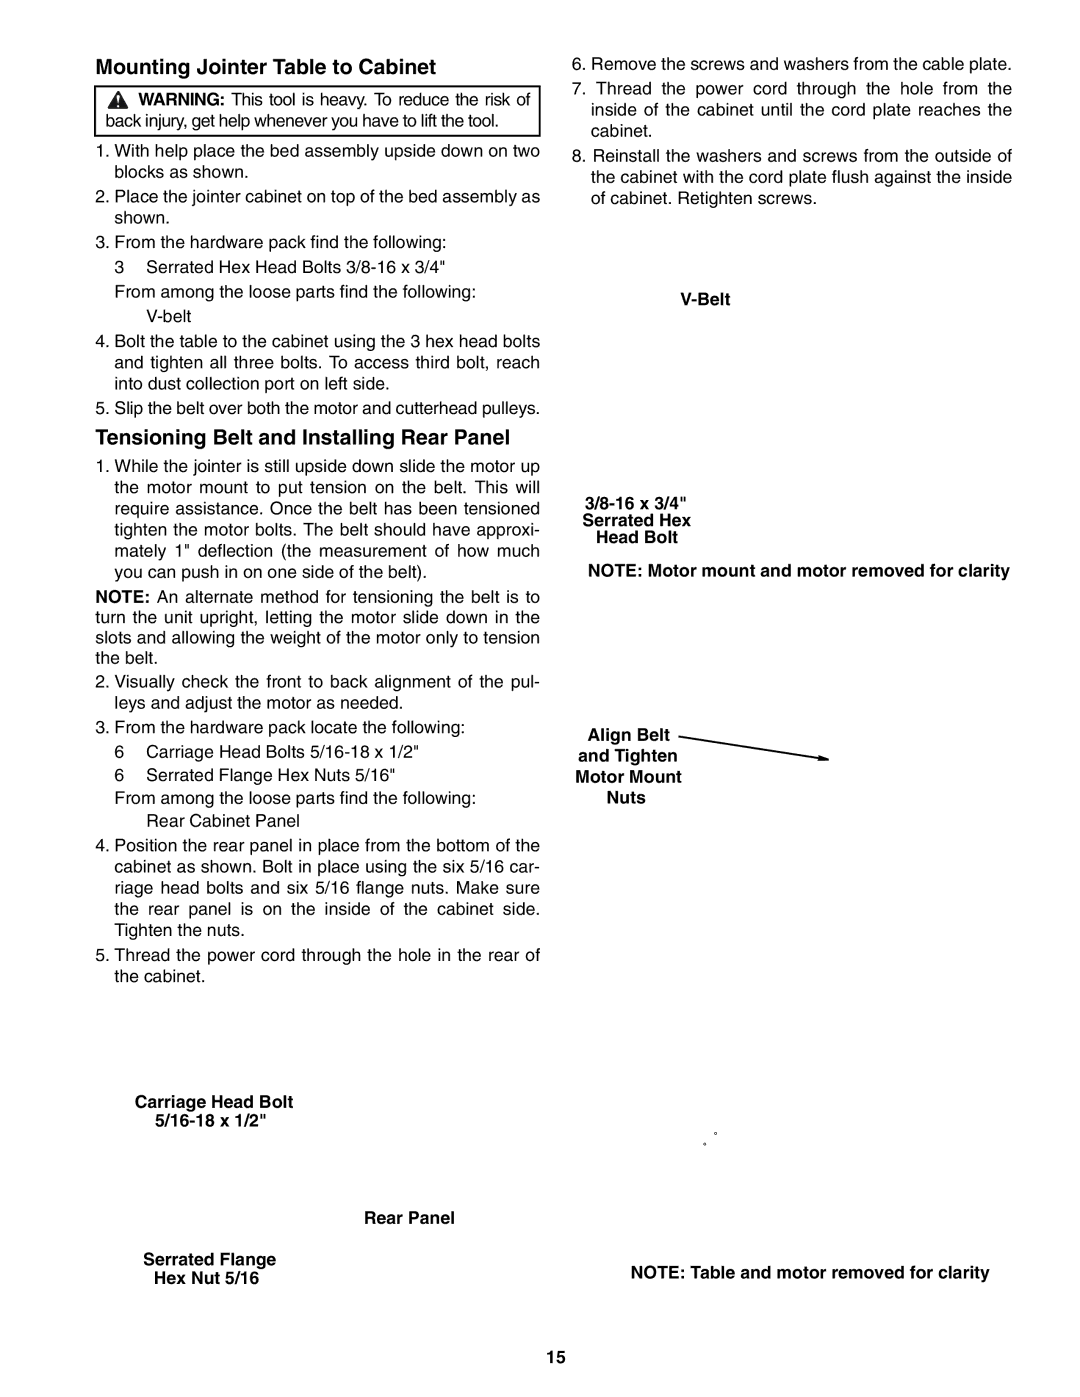
4.Position the rear panel in place from the bottom of the cabinet as shown. Bolt in place using the six 5/16 car- riage head bolts and six 5/16 flange nuts. Make sure the rear panel is on the inside of the cabinet side. Tighten the nuts.
5.Thread the power cord through the hole in the rear of the cabinet.
Carriage Head Bolt
Rear Panel
Serrated Flange
Hex Nut 5/16
6.Remove the screws and washers from the cable plate.
7.Thread the power cord through the hole from the inside of the cabinet until the cord plate reaches the cabinet.
8.Reinstall the washers and screws from the outside of the cabinet with the cord plate flush against the inside of cabinet. Retighten screws.
V-Belt
NOTE: Motor mount and motor removed for clarity
Align Belt 
and Tighten
Motor Mount
Nuts
NOTE: Table and motor removed for clarity
15