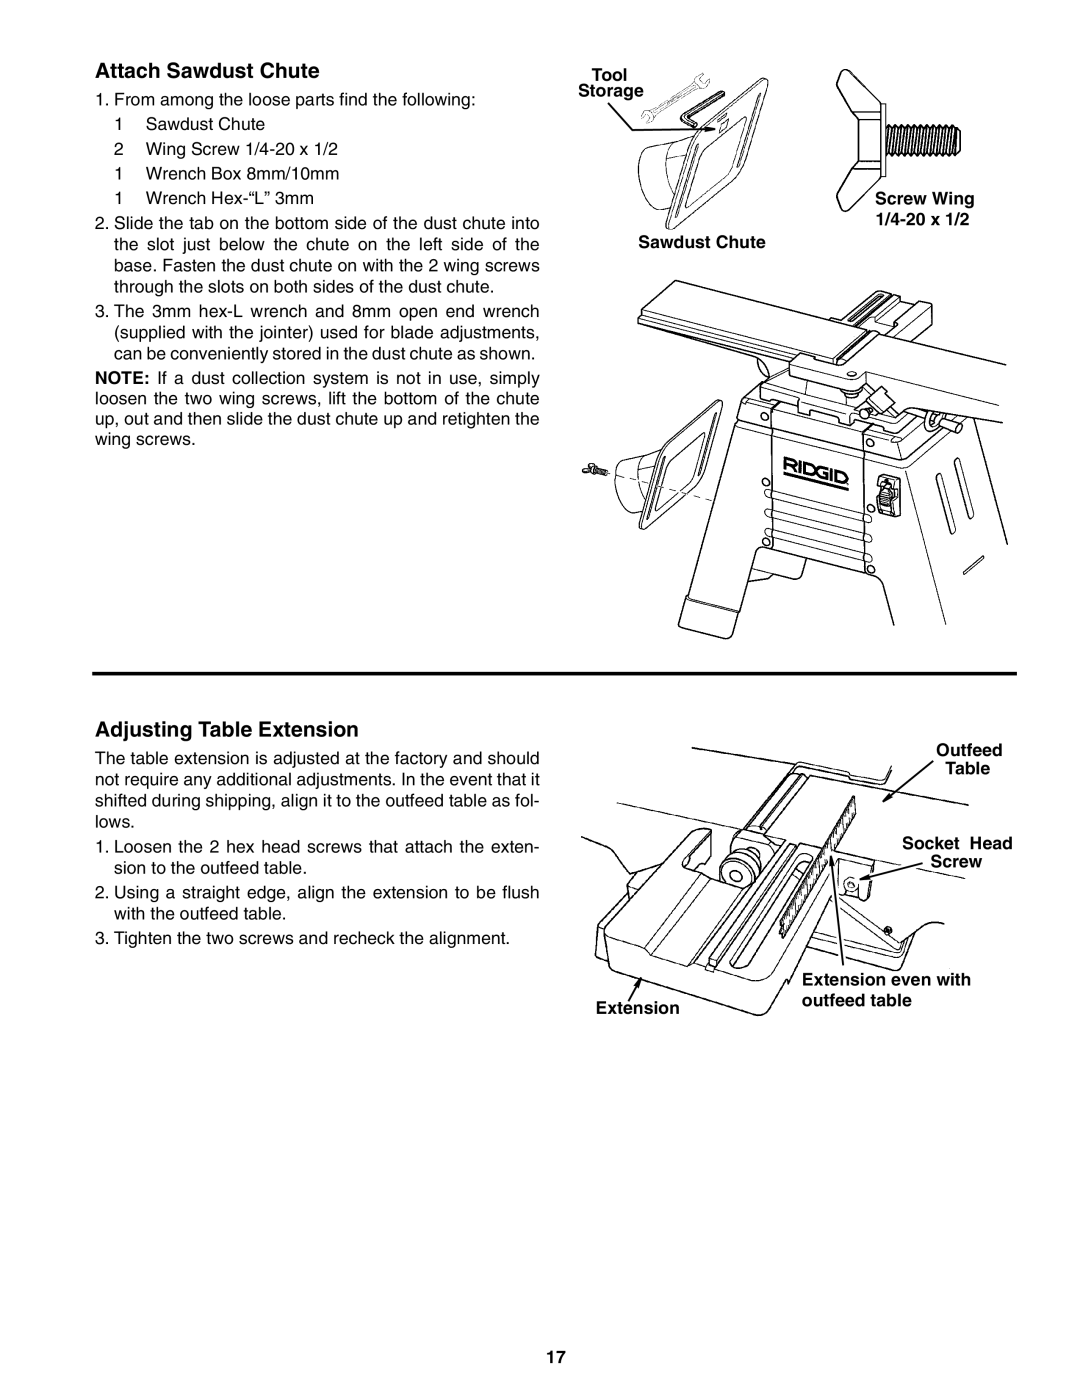
Attach Sawdust Chute
1.From among the loose parts find the following:
1Sawdust Chute
2Wing Screw
1Wrench Box 8mm/10mm
1Wrench
2.Slide the tab on the bottom side of the dust chute into the slot just below the chute on the left side of the base. Fasten the dust chute on with the 2 wing screws through the slots on both sides of the dust chute.
3.The 3mm
NOTE: If a dust collection system is not in use, simply loosen the two wing screws, lift the bottom of the chute up, out and then slide the dust chute up and retighten the wing screws.
Tool
Storage
Sawdust Chute
Screw Wing 1/4-20 x 1/2
Adjusting Table Extension
The table extension is adjusted at the factory and should not require any additional adjustments. In the event that it shifted during shipping, align it to the outfeed table as fol- lows.
1.Loosen the 2 hex head screws that attach the exten- sion to the outfeed table.
2.Using a straight edge, align the extension to be flush with the outfeed table.
3.Tighten the two screws and recheck the alignment.
Outfeed
Table
Socket Head
 Screw
Screw
| Extension even with |
Extension | outfeed table |
|
17