Alignments
Cutter Knife Alignment/Adjustments
![]() WARNING: The cutter knives are extremely sharp. Do not let your hand or fingers touch the cutter knives to prevent serious personal injury.
WARNING: The cutter knives are extremely sharp. Do not let your hand or fingers touch the cutter knives to prevent serious personal injury.
Tools Needed
8mm open end wrench and 3mm Allen wrench (supplied). Metal straightedge
• Unplug jointer/planer.
![]() WARNING: To reduce the risk of injury from acci- dental start, make sure switch is “OFF” and plug is not connected to power source outlet.
WARNING: To reduce the risk of injury from acci- dental start, make sure switch is “OFF” and plug is not connected to power source outlet.
Checking Alignment
Note: The blades are adjusted at the factory, and should not require adjustment.
1.Lower infeed table by turning the depth of the cut handwheel clockwise.
2.Position the fence to the rear of the jointer, approxi- mately 1/4" beyond the end of the cutter knives. Lock the fence in this position.
3.Remove cutter head guard.
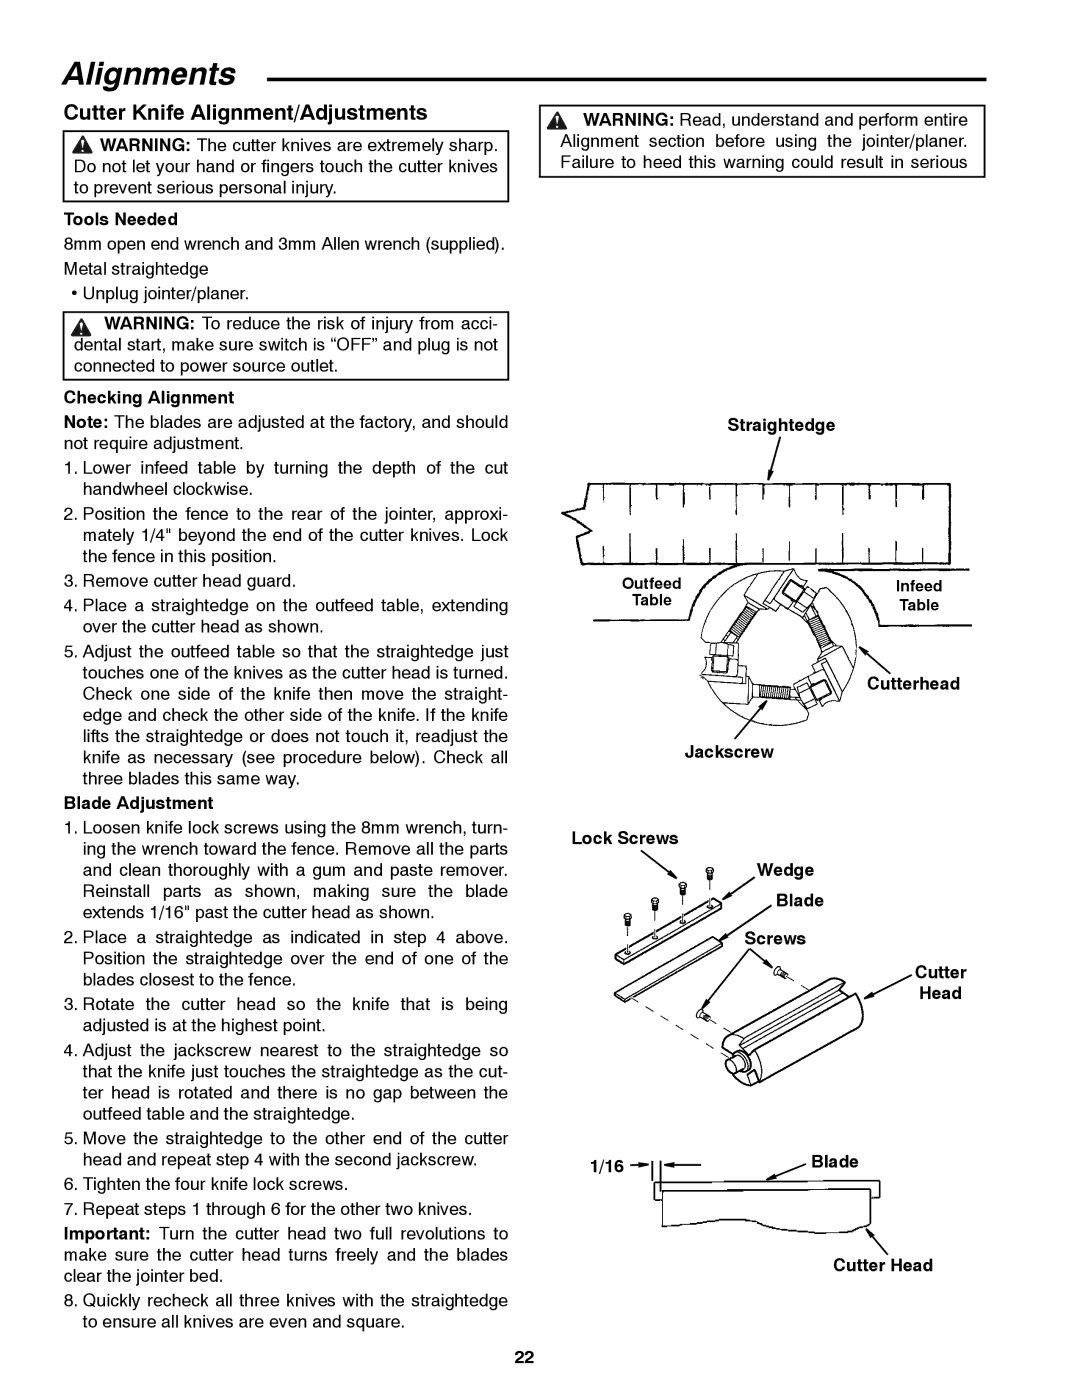
4.Place a straightedge on the outfeed table, extending over the cutter head as shown.
5.Adjust the outfeed table so that the straightedge just touches one of the knives as the cutter head is turned. Check one side of the knife then move the straight- edge and check the other side of the knife. If the knife lifts the straightedge or does not touch it, readjust the knife as necessary (see procedure below). Check all three blades this same way.
Blade Adjustment
1.Loosen knife lock screws using the 8mm wrench, turn- ing the wrench toward the fence. Remove all the parts and clean thoroughly with a gum and paste remover. Reinstall parts as shown, making sure the blade extends 1/16" past the cutter head as shown.
2.Place a straightedge as indicated in step 4 above. Position the straightedge over the end of one of the blades closest to the fence.
3.Rotate the cutter head so the knife that is being adjusted is at the highest point.
4.Adjust the jackscrew nearest to the straightedge so that the knife just touches the straightedge as the cut- ter head is rotated and there is no gap between the outfeed table and the straightedge.
5.Move the straightedge to the other end of the cutter head and repeat step 4 with the second jackscrew.
6.Tighten the four knife lock screws.
7.Repeat steps 1 through 6 for the other two knives.
Important: Turn the cutter head two full revolutions to make sure the cutter head turns freely and the blades clear the jointer bed.
8.Quickly recheck all three knives with the straightedge to ensure all knives are even and square.
![]() WARNING: Read, understand and perform entire Alignment section before using the jointer/planer. Failure to heed this warning could result in serious
WARNING: Read, understand and perform entire Alignment section before using the jointer/planer. Failure to heed this warning could result in serious
Straightedge
Outfeed | Infeed |
Table | Table |
|
Cutterhead
Jackscrew
Lock Screws
Wedge
Blade
Screws
Cutter
Head
1/16 |
|
|
| Blade |
|
|
| ||
|
|
|
|
|
Cutter Head
22