ASSEMBLY
NOTE: Many of the illustrations in this manual show only portions of the compound miter saw. This is intentional so that we can clearly show points being made in the illustrations. Never operate the saw without all guards securely in place and in good operating condition.
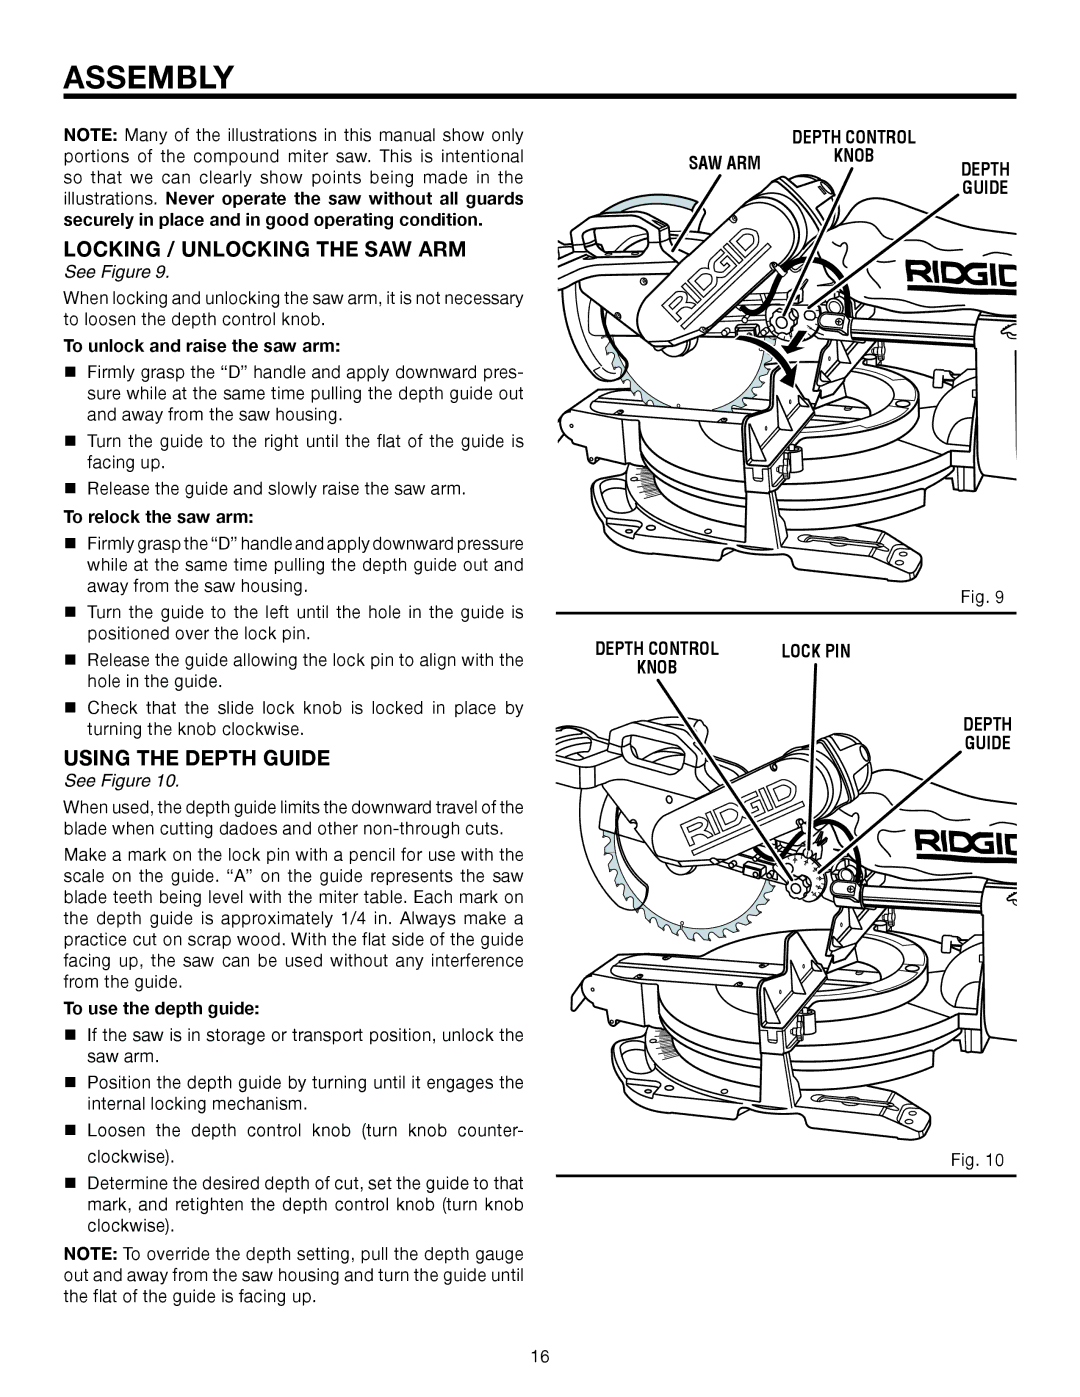
LOCKING / UNLOCKING THE SAW ARM
See Figure 9.
When locking and unlocking the saw arm, it is not necessary to loosen the depth control knob.
To unlock and raise the saw arm:
Firmly grasp the “D” handle and apply downward pres- sure while at the same time pulling the depth guide out and away from the saw housing.
Turn the guide to the right until the flat of the guide is facing up.
Release the guide and slowly raise the saw arm.
To relock the saw arm:
Firmly grasp the “D” handle and apply downward pressure while at the same time pulling the depth guide out and away from the saw housing.
Turn the guide to the left until the hole in the guide is positioned over the lock pin.
Release the guide allowing the lock pin to align with the hole in the guide.
Check that the slide lock knob is locked in place by turning the knob clockwise.
USING THE DEPTH GUIDE
See Figure 10.
When used, the depth guide limits the downward travel of the blade when cutting dadoes and other
Make a mark on the lock pin with a pencil for use with the scale on the guide. “A” on the guide represents the saw blade teeth being level with the miter table. Each mark on the depth guide is approximately 1/4 in. Always make a practice cut on scrap wood. With the flat side of the guide facing up, the saw can be used without any interference from the guide.
To use the depth guide:
If the saw is in storage or transport position, unlock the saw arm.
Position the depth guide by turning until it engages the internal locking mechanism.
Loosen the depth control knob (turn knob counter- clockwise).
Determine the desired depth of cut, set the guide to that mark, and retighten the depth control knob (turn knob clockwise).
NOTE: To override the depth setting, pull the depth gauge out and away from the saw housing and turn the guide until the flat of the guide is facing up.
| DEPTH CONTROL |
|
SAW ARM | KNOB | DEPTH |
| ||
|
| GUIDE |
Fig. 9
DEPTH CONTROL | LOCK PIN |
KNOB |
|
DEPTH
GUIDE
Fig. 10
16