ASSEMBLY
ADJUSTING THE MITER LOCK LEVER
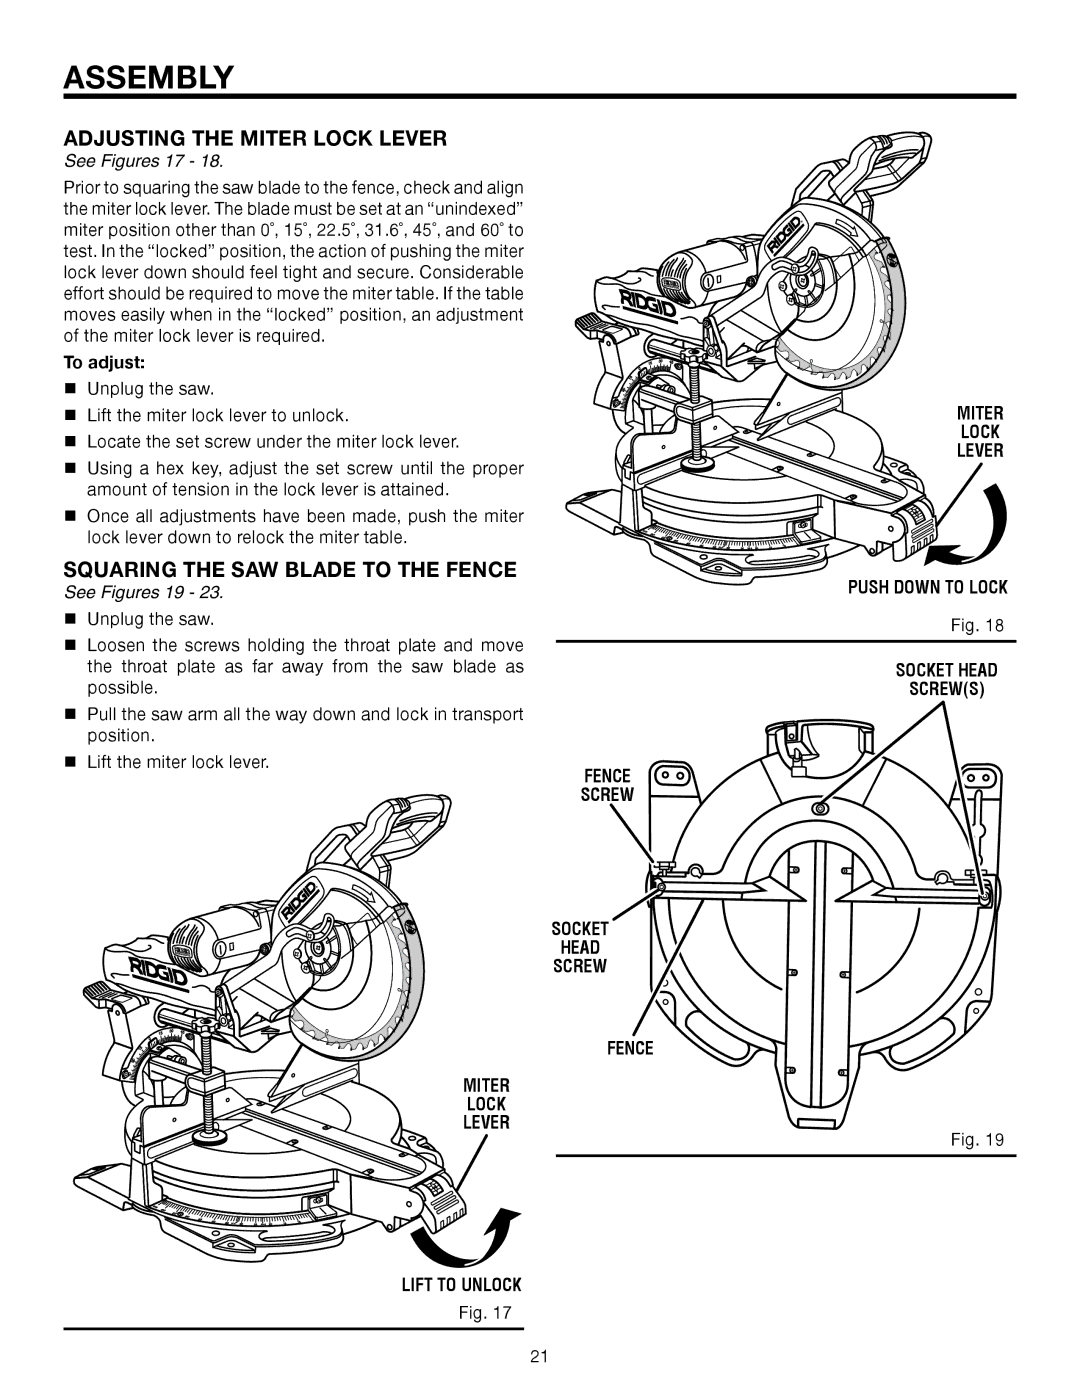
See Figures 17 - 18.
Prior to squaring the saw blade to the fence, check and align the miter lock lever. The blade must be set at an “unindexed” miter position other than 0˚, 15˚, 22.5˚, 31.6˚, 45˚, and 60˚ to test. In the “locked” position, the action of pushing the miter lock lever down should feel tight and secure. Considerable effort should be required to move the miter table. If the table moves easily when in the “locked” position, an adjustment of the miter lock lever is required.
To adjust:
Unplug the saw.
Lift the miter lock lever to unlock.
Locate the set screw under the miter lock lever.
Using a hex key, adjust the set screw until the proper amount of tension in the lock lever is attained.
Once all adjustments have been made, push the miter lock lever down to relock the miter table.
SQUARING THE SAW BLADE TO THE FENCE
See Figures 19 - 23.
Unplug the saw.
Loosen the screws holding the throat plate and move the throat plate as far away from the saw blade as possible.
Pull the saw arm all the way down and lock in transport
position.
Lift the miter lock lever.
FENCE
SCREW
®
SOCKET
HEAD
SCREW
FENCE
MITER
LOCK
LEVER
LIFT TO UNLOCK
Fig. 17
®
MITER
LOCK
LEVER
PUSH DOWN TO LOCK
Fig. 18
SOCKET HEAD
SCREW(S)
Fig. 19
21