Performing
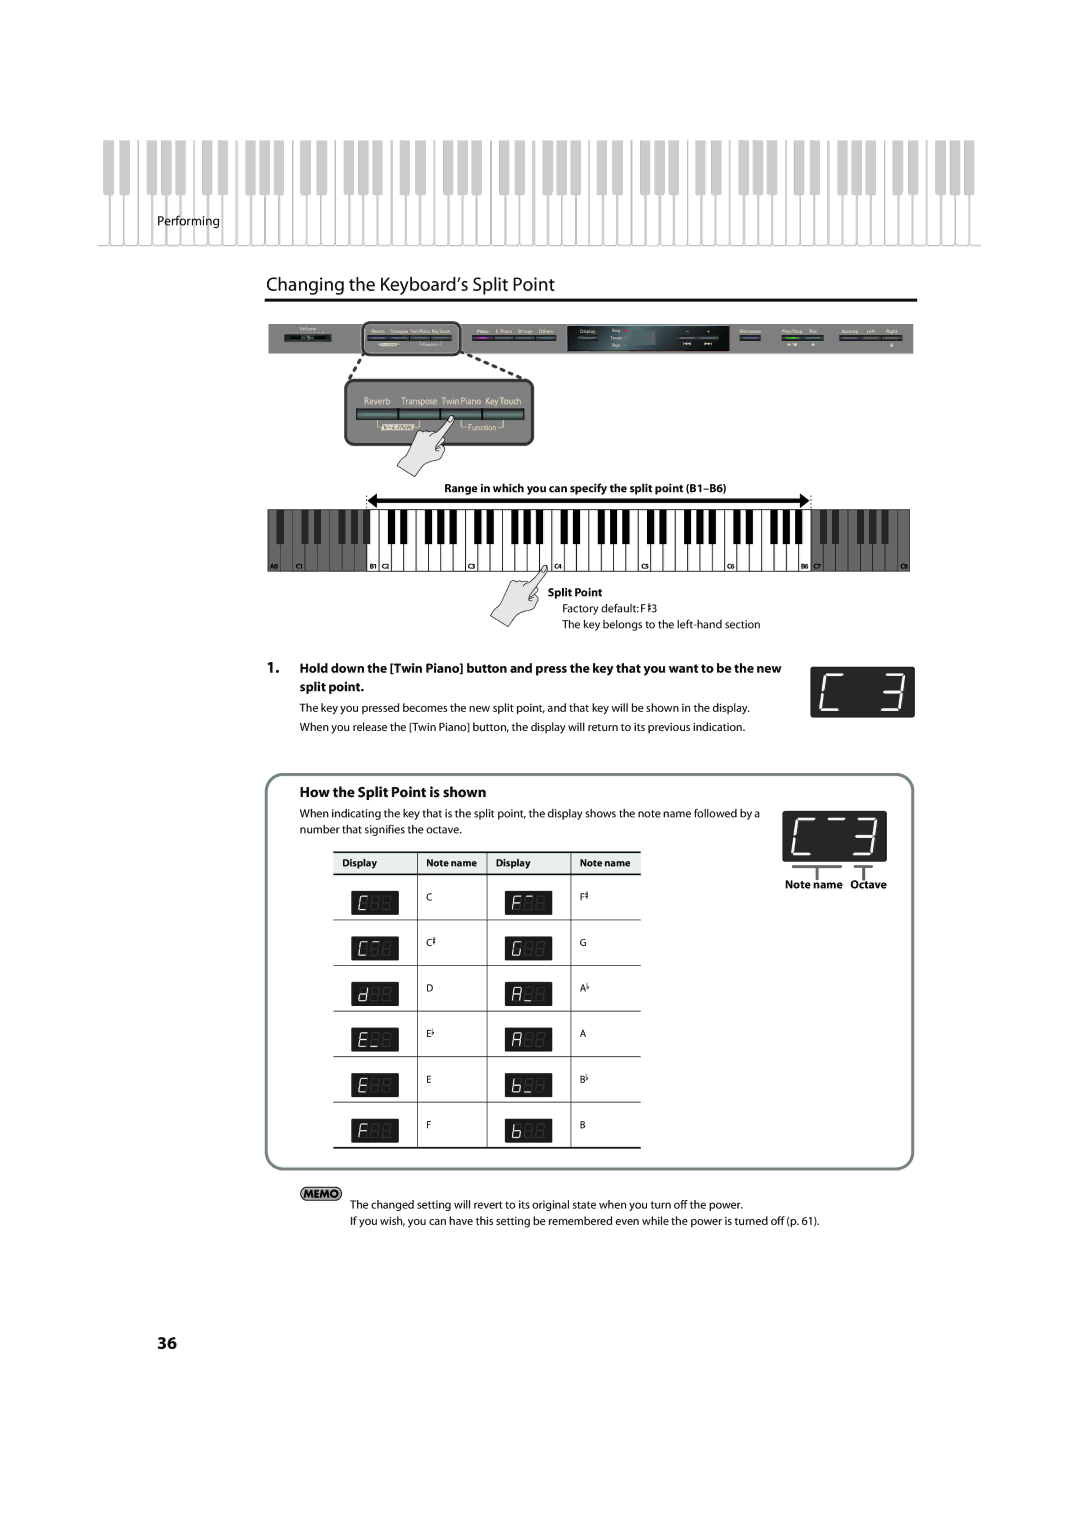
Changing the Keyboard’s Split Point
fig.Panel
Range in which you can specify the split point
|
|
|
|
|
|
|
|
|
|
|
|
|
|
|
|
|
|
|
|
|
|
|
|
|
|
|
|
|
|
|
|
|
|
|
|
|
|
|
|
|
|
|
|
|
|
|
|
|
|
|
|
|
|
A0 |
| C1 |
|
|
|
|
| B1 | C2 |
|
|
|
|
|
| C3 |
|
|
|
|
|
| C4 |
|
|
|
|
|
| C5 |
|
|
|
|
|
| C6 |
|
|
|
|
| B6 | C7 |
|
|
|
|
|
|
|
| |
Split Point
Factory default: F ![]() 3
3
The key belongs to the
1.Hold down the [Twin Piano] button and press the key that you want to be the new
split point.
The key you pressed becomes the new split point, and that key will be shown in the display.
When you release the [Twin Piano] button, the display will return to its previous indication.
C8
How the Split Point is shown
When indicating the key that is the split point, the display shows the note name followed by a number that signifies the octave.
Display | Note name | Display | Note name |
|
|
|
|
|
| Note name Octave |
C | F |
|
|
|
|
C![]()
G
D
A![]()
E![]()
A
E
B![]()
F
B
The changed setting will revert to its original state when you turn off the power.
If you wish, you can have this setting be remembered even while the power is turned off (p. 61).
36
