Operation
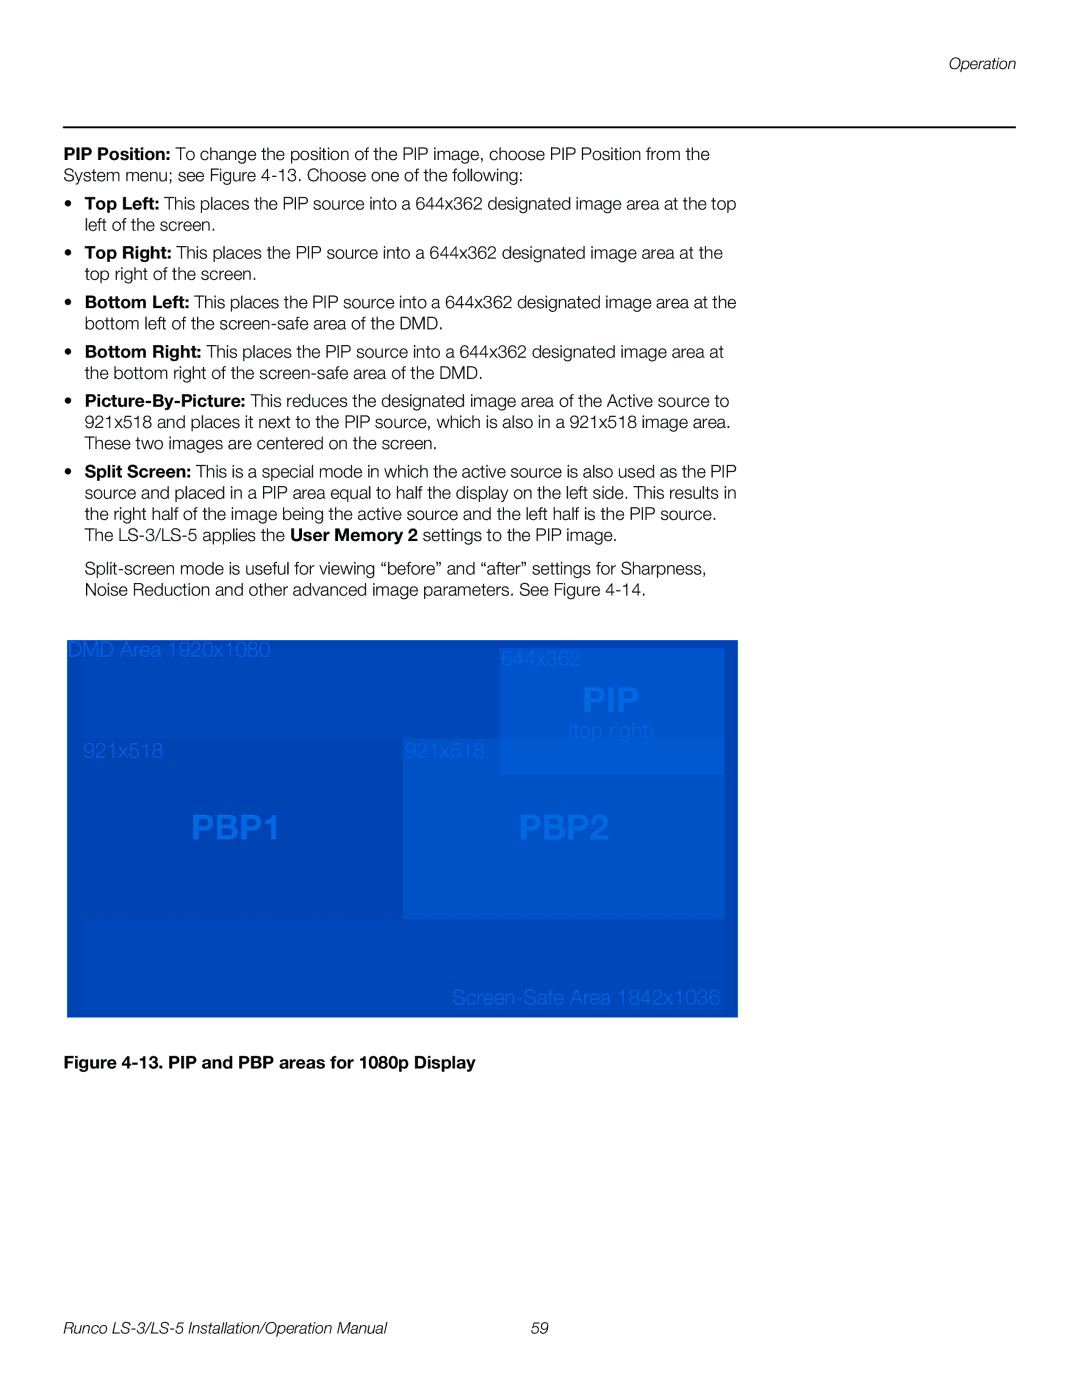
PIP Position: To change the position of the PIP image, choose PIP Position from the
System menu; see Figure
•Top Left: This places the PIP source into a 644x362 designated image area at the top left of the screen.
•Top Right: This places the PIP source into a 644x362 designated image area at the top right of the screen.
•Bottom Left: This places the PIP source into a 644x362 designated image area at the bottom left of the
•Bottom Right: This places the PIP source into a 644x362 designated image area at the bottom right of the
•
•Split Screen: This is a special mode in which the active source is also used as the PIP source and placed in a PIP area equal to half the display on the left side. This results in the right half of the image being the active source and the left half is the PIP source.
The
DMD Area 1920x1080 | 644x362 |
|
|
| PIP |
|
| (top right) |
921x518 | 921x518 |
|
|
|
|
PBP1 |
| PBP2 |
|
|
|
Screen-Safe Area 1842x1036
Figure 4-13. PIP and PBP areas for 1080p Display
Runco | 59 |