Picture Quality Adjustments
INPUT SELECT
STANDARD VIDEO:
COMPOSITE
COMPONENT
HIGH DEFINITION:
COMPONENT
RGB
MONITOR INPUT:
DVI
ASPECT RATIO
INSTALLATION
TINT COLOR BRIGHTNESS CONTRAST SHARPNESS LUMA ENHANCE CHROMA ENHANCE COLOR TEMPERATURE COLOR BALANCE
Only on Installation Mode
Picture quality adjustments (also known as "Front Panel Controls") are the controls that change different parameters of the image such as the amount of color, black level, etc. While these adjustments can be set to suit the needs of the user, there is a way to set these properly. This section will describe what each function does and how to adjust them properly.
To access the picture quality adjustments, press MENU, highlight the active source (indicated by the arrow) and press ENTER. The picture quality
To make an adjustment to a particular function, highlight the function with the up or down arrow buttons and press ENTER. Once the function is
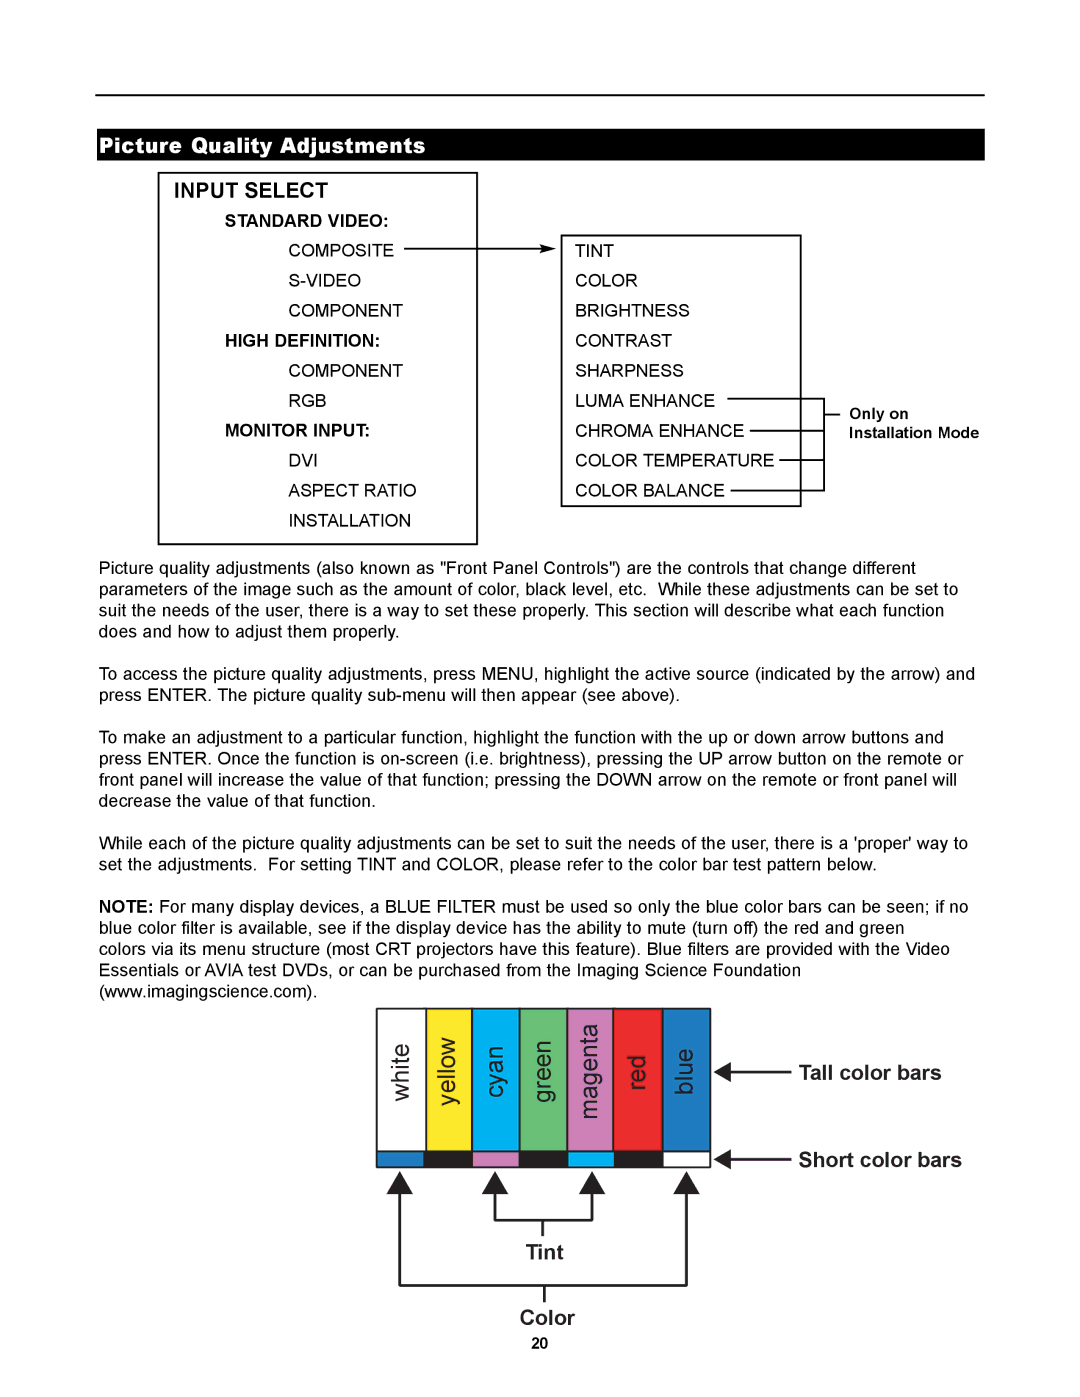
While each of the picture quality adjustments can be set to suit the needs of the user, there is a 'proper' way to set the adjustments. For setting TINT and COLOR, please refer to the color bar test pattern below.
NOTE: For many display devices, a BLUE FILTER must be used so only the blue color bars can be seen; if no blue color filter is available, see if the display device has the ability to mute (turn off) the red and green colors via its menu structure (most CRT projectors have this feature). Blue filters are provided with the Video Essentials or AVIA test DVDs, or can be purchased from the Imaging Science Foundation (www.imagingscience.com).
white | yellow | cyan | green | magenta | red | blue | Tall color bars |
| |||||||
|
|
|
|
|
|
| Short color bars |
Tint
Color
20