Installation
Installing the AutoScope ➤ | Figure | |
Lens Motor |
|
|
|
|
|
AutoScope) | Screw, Phillips |
|
| CineWide with AutoScope | |
| 3 | Ceiling Mount Adapter/ |
|
| Projector Stand, Right |
| AutoScope 1 |
|
| Lens Motor |
|
4 CineWide with AutoScope Ceiling Mount Adapter/ Projector Stand, Left
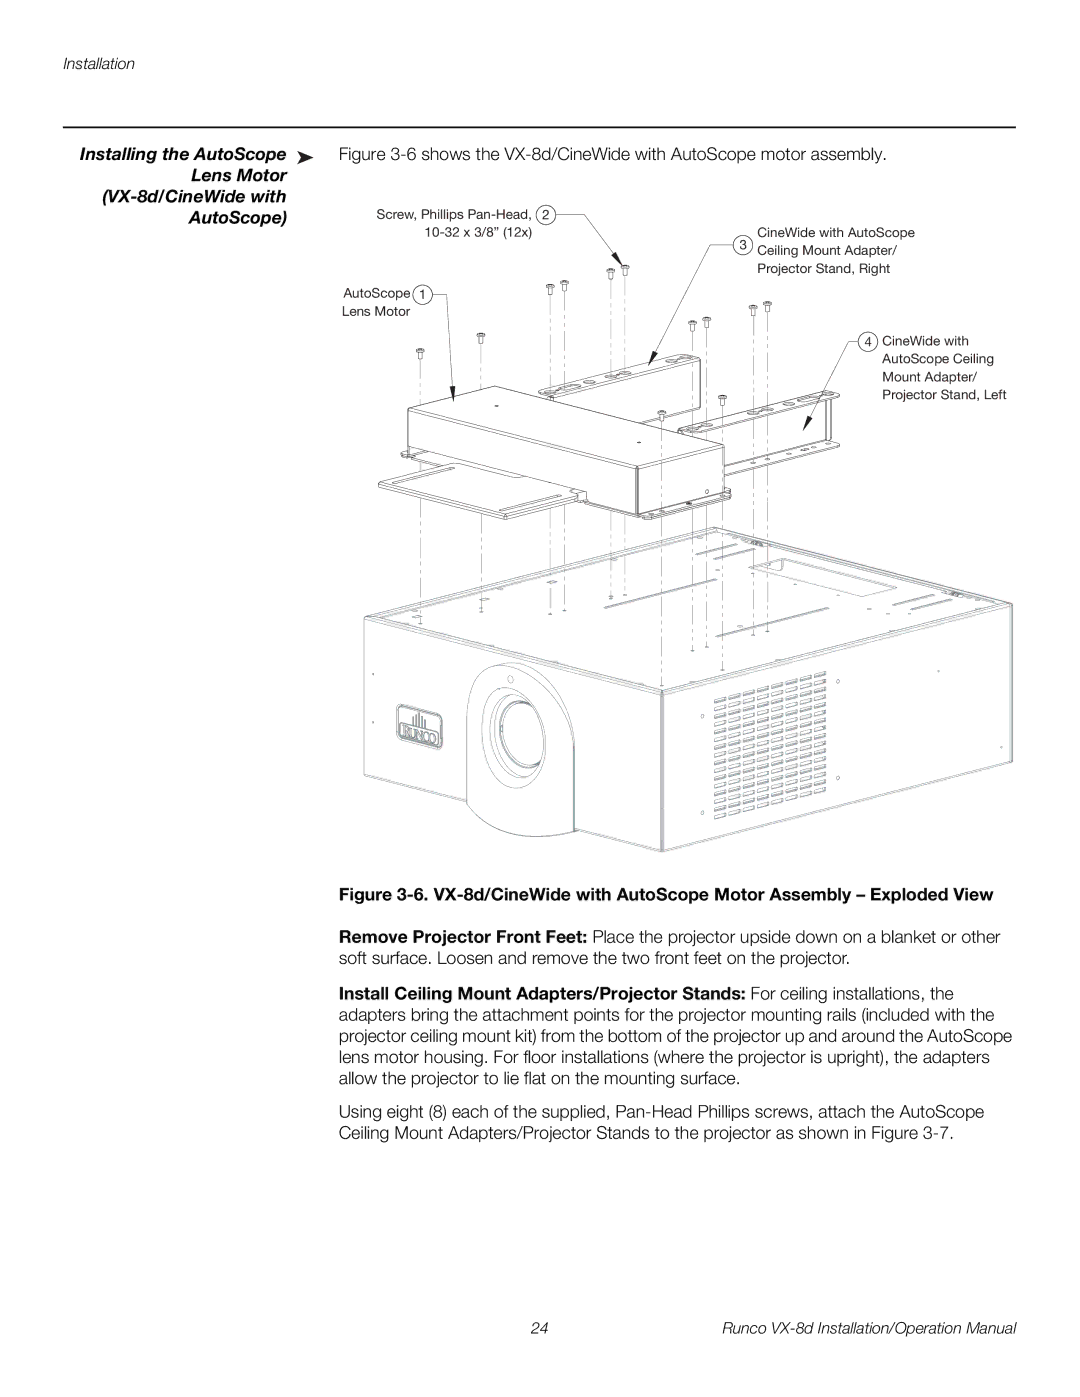
Figure 3-6. VX-8d/CineWide with AutoScope Motor Assembly – Exploded View
Remove Projector Front Feet: Place the projector upside down on a blanket or other soft surface. Loosen and remove the two front feet on the projector.
Install Ceiling Mount Adapters/Projector Stands: For ceiling installations, the adapters bring the attachment points for the projector mounting rails (included with the projector ceiling mount kit) from the bottom of the projector up and around the AutoScope lens motor housing. For floor installations (where the projector is upright), the adapters allow the projector to lie flat on the mounting surface.
Using eight (8) each of the supplied,
Ceiling Mount Adapters/Projector Stands to the projector as shown in Figure
24 | Runco |