INSTALLER
COMPONENT GUIDE
Keypad Rear Panel and Installation
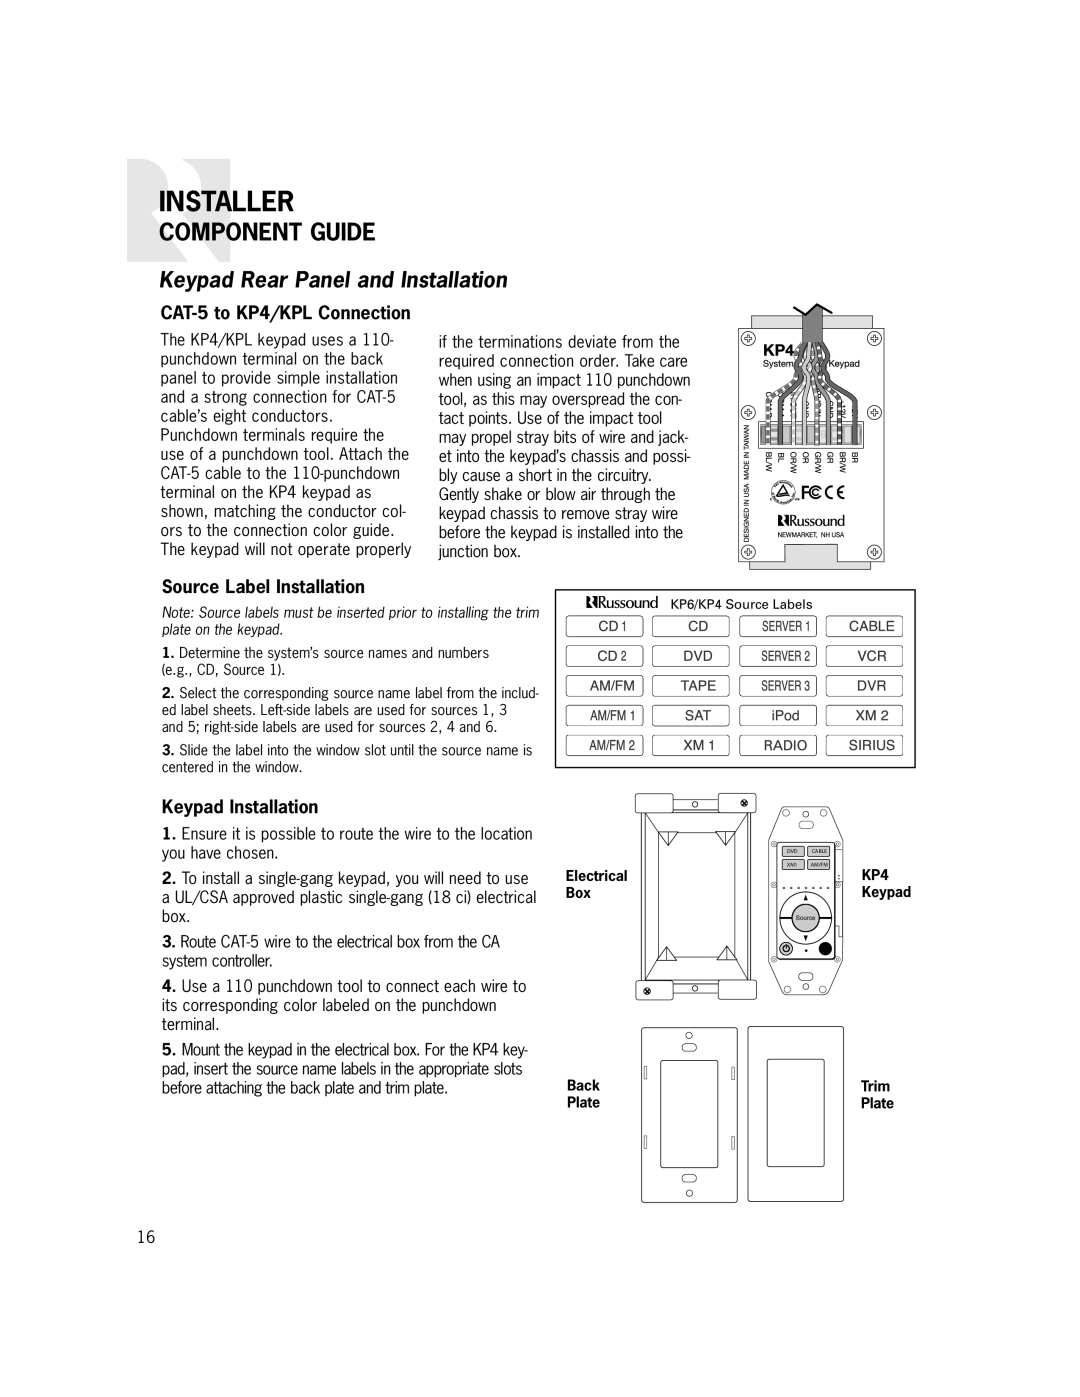
CAT-5 to KP4/KPL Connection
The KP4/KPL keypad uses a 110- punchdown terminal on the back panel to provide simple installation and a strong connection for
if the terminations deviate from the required connection order. Take care when using an impact 110 punchdown tool, as this may overspread the con- tact points. Use of the impact tool may propel stray bits of wire and jack- et into the keypad’s chassis and possi- bly cause a short in the circuitry. Gently shake or blow air through the keypad chassis to remove stray wire before the keypad is installed into the junction box.
Source Label Installation
Note: Source labels must be inserted prior to installing the trim plate on the keypad.
1.Determine the system’s source names and numbers (e.g., CD, Source 1).
2.Select the corresponding source name label from the includ- ed label sheets.
3.Slide the label into the window slot until the source name is centered in the window.
KP6/KP4 Source Labels |
Keypad Installation
1. Ensure it is possible to route the wire to the location you have chosen.
2. To install a | Electrical |
a UL/CSA approved plastic | Box |
box. |
|
3. Route |
|
system controller. |
|
4. Use a 110 punchdown tool to connect each wire to |
|
its corresponding color labeled on the punchdown |
|
terminal. |
|
5. Mount the keypad in the electrical box. For the KP4 key- |
|
pad, insert the source name labels in the appropriate slots | Back |
before attaching the back plate and trim plate. | |
| Plate |
DVD CABLE
XM1 AM/FM
Source
KP4 Keypad
Trim
Plate
16
