Keypad Installation
To install a
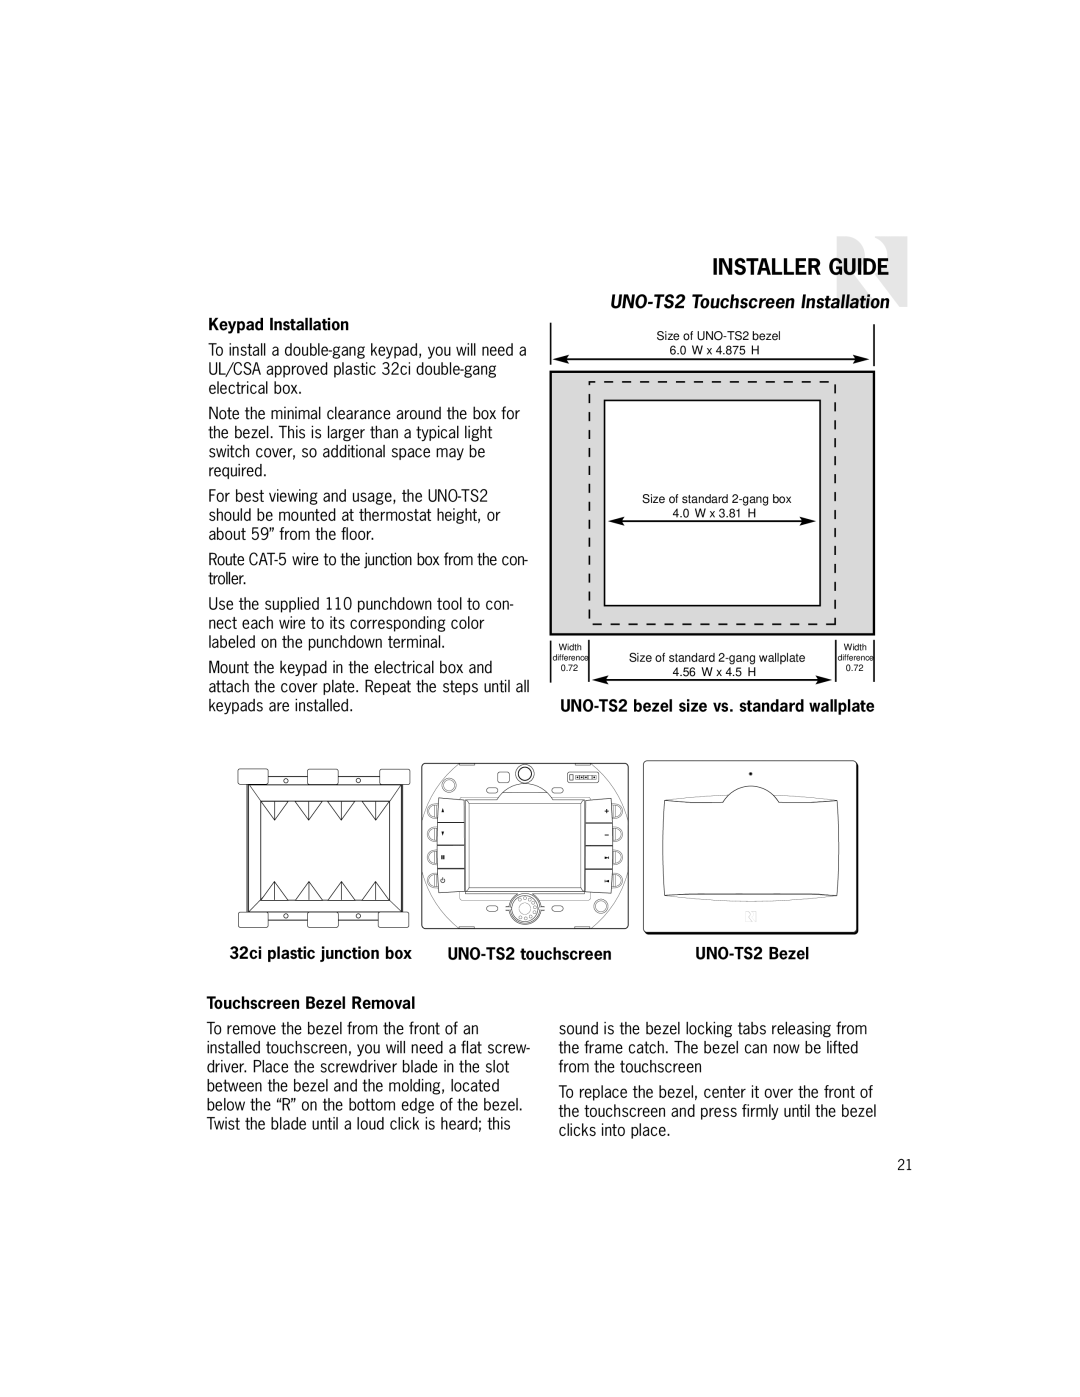
Note the minimal clearance around the box for the bezel. This is larger than a typical light switch cover, so additional space may be required.
For best viewing and usage, the
Route
Use the supplied 110 punchdown tool to con- nect each wire to its corresponding color labeled on the punchdown terminal.
Mount the keypad in the electrical box and attach the cover plate. Repeat the steps until all keypads are installed.
INSTALLER GUIDE
UNO-TS2 Touchscreen Installation
| Size of |
|
| 6.0” W x 4.875” H |
|
| Size of standard |
|
| 4.0” W x 3.81” H |
|
Width | Size of standard | Width |
difference | difference | |
0.72” | 4.56” W x 4.5” H | 0.72” |
|
|
32ci plastic junction box |
Touchscreen Bezel Removal
To remove the bezel from the front of an installed touchscreen, you will need a flat screw- driver. Place the screwdriver blade in the slot between the bezel and the molding, located below the “R” on the bottom edge of the bezel. Twist the blade until a loud click is heard; this
sound is the bezel locking tabs releasing from the frame catch. The bezel can now be lifted from the touchscreen
To replace the bezel, center it over the front of the touchscreen and press firmly until the bezel clicks into place.
21
