OPERATION
TO MAKE NON-THROUGH CUTS
![]() WARNING:
WARNING:
Unplug the saw to avoid possible injury.
■Remove the screw holding the throat plate in place. Remove the throat plate.
■Raise the saw blade by pushing the bevel locking lever to the left and rotating the blade adjusting handle clockwise.
■Put the saw in angle mode by pushing the bevel locking
lever to the right. Turn the blade adjusting handle until the blade indicator shows a 30° angle. Push the bevel locking lever securely to the left to lock the angle.
■With the box end of the small hex wrench, loosen the two hex nuts at the base of the riving knife. Do not remove hex nuts. Remove the riving knife/guard assembly. Retighten the two hex nuts on the base. Insert the throat plate.
■Bring the blade back to 90°.
■Lower the blade to the correct height by turning the blade adjusting handle counterclockwise. Secure throat plate with the screw.
![]() WARNING:
WARNING:
Carefully check all setups and rotate the blade one full revolution to assure proper clearance before connecting saw to power source.
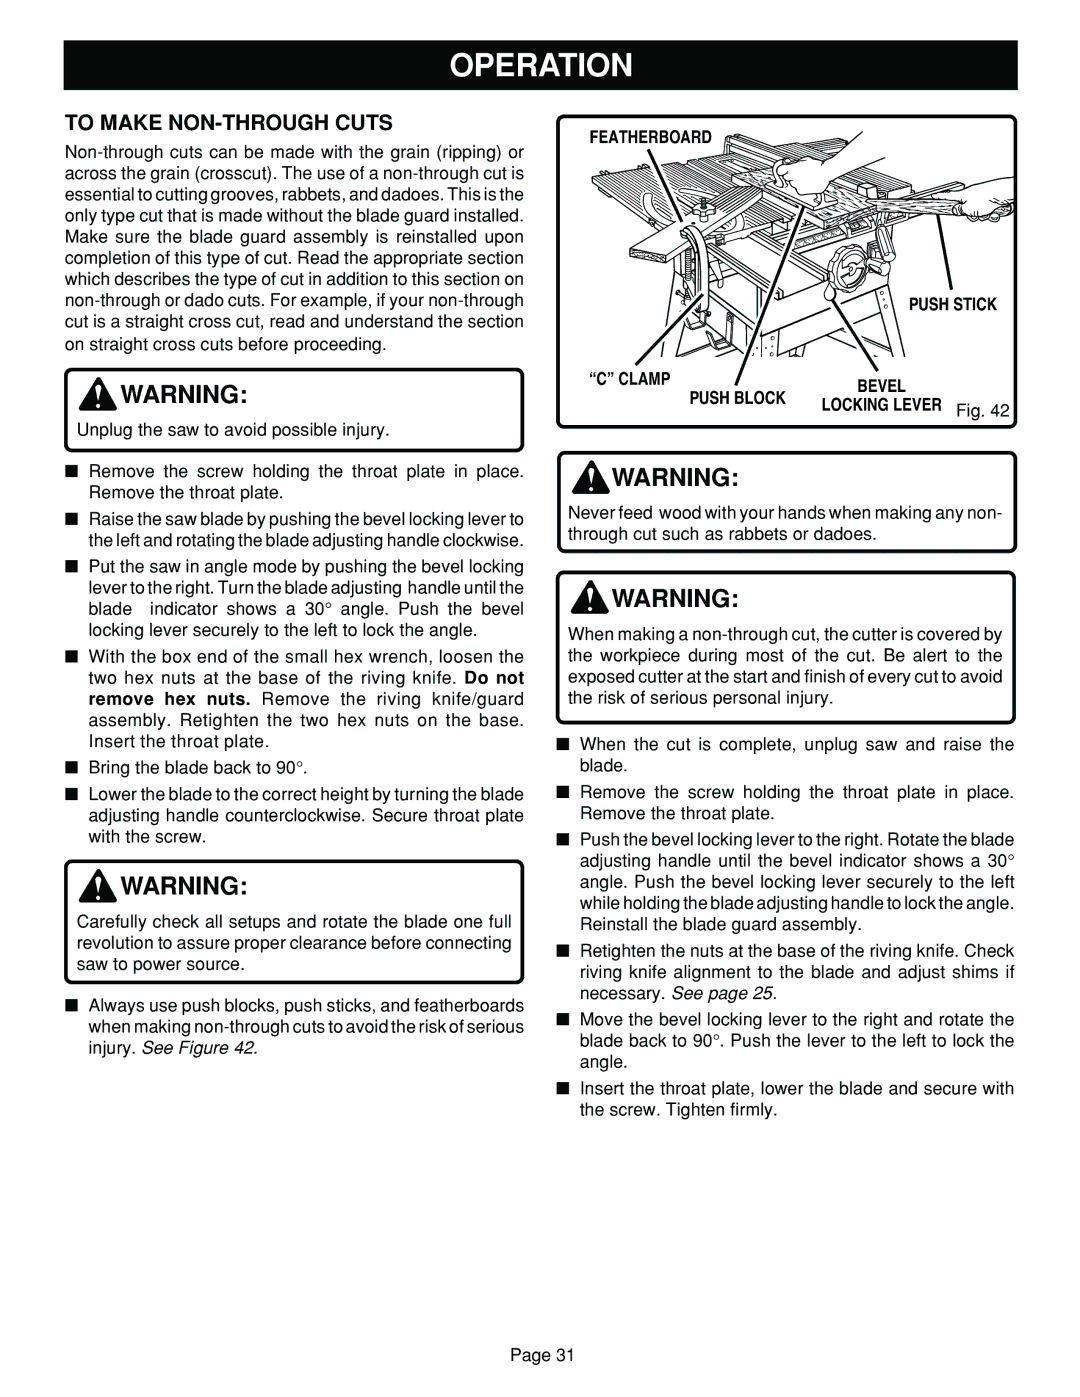
■Always use push blocks, push sticks, and featherboards when making
FEATHERBOARD
|
| PUSH STICK |
“C” CLAMP | PUSH BLOCK | BEVEL |
| ||
| LOCKING LEVER Fig. 42 | |
|
|
![]() WARNING:
WARNING:
Never feed wood with your hands when making any non- through cut such as rabbets or dadoes.
![]() WARNING:
WARNING:
When making a
■When the cut is complete, unplug saw and raise the blade.
■Remove the screw holding the throat plate in place. Remove the throat plate.
■Push the bevel locking lever to the right. Rotate the blade adjusting handle until the bevel indicator shows a 30° angle. Push the bevel locking lever securely to the left while holding the blade adjusting handle to lock the angle. Reinstall the blade guard assembly.
■Retighten the nuts at the base of the riving knife. Check riving knife alignment to the blade and adjust shims if necessary. See page 25.
■Move the bevel locking lever to the right and rotate the blade back to 90°. Push the lever to the left to lock the angle.
■Insert the throat plate, lower the blade and secure with the screw. Tighten firmly.
Page 31
