Starting the recording mode
![]() How to use the SCENE mode (
How to use the SCENE mode ( ![]()
![]()
![]()
![]()
![]() )
)
Use the menu to easily configure optimal settings for a variety of shooting situations. These include NIGHT, PORTRAIT, CHILDREN, LANDSCAPE, CLOSE UP, TEXT RECOGNITION, SUNSET, DAWN, BACKLIGHT, FIREWORKS and BEACH & SNOW scenes.
Steps from
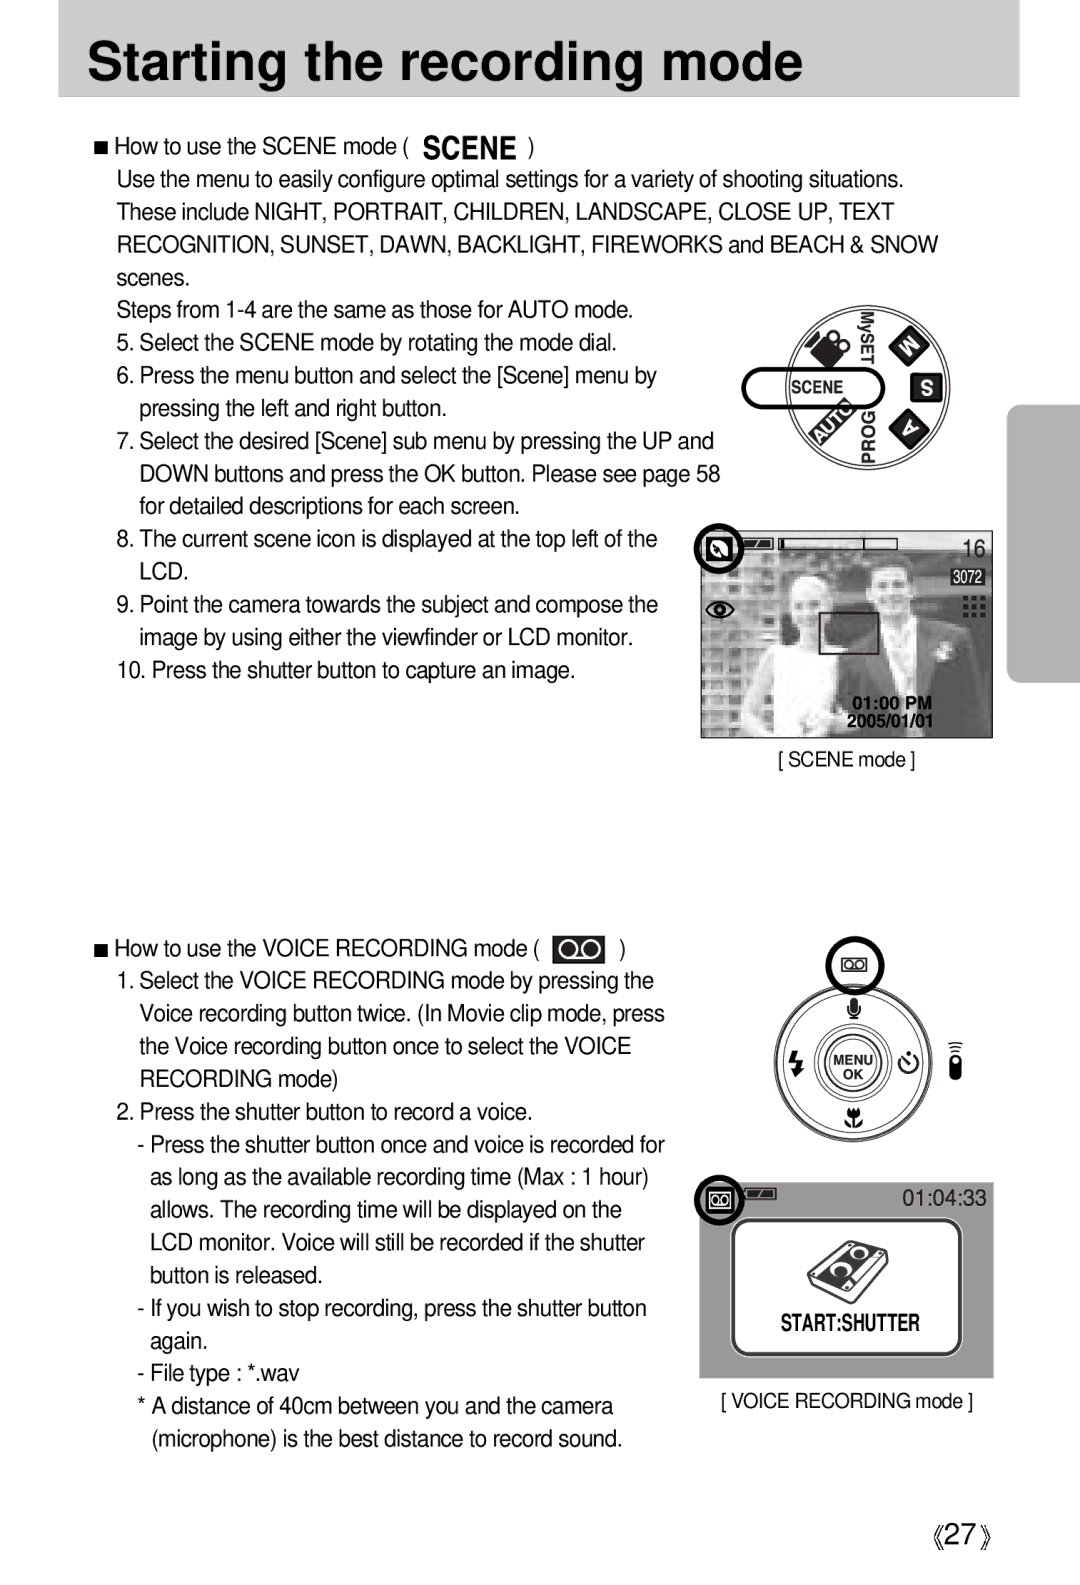
5. Select the SCENE mode by rotating the mode dial. 6. Press the menu button and select the [Scene] menu by
pressing the left and right button. 7. Select the desired [Scene] sub menu by pressing the UP and
DOWN buttons and press the OK button. Please see page 58 for detailed descriptions for each screen.
8. The current scene icon is displayed at the top left of the
LCD. 9. Point the camera towards the subject and compose the
image by using either the viewfinder or LCD monitor. 10. Press the shutter button to capture an image.
[ SCENE mode ]
![]() How to use the VOICE RECORDING mode (
How to use the VOICE RECORDING mode ( ![]()
![]() )
)
1.Select the VOICE RECORDING mode by pressing the Voice recording button twice. (In Movie clip mode, press the Voice recording button once to select the VOICE RECORDING mode)
2.Press the shutter button to record a voice.
-Press the shutter button once and voice is recorded for as long as the available recording time (Max : 1 hour) allows. The recording time will be displayed on the LCD monitor. Voice will still be recorded if the shutter button is released.
-If you wish to stop recording, press the shutter button again.
-File type : *.wav
*A distance of 40cm between you and the camera (microphone) is the best distance to record sound.
START:SHUTTER
[ VOICE RECORDING mode ]
![]() 27
27![]()
