Connecting to a TV
CONNECTING TO A REGULAR TV
You can view images recorded with your camcorder on a regular TV that supports standard definition. This camcorder supports the composite output for standard definition video transfer.
Use the AC power adaptor to power the camcorder when you attach it to a TV.
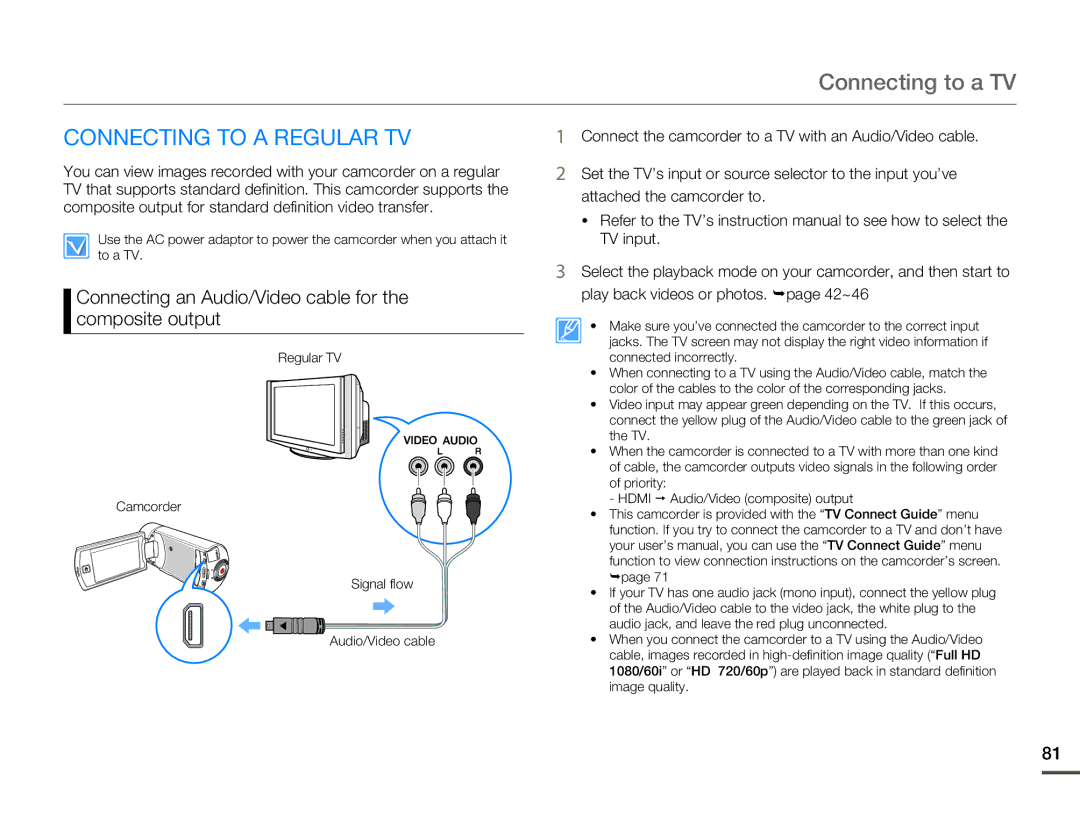
Connecting an Audio/Video cable for the composite output
Regular TV
Camcorder
Signal flow
Audio/Video cable
1Connect the camcorder to a TV with an Audio/Video cable.
2Set the TV’s input or source selector to the input you’ve attached the camcorder to.
•Refer to the TV’s instruction manual to see how to select the TV input.
3Select the playback mode on your camcorder, and then start to play back videos or photos. ¬page 42~46
• Make sure you’ve connected the camcorder to the correct input jacks. The TV screen may not display the right video information if connected incorrectly.
•When connecting to a TV using the Audio/Video cable, match the color of the cables to the color of the corresponding jacks.
•Video input may appear green depending on the TV. If this occurs, connect the yellow plug of the Audio/Video cable to the green jack of the TV.
•When the camcorder is connected to a TV with more than one kind of cable, the camcorder outputs video signals in the following order
of priority:
- HDMI p Audio/Video (composite) output
•This camcorder is provided with the “TV Connect Guide” menu function. If you try to connect the camcorder to a TV and don’t have your user’s manual, you can use the “TV Connect Guide” menu
function to view connection instructions on the camcorder’s screen. ¬page 71
•If your TV has one audio jack (mono input), connect the yellow plug of the Audio/Video cable to the video jack, the white plug to the audio jack, and leave the red plug unconnected.
•When you connect the camcorder to a TV using the Audio/Video cable, images recorded in
81