Getting Started
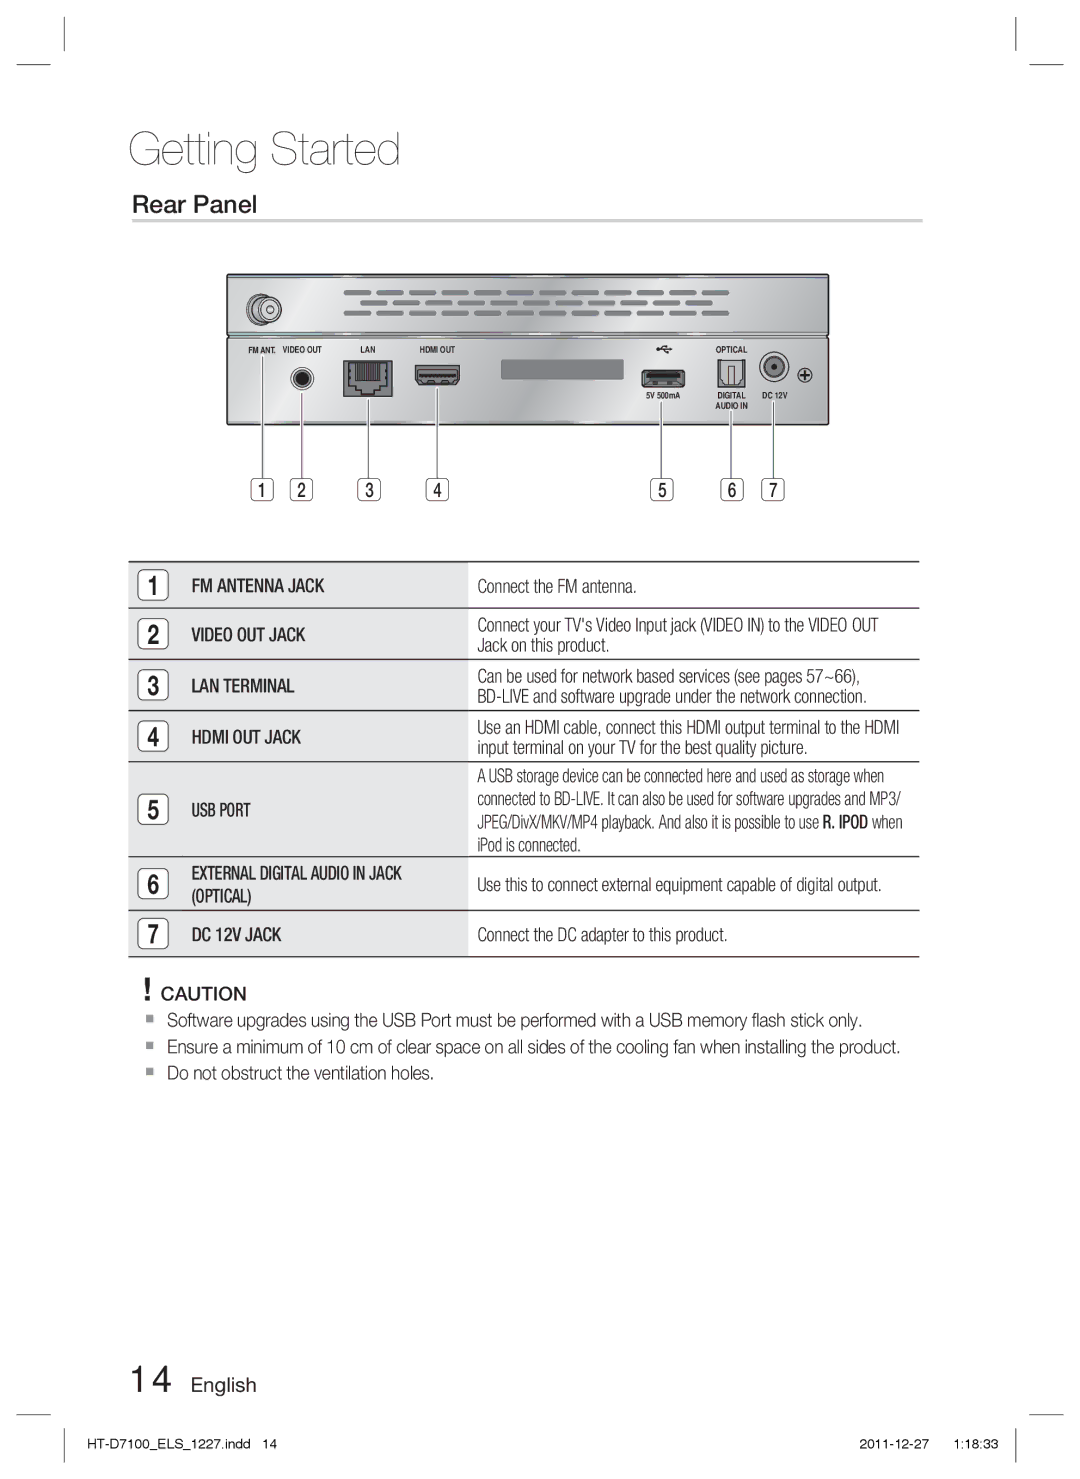
Rear Panel
| FM ANT. VIDEO OUT | LAN | HDMI OUT |
|
| OPTICAL |
|
| |||||||
|
|
|
|
|
|
|
|
|
|
|
|
|
|
|
|
|
|
|
|
|
|
|
|
|
|
|
|
|
|
|
|
|
|
|
|
|
|
|
|
|
|
|
|
|
|
|
|
|
|
|
|
|
|
|
|
|
|
|
|
|
|
|
|
|
|
|
|
|
|
|
|
|
| 5V 500mA | DIGITAL | DC 12V | |||
|
|
|
|
|
|
|
|
|
| ||||||
|
|
|
|
|
|
|
|
|
|
|
| AUDIO IN |
|
| |
|
|
|
|
|
|
|
|
|
|
|
|
|
|
|
|
| 1 | 2 | 3 |
|
| 4 | 5 | 6 | 7 | ||||||
|
|
|
|
|
|
|
|
|
|
|
|
|
|
| |
1 | FM ANTENNA JACK |
|
|
|
|
| Connect the FM antenna. |
|
|
|
| ||||
|
|
|
|
|
|
|
|
|
|
|
|
|
| ||
2 | VIDEO OUT JACK |
|
|
|
|
| Connect your TV's Video Input jack (VIDEO IN) to the VIDEO OUT | ||||||||
|
|
|
|
| Jack on this product. |
|
|
|
| ||||||
|
|
|
|
|
|
|
|
|
|
|
|
|
| ||
3 | LAN TERMINAL |
|
|
|
|
|
|
| Can be used for network based services (see pages 57~66), | ||||||
|
|
|
|
|
|
| |||||||||
|
|
|
|
|
|
|
|
|
| ||||||
4 | HDMI OUT JACK |
|
|
|
|
| Use an HDMI cable, connect this HDMI output terminal to the HDMI | ||||||||
|
|
|
|
| input terminal on your TV for the best quality picture. | ||||||||||
|
|
|
|
|
|
|
|
|
| ||||||
|
|
|
|
|
|
|
|
|
| A USB storage device can be connected here and used as storage when | |||||
5 | USB PORT |
|
|
|
|
|
|
| connected to | ||||||
|
|
|
|
|
|
| JPEG/DivX/MKV/MP4 playback. And also it is possible to use R. IPOD when | ||||||||
|
|
|
|
|
|
|
|
|
| ||||||
|
|
|
|
|
|
|
|
|
| iPod is connected. |
|
|
|
| |
6 | EXTERNAL DIGITAL AUDIO IN JACK |
|
| Use this to connect external equipment capable of digital output. | |||||||||||
(OPTICAL) |
|
|
|
|
|
|
| ||||||||
|
|
|
|
|
|
|
|
|
|
|
|
|
| ||
7 | DC 12V JACK |
|
|
|
|
|
|
| Connect the DC adapter to this product. |
|
| ||||
|
|
|
|
|
|
|
|
|
|
|
|
|
|
|
|
!CAUTION
Software upgrades using the USB Port must be performed with a USB memory flash stick only.
Ensure a minimum of 10 cm of clear space on all sides of the cooling fan when installing the product.
Do not obstruct the ventilation holes.