yTarget bitrate : Transfers video signal at a specifi ed bit rate.
yCompression : Adjust the compression rate from 5 through 100 by 5.
yEncode priority : Set the video transfer method to Frame rate or Quality.
yGOP* size : Select a GOP size between 5 and 15.
yDeblock : This will soften the edges between macro blocks.
y
J If the WDR is set to <OFF> or the MPEG4 resolution is not 4CIF, you cannot enable the MPEG4 CODEC’s
yProfile : Select Baseline or Main for the H.264 profiling method.
yEntropy coding* : Reduces the compression loss due to encoding.
J If you set the profile to Baseline, the entropy coding is available only for CAVLC*; if you set it to MAIN, the entropy coding is available for both CAVLC* and CABAC*.
yMotion estimation : Estimates the movement of pixels by determining the motion vector.
yInput gain : You can set the audio input gain from 0 to 10.
yOutput gain : You can set the audio output gain from 0 to 10.
J If the audio input gain is set to 0, no sound is heard.
2.When done, click [Apply]. Your settings will be saved.
To configure the IP settings
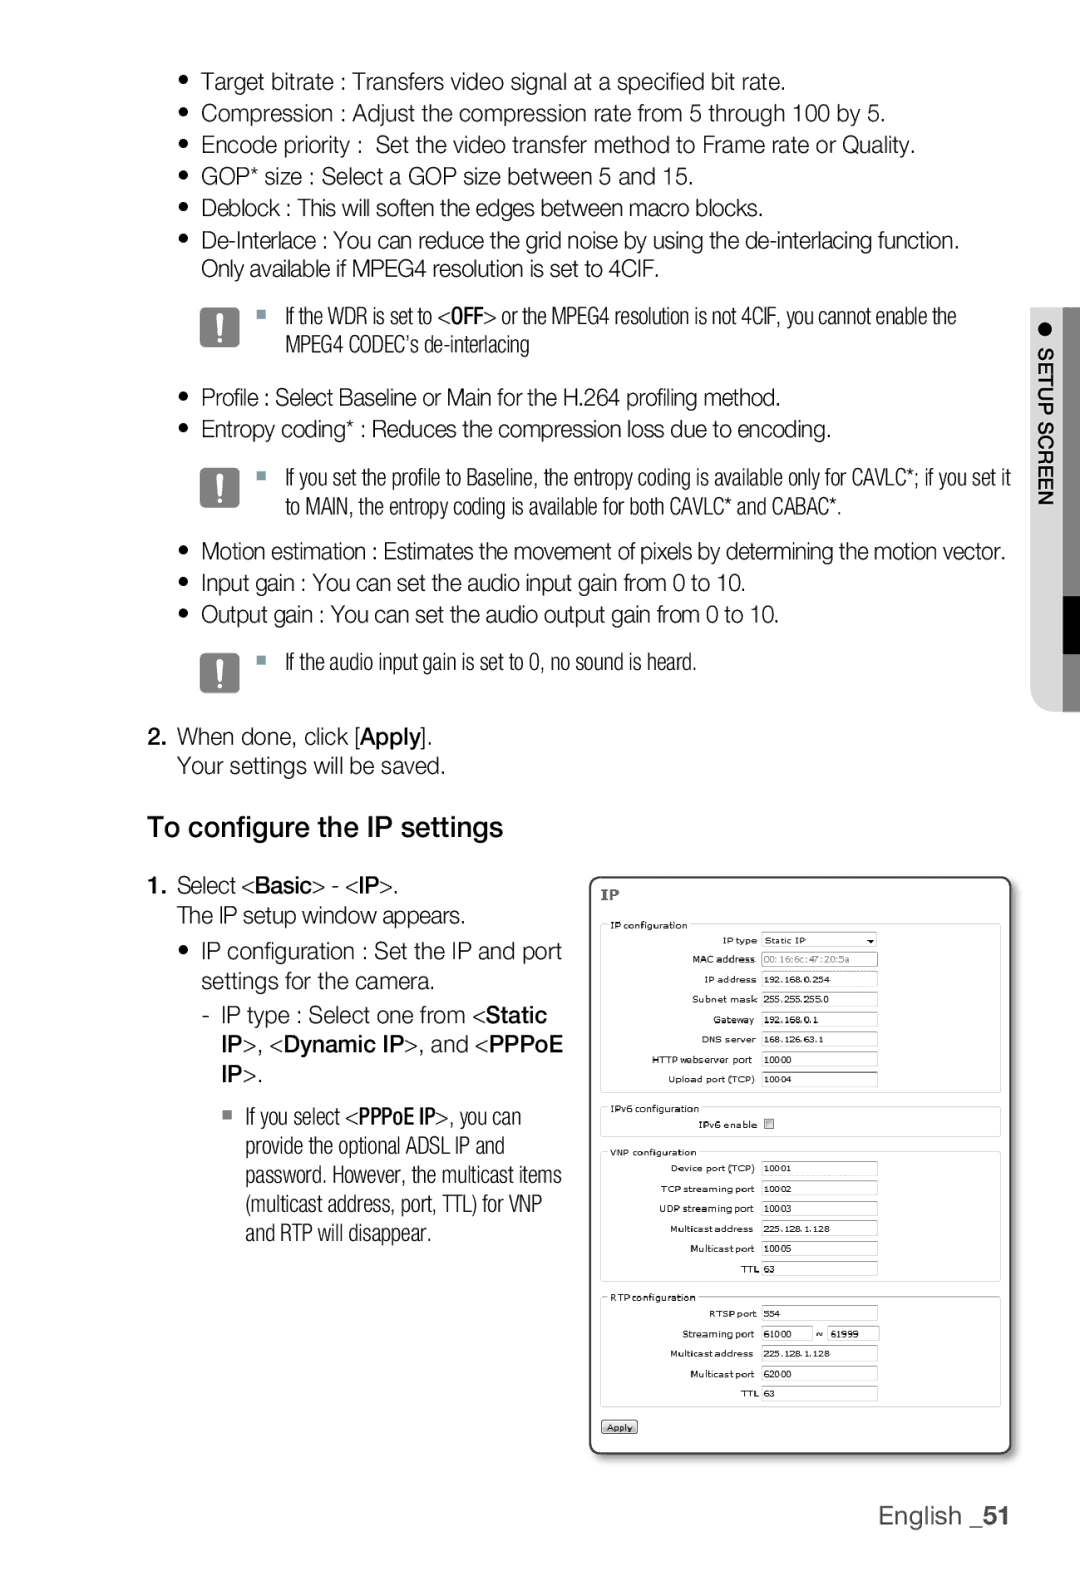
1.Select <Basic> - <IP>.
The IP setup window appears.
y IP confi guration : Set the IP and port settings for the camera.
-IP type : Select one from <Static IP>, <Dynamic IP>, and <PPPoE IP>.
If you select <PPPoE IP>, you can provide the optional ADSL IP and password. However, the multicast items (multicast address, port, TTL) for VNP and RTP will disappear.
● SETUP SCREEN