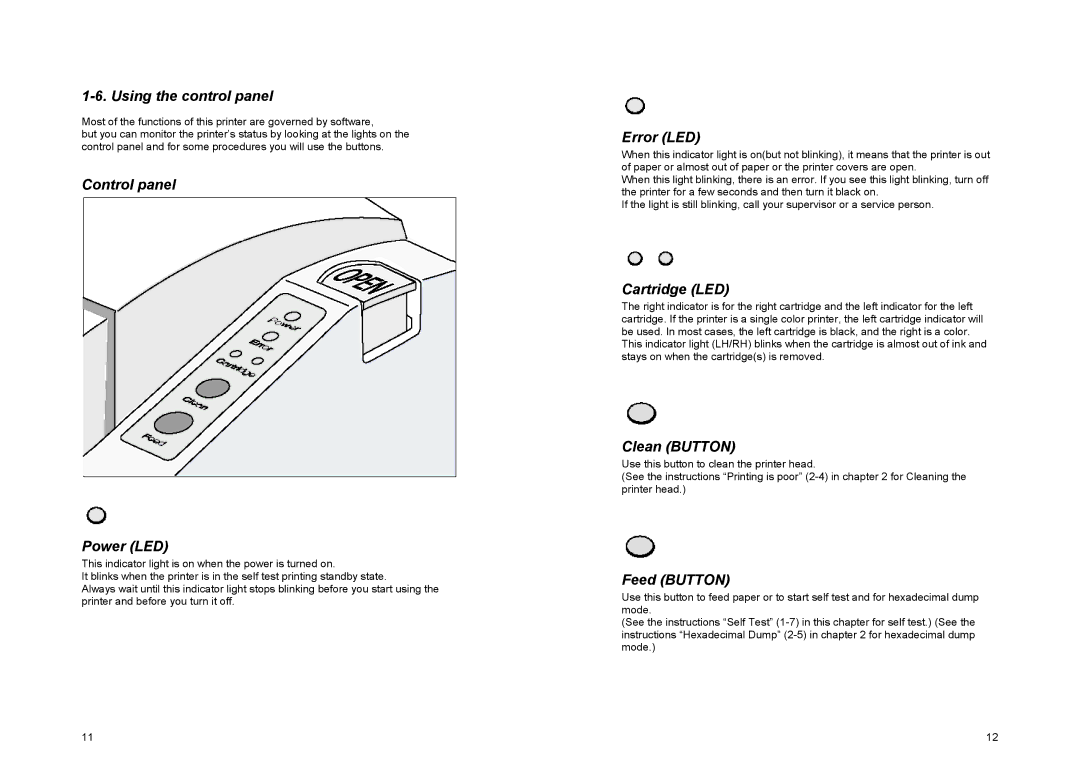
1-6. Using the control panel
Most of the functions of this printer are governed by software,
but you can monitor the printer’s status by looking at the lights on the control panel and for some procedures you will use the buttons.
Control panel
Power (LED)
This indicator light is on when the power is turned on.
It blinks when the printer is in the self test printing standby state.
Always wait until this indicator light stops blinking before you start using the printer and before you turn it off.
11
Error (LED)
When this indicator light is on(but not blinking), it means that the printer is out of paper or almost out of paper or the printer covers are open.
When this light blinking, there is an error. If you see this light blinking, turn off the printer for a few seconds and then turn it black on.
If the light is still blinking, call your supervisor or a service person.
Cartridge (LED)
The right indicator is for the right cartridge and the left indicator for the left cartridge. If the printer is a single color printer, the left cartridge indicator will be used. In most cases, the left cartridge is black, and the right is a color. This indicator light (LH/RH) blinks when the cartridge is almost out of ink and stays on when the cartridge(s) is removed.
Clean (BUTTON)
Use this button to clean the printer head.
(See the instructions “Printing is poor”
Feed (BUTTON)
Use this button to feed paper or to start self test and for hexadecimal dump mode.
(See the instructions “Self Test”
12