Self-timer ( ![self-timer]](/images/new-backgrounds/186720/18672073xi2.webp) ) / Right button
) / Right button
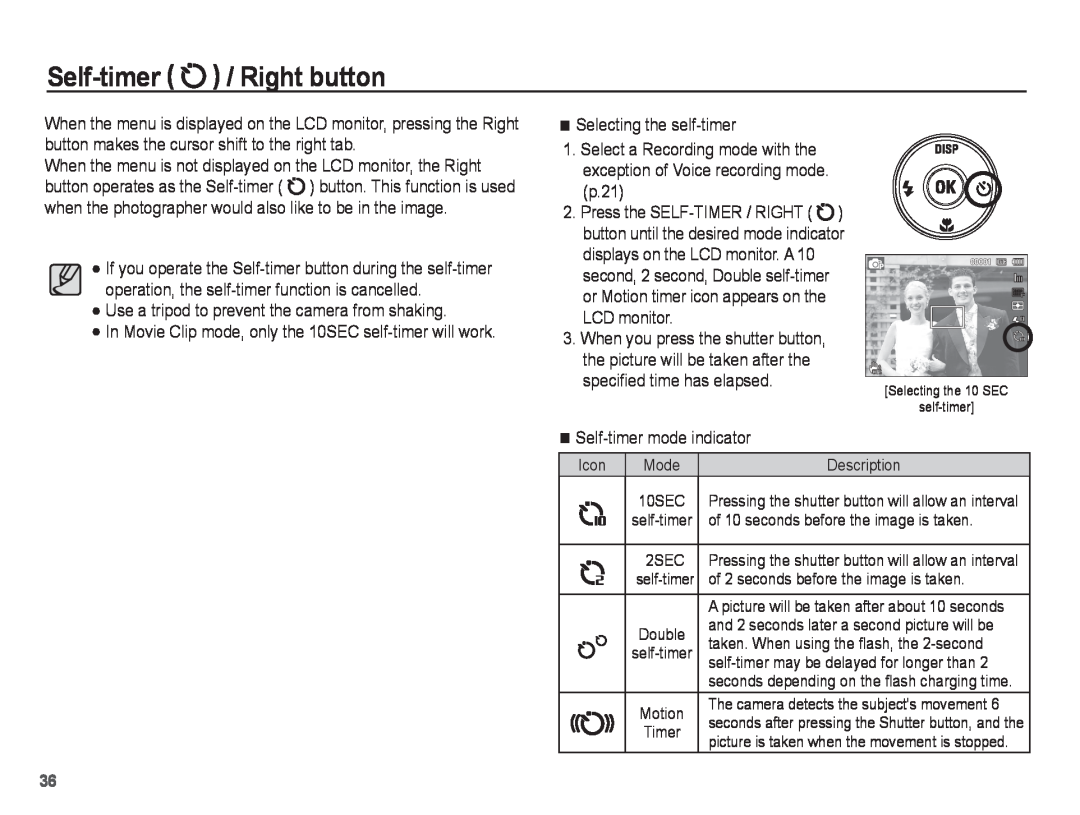
When the menu is displayed on the LCD monitor, pressing the Right button makes the cursor shift to the right tab.
When the menu is not displayed on the LCD monitor, the Right button operates as the ![]() ) button. This function is used when the photographer would also like to be in the image.
) button. This function is used when the photographer would also like to be in the image.
If you operate the
Use a tripod to prevent the camera from shaking.
In Movie Clip mode, only the 10SEC
Selecting the |
| ||
1. Select a Recording mode with the |
| ||
exception of Voice recording mode. |
| ||
(p.21) |
|
|
|
2. Press the | ) | ||
button until the desired mode indicator | |||
displays on the LCD monitor. A 10 |
| ||
second, 2 second, Double |
| ||
or Motion timer icon appears on the |
| ||
LCD monitor. |
|
| |
3. When you press the shutter button, |
| ||
the picture will be taken after the |
| ||
specified time has elapsed. | [Selecting the 10 SEC | ||
|
|
| |
|
|
|
|
| |||
Icon | Mode | Description | |
| 10SEC | Pressing the shutter button will allow an interval | |
| of 10 seconds before the image is taken. | ||
| 2SEC | Pressing the shutter button will allow an interval | |
| of 2 seconds before the image is taken. | ||
|
| A picture will be taken after about 10 seconds | |
| Double | and 2 seconds later a second picture will be | |
| taken. When using the flash, the | ||
| |||
|
| ||
|
| seconds depending on the flash charging time. | |
| Motion | The camera detects the subject's movement 6 | |
| seconds after pressing the Shutter button, and the | ||
| Timer | ||
| picture is taken when the movement is stopped. | ||
|
| ||
36
