Setting the Date and Time |
| Setting the Menu Language |
|
|
|
Your
◆Automatically stop programme recording
◆Preset your
You must set the date and time when:
◆You purchase the
☛◆ Do not forget to reset the time when you change clocks from winter to summer time and vice versa.
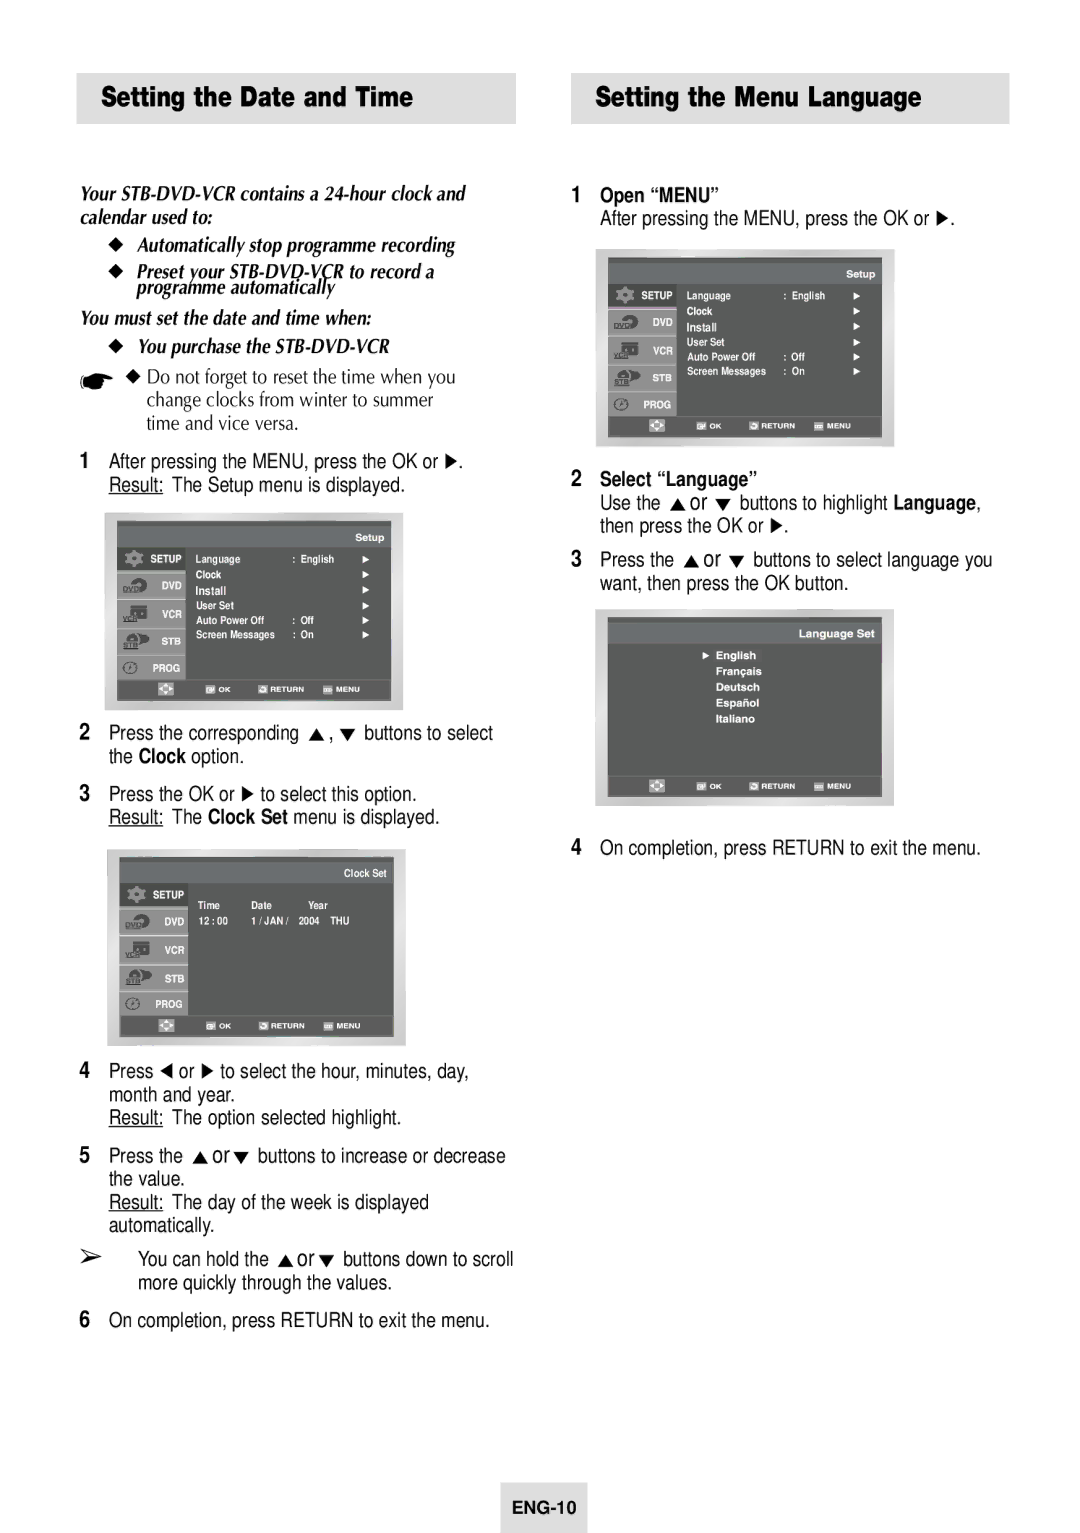
1After pressing the MENU, press the OK or ❿. Result: The Setup menu is displayed.
|
|
|
|
|
|
|
| Language | : English |
|
|
| Install |
|
|
|
| User Set |
|
|
|
|
| |
|
|
| Auto Power Off | : Off |
|
|
| Screen Messages | : On |
|
|
|
|
|
|
|
|
|
|
|
|
|
|
|
2 Press the corresponding | ,❷ buttons to select |
the Clock option. |
|
3Press the OK or ❿ to select this option. Result: The Clock Set menu is displayed.
Clock Set
Time | Date | Year |
12 : 00 | 1 / JAN / | 2004 THU |
4Press ➛ or ❿ to select the hour, minutes, day, month and year.
Result: The option selected highlight.
5Press the or❷ buttons to increase or decrease the value.
Result: The day of the week is displayed automatically.
➢You can hold the or❷ buttons down to scroll more quickly through the values.
6On completion, press RETURN to exit the menu.
1Open “MENU”
After pressing the MENU, press the OK or ❿.
|
|
|
|
|
|
|
| Language | : English |
|
|
| Install |
|
|
|
| User Set |
|
|
|
|
| |
|
|
| Auto Power Off | : Off |
|
|
| Screen Messages | : On |
|
|
|
|
|
|
|
|
|
|
|
|
|
|
|
2Select “Language”
Use the or ❷ buttons to highlight Language, then press the OK or ❿.
3Press the or ❷ buttons to select language you want, then press the OK button.
4On completion, press RETURN to exit the menu.
