preparation
INITIAL SETTING : TIME ZONE, DATE AND TIME & OSD LANGUAGE
•Initial setting is available in all operating modes.
•To read the menus or messages in your desired language, set the OSD language.
•To store the date and time during recording, set the time zone and date/time.
Turning the power on and setting the date and time
Set the date and time when using this memory camcorder for the first time.
If you do not set date and time, the date and time (time zone) screen appears every time you turn on your memory camcorder.
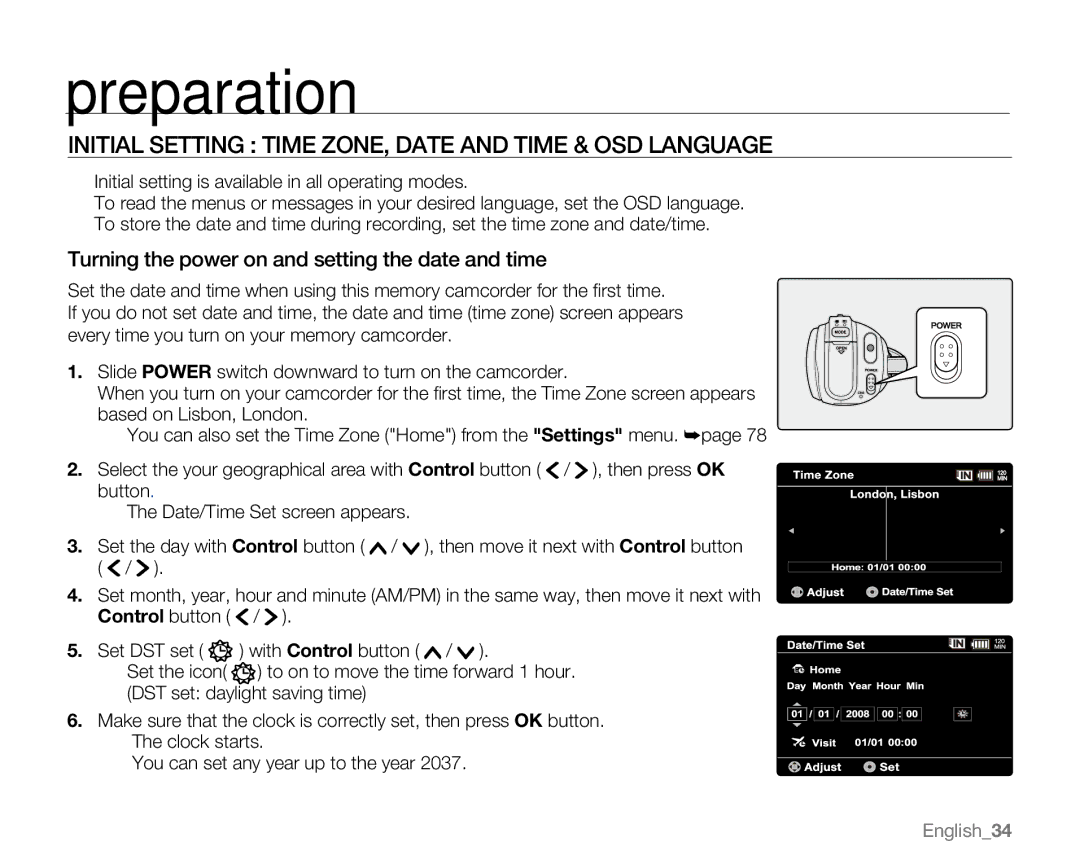
1.Slide POWER switch downward to turn on the camcorder.
When you turn on your camcorder for the first time, the Time Zone screen appears based on Lisbon, London.
•You can also set the Time Zone ("Home") from the "Settings" menu. ²page 78
2.Select the your geographical area with Control button ( ![]() /
/ ![]() ), then press OK button.
), then press OK button.
•The Date/Time Set screen appears.
3. Set the day with Control button ( ![]() /
/ ![]() ), then move it next with Control button
), then move it next with Control button
(![]() /
/ ![]() ).
).
4.Set month, year, hour and minute (AM/PM) in the same way, then move it next with Control button ( ![]() /
/ ![]() ).
).
5.Set DST set ( ![]() ) with Control button (
) with Control button ( ![]() /
/ ![]() ).
).
•Set the icon( ![]() ) to on to move the time forward 1 hour. (DST set: daylight saving time)
) to on to move the time forward 1 hour. (DST set: daylight saving time)
6.Make sure that the clock is correctly set, then press OK button.
•The clock starts.
•You can set any year up to the year 2037.
POWER
English_34
