Installation
Focus correction
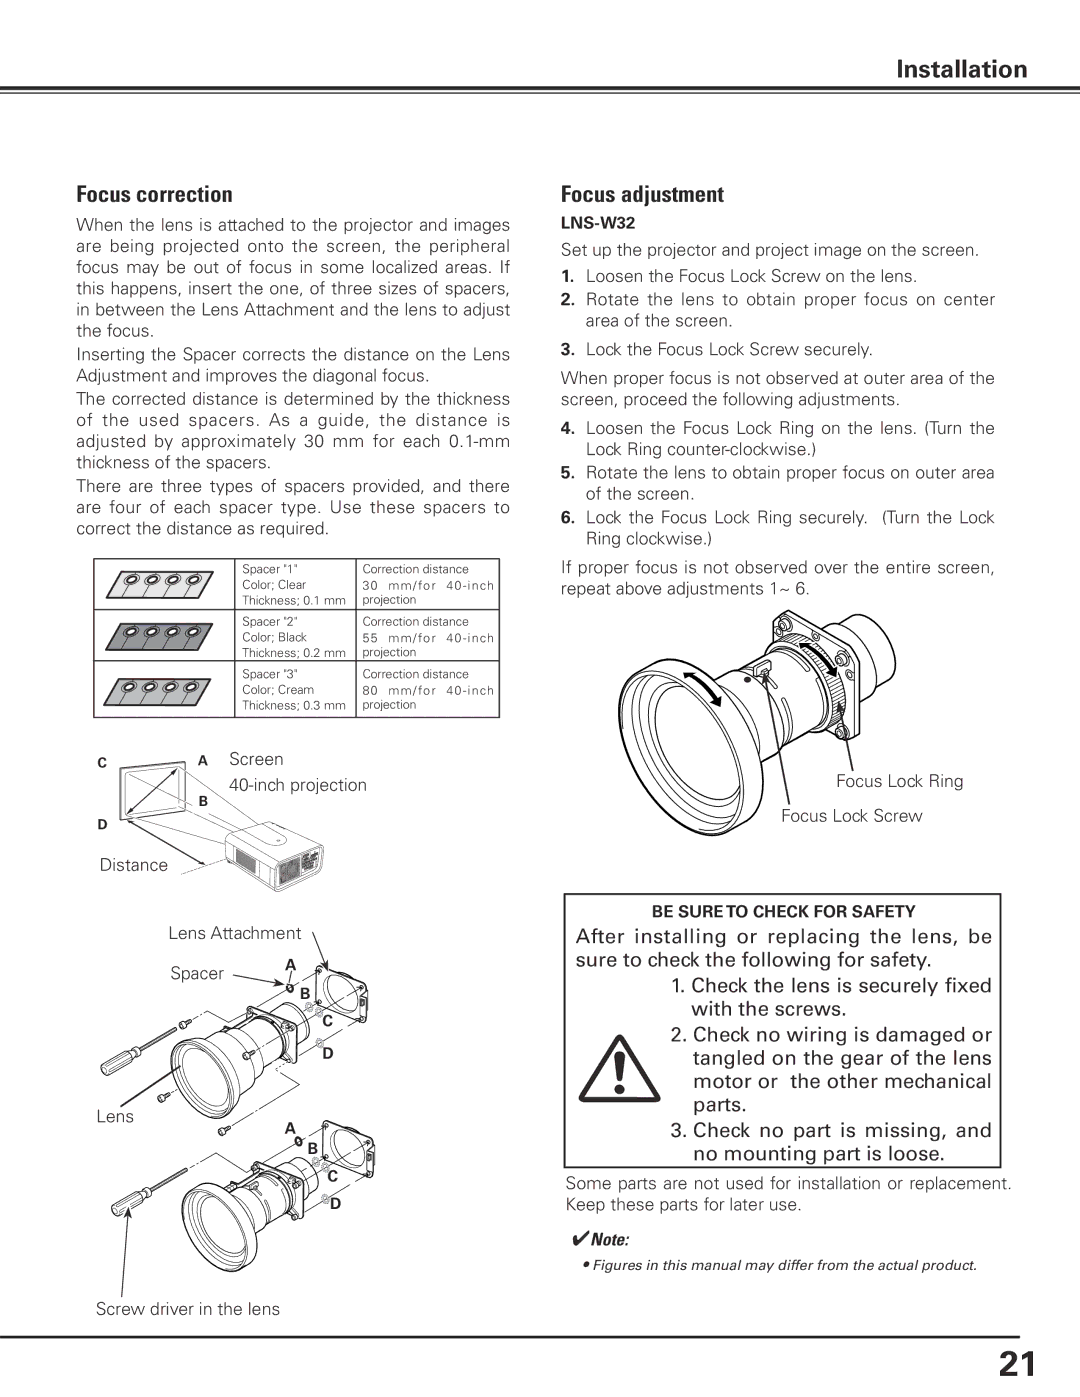
When the lens is attached to the projector and images are being projected onto the screen, the peripheral focus may be out of focus in some localized areas. If this happens, insert the one, of three sizes of spacers, in between the Lens Attachment and the lens to adjust the focus.
Inserting the Spacer corrects the distance on the Lens Adjustment and improves the diagonal focus.
The corrected distance is determined by the thickness of the used spacers. As a guide, the distance is adjusted by approximately 30 mm for each
There are three types of spacers provided, and there are four of each spacer type. Use these spacers to correct the distance as required.
| Spacer "1" | Correction distance | ||
| Color; Clear | 30 | mm/for | 40 - inch |
| Thickness; 0.1 mm | projection |
| |
| Spacer "2" | Correction distance | ||
| Color; Black | 55 | mm/for | 40 - inch |
| Thickness; 0.2 mm | projection |
| |
| Spacer "3" | Correction distance | ||
| Color; Cream | 80 | mm/for | 40 - inch |
| Thickness; 0.3 mm | projection |
| |
|
|
|
|
|
CA Screen
B
D
Distance
Lens Attachment
Spacer A
![]() B
B
![]()
![]()
![]() C
C
Focus adjustment
LNS-W32
Set up the projector and project image on the screen.
1..Loosen the Focus Lock Screw on the lens.
2..Rotate the lens to obtain proper focus on center area of the screen.
3..Lock the Focus Lock Screw securely.
When proper focus is not observed at outer area of the screen, proceed the following adjustments.
4..Loosen the Focus Lock Ring on the lens. (Turn the Lock Ring
5..Rotate the lens to obtain proper focus on outer area of the screen.
6..Lock the Focus Lock Ring securely. (Turn the Lock Ring clockwise.)
If proper focus is not observed over the entire screen, repeat above adjustments 1~ 6.
Focus Lock Ring
Focus Lock Screw
BE SURE TO CHECK FOR SAFETY
After installing or replacing the lens, be sure to check the following for safety.
1. Check the lens is securely fixed |
with the screws. |
2. Check no wiring is damaged or |
Lens
D
A
![]() B
B
![]() C
C ![]() D
D
tangled on the gear of the lens |
motor or the other mechanical |
parts. |
3. Check no part is missing, and |
no mounting part is loose. |
Some parts are not used for installation or replacement. Keep these parts for later use.
✔Note:
•Figures in this manual may differ from the actual product.
Screw driver in the lens
21