CHAPTER 4
POLISHING PROCEDURE
When all of the polishing preparations have been made, ferrule polishing can begin.
4.1 MOUNTING THE FERRULES
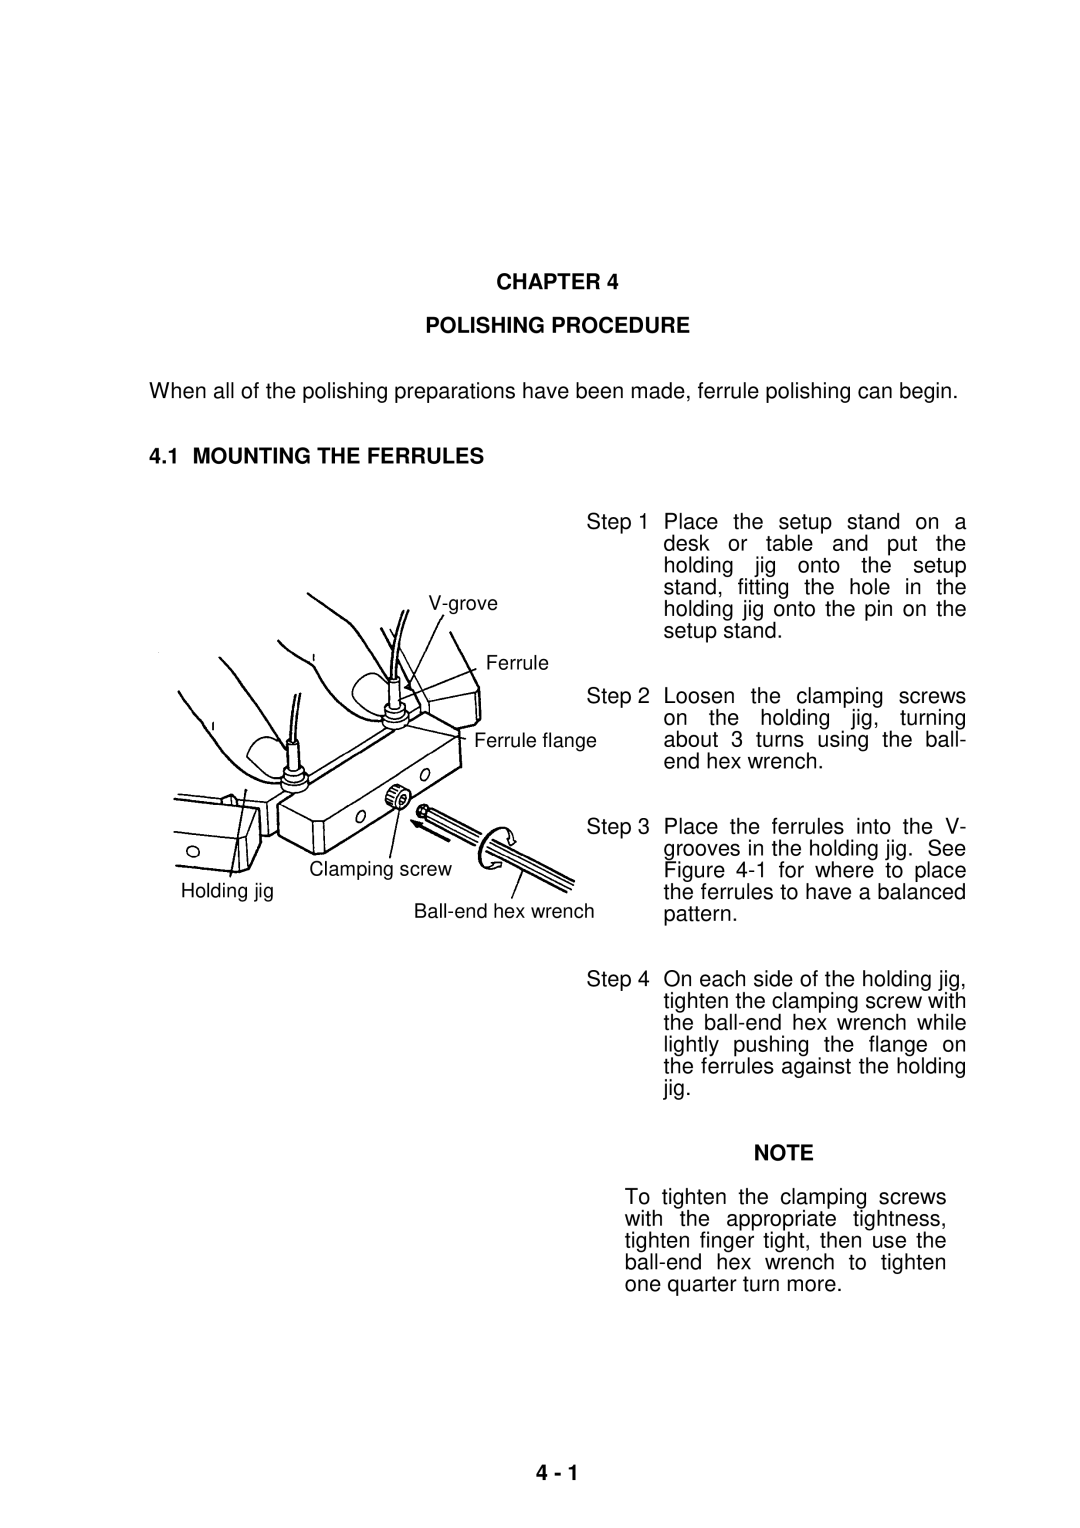
Ferrule
Clamping screw
Holding jig
Step 1 Place the setup stand on a desk or table and put the holding jig onto the setup stand, fitting the hole in the holding jig onto the pin on the setup stand.
Step 2 Loosen the clamping screws on the holding jig, turning about 3 turns using the ball- end hex wrench.
Step 3 Place the ferrules into the V- grooves in the holding jig. See Figure
Step 4 On each side of the holding jig, tighten the clamping screw with the
NOTE
To tighten the clamping screws with the appropriate tightness, tighten finger tight, then use the
4 - 1
