Test Print Head
Maintenance
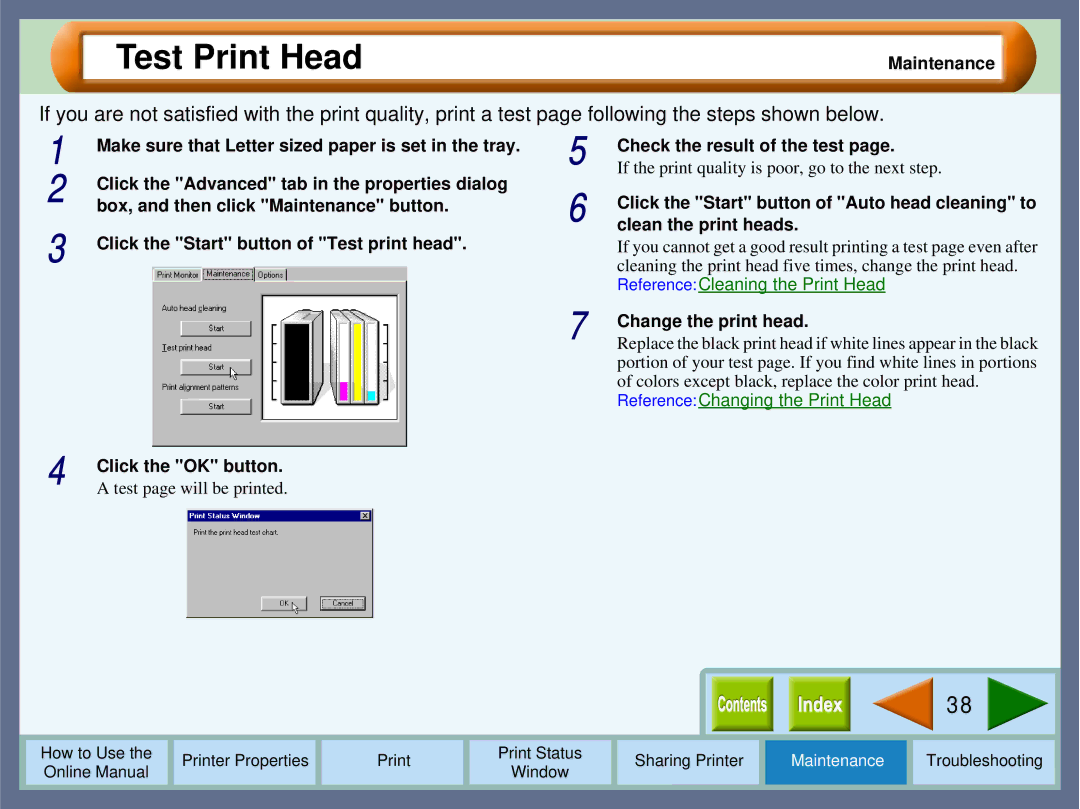
If you are not satisfied with the print quality, print a test page following the steps shown below.
1 | Make sure that Letter sized paper is set in the tray. | 5 | Check the result of the test page. |
| If the print quality is poor, go to the next step. | ||
2 | Click the "Advanced" tab in the properties dialog | 6 | Click the "Start" button of "Auto head cleaning" to |
box, and then click "Maintenance" button. | |||
3 | Click the "Start" button of "Test print head". | clean the print heads. | |
| If you cannot get a good result printing a test page even after | ||
|
| cleaning the print head five times, change the print head. |
Reference:Cleaning the Print Head
7
4 | Click the "OK" button. |
A test page will be printed. |
Change the print head.
Replace the black print head if white lines appear in the black portion of your test page. If you find white lines in portions of colors except black, replace the color print head.
Reference:Changing the Print Head
|
|
|
|
|
|
|
|
|
| 38 |
|
|
|
|
|
|
|
|
|
|
|
|
|
|
|
|
|
|
|
|
|
|
|
|
|
How to Use the |
| Printer Properties |
|
| Print Status | Sharing Printer | Maintenance | Troubleshooting |
| ||
Online Manual |
|
|
| Window |
| ||||||
|
|
|
|
|
|
|
|
|
| ||
|
|
|
|
|
|
|
|
|
|
|
|
