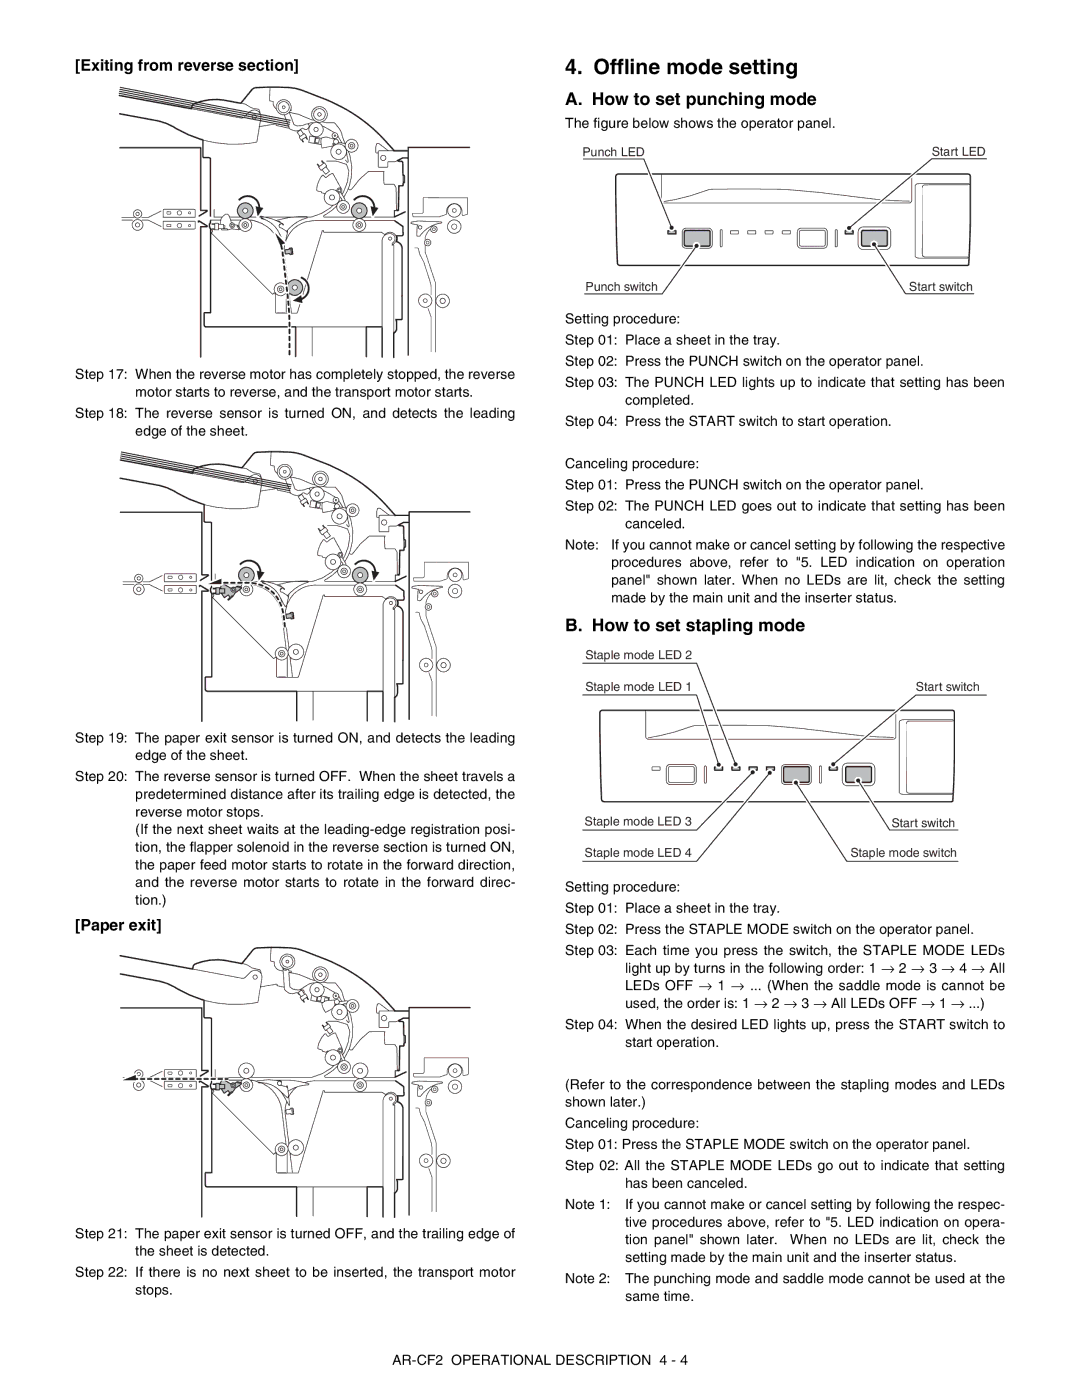
[Exiting from reverse section]
Step 17: When the reverse motor has completely stopped, the reverse motor starts to reverse, and the transport motor starts.
Step 18: The reverse sensor is turned ON, and detects the leading edge of the sheet.
Step 19: The paper exit sensor is turned ON, and detects the leading edge of the sheet.
Step 20: The reverse sensor is turned OFF. When the sheet travels a predetermined distance after its trailing edge is detected, the reverse motor stops.
(If the next sheet waits at the
[Paper exit]
Step 21: The paper exit sensor is turned OFF, and the trailing edge of the sheet is detected.
Step 22: If there is no next sheet to be inserted, the transport motor stops.
4. Offline mode setting
A. How to set punching mode
The figure below shows the operator panel.
Punch LED | Start LED |
Punch switch | Start switch |
Setting procedure:
Step 01: Place a sheet in the tray.
Step 02: Press the PUNCH switch on the operator panel.
Step 03: The PUNCH LED lights up to indicate that setting has been completed.
Step 04: Press the START switch to start operation.
Canceling procedure:
Step 01: Press the PUNCH switch on the operator panel.
Step 02: The PUNCH LED goes out to indicate that setting has been canceled.
Note: If you cannot make or cancel setting by following the respective procedures above, refer to "5. LED indication on operation panel" shown later. When no LEDs are lit, check the setting made by the main unit and the inserter status.
B. How to set stapling mode
Staple mode LED 2 |
|
Staple mode LED 1 | Start switch |
Staple mode LED 3 | Start switch |
Staple mode LED 4 | Staple mode switch |
Setting procedure:
Step 01: Place a sheet in the tray.
Step 02: Press the STAPLE MODE switch on the operator panel.
Step 03: Each time you press the switch, the STAPLE MODE LEDs light up by turns in the following order: 1 → 2 → 3 → 4 → All LEDs OFF → 1 → ... (When the saddle mode is cannot be used, the order is: 1 → 2 → 3 → All LEDs OFF → 1 → ...)
Step 04: When the desired LED lights up, press the START switch to start operation.
(Refer to the correspondence between the stapling modes and LEDs shown later.)
Canceling procedure:
Step 01: Press the STAPLE MODE switch on the operator panel.
Step 02: All the STAPLE MODE LEDs go out to indicate that setting has been canceled.
Note 1: If you cannot make or cancel setting by following the respec- tive procedures above, refer to "5. LED indication on opera- tion panel" shown later. When no LEDs are lit, check the setting made by the main unit and the inserter status.
Note 2: The punching mode and saddle mode cannot be used at the same time.