Setting the Clock
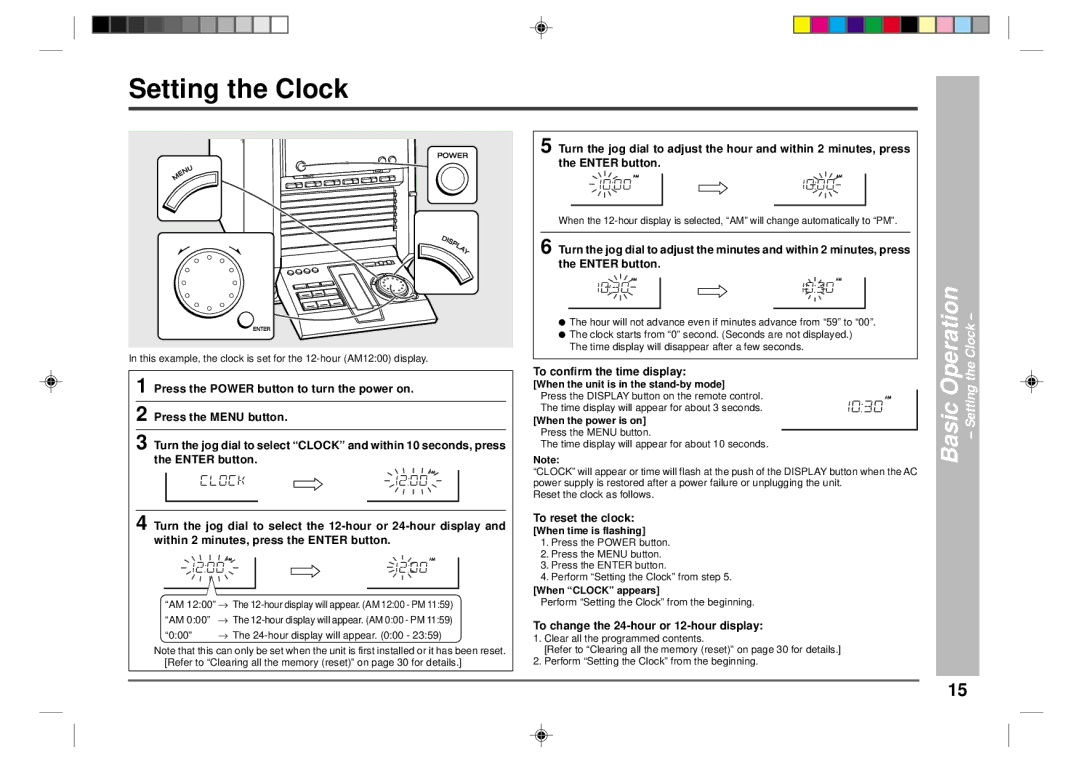
In this example, the clock is set for the
5 Turn the jog dial to adjust the hour and within 2 minutes, press the ENTER button.
When the
6 Turn the jog dial to adjust the minutes and within 2 minutes, press the ENTER button.
●The hour will not advance even if minutes advance from “59” to “00”.
●The clock starts from “0” second. (Seconds are not displayed.) The time display will disappear after a few seconds.
Operation
Clock –
1 Press the POWER button to turn the power on.
2 Press the MENU button.
3 Turn the jog dial to select “CLOCK” and within 10 seconds, press the ENTER button.
4 Turn the jog dial to select the
“AM 12:00”→ | The | |
“AM 0:00” → | The | |
“0:00” | → | The |
Note that this can only be set when the unit is first installed or it has been reset. [Refer to “Clearing all the memory (reset)” on page 30 for details.]
To confirm the time display:
[When the unit is in the
[When the power is on] Press the MENU button.
The time display will appear for about 10 seconds.
Note:
“CLOCK” will appear or time will flash at the push of the DISPLAY button when the AC power supply is restored after a power failure or unplugging the unit.
Reset the clock as follows.
To reset the clock:
[When time is flashing]
1.Press the POWER button.
2.Press the MENU button.
3.Press the ENTER button.
4.Perform “Setting the Clock” from step 5.
[When “CLOCK” appears]
Perform “Setting the Clock” from the beginning.
To change the 24-hour or 12-hour display:
1.Clear all the programmed contents.
[Refer to “Clearing all the memory (reset)” on page 30 for details.]
2.Perform “Setting the Clock” from the beginning.
Basic
– Setting the
15