Removing the paper roll
When a red dye appears on the paper roll, it is time to replace it. Replace the paper roll with a new one. If you plan on not using the register for an extended period of time, remove the paper roll, and store it in an appropriate place.
Caution: The paper cutter is mounted on the printer cover. Be careful not to cut yourself. When not using the
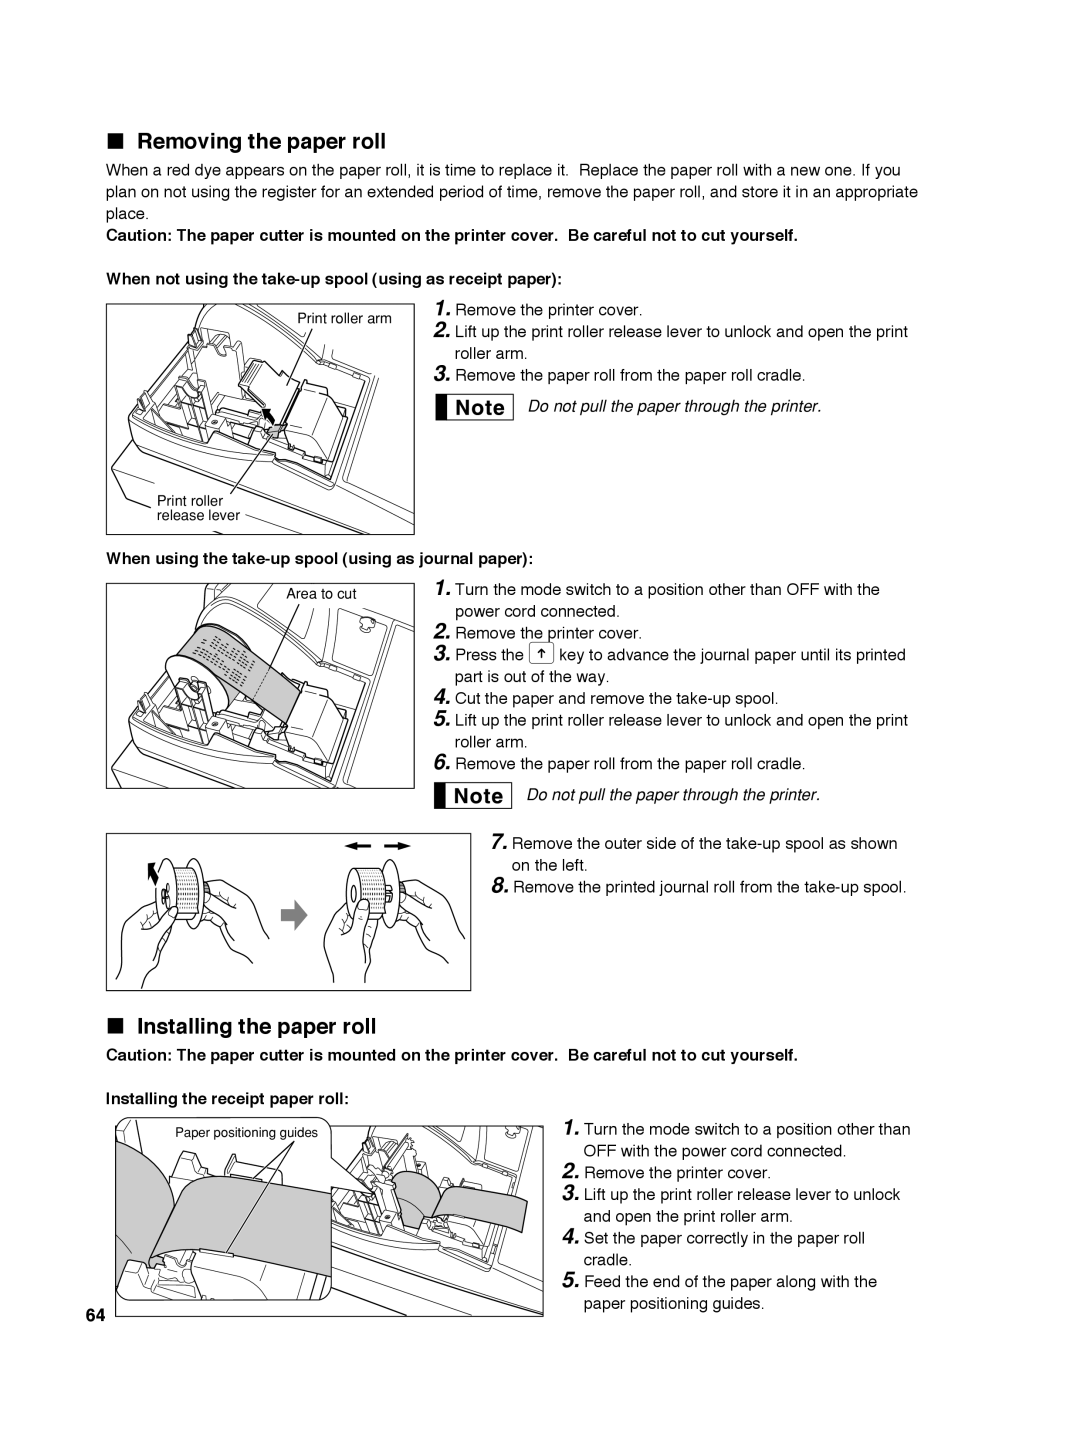
Print roller arm |
Print roller |
release lever |
1.Remove the printer cover.
2.Lift up the print roller release lever to unlock and open the print roller arm.
3.Remove the paper roll from the paper roll cradle.
Do not pull the paper through the printer.
When using the take-up spool (using as journal paper):
Area to cut |
1.Turn the mode switch to a position other than OFF with the power cord connected.
2.Remove the printer cover.
3.Press the Fkey to advance the journal paper until its printed part is out of the way.
4.Cut the paper and remove the
5.Lift up the print roller release lever to unlock and open the print roller arm.
6.Remove the paper roll from the paper roll cradle.
Do not pull the paper through the printer.
7. Remove the outer side of the
8. Remove the printed journal roll from the
Installing the paper roll
Caution: The paper cutter is mounted on the printer cover. Be careful not to cut yourself. Installing the receipt paper roll:
Paper positioning guides |
64 |
1.Turn the mode switch to a position other than OFF with the power cord connected.
2.Remove the printer cover.
3.Lift up the print roller release lever to unlock and open the print roller arm.
4.Set the paper correctly in the paper roll cradle.
5.Feed the end of the paper along with the paper positioning guides.