Basic adjustment settings
Picture adjustments
You can adjust the picture to your preference. Follow the steps to adjust the picture.
1 Press MENU and the MENU screen displays.
2 Press c/dto select “Picture”.
3 Press a/bto select a specific adjustment item.
4 Press c/dto adjust the item to your desired position.
![]() NOTE
NOTE
•For resetting all adjustment items to factory preset values, press a/bto select “Reset”, press ENTER, press c/d to select “Yes”, and then press ENTER.
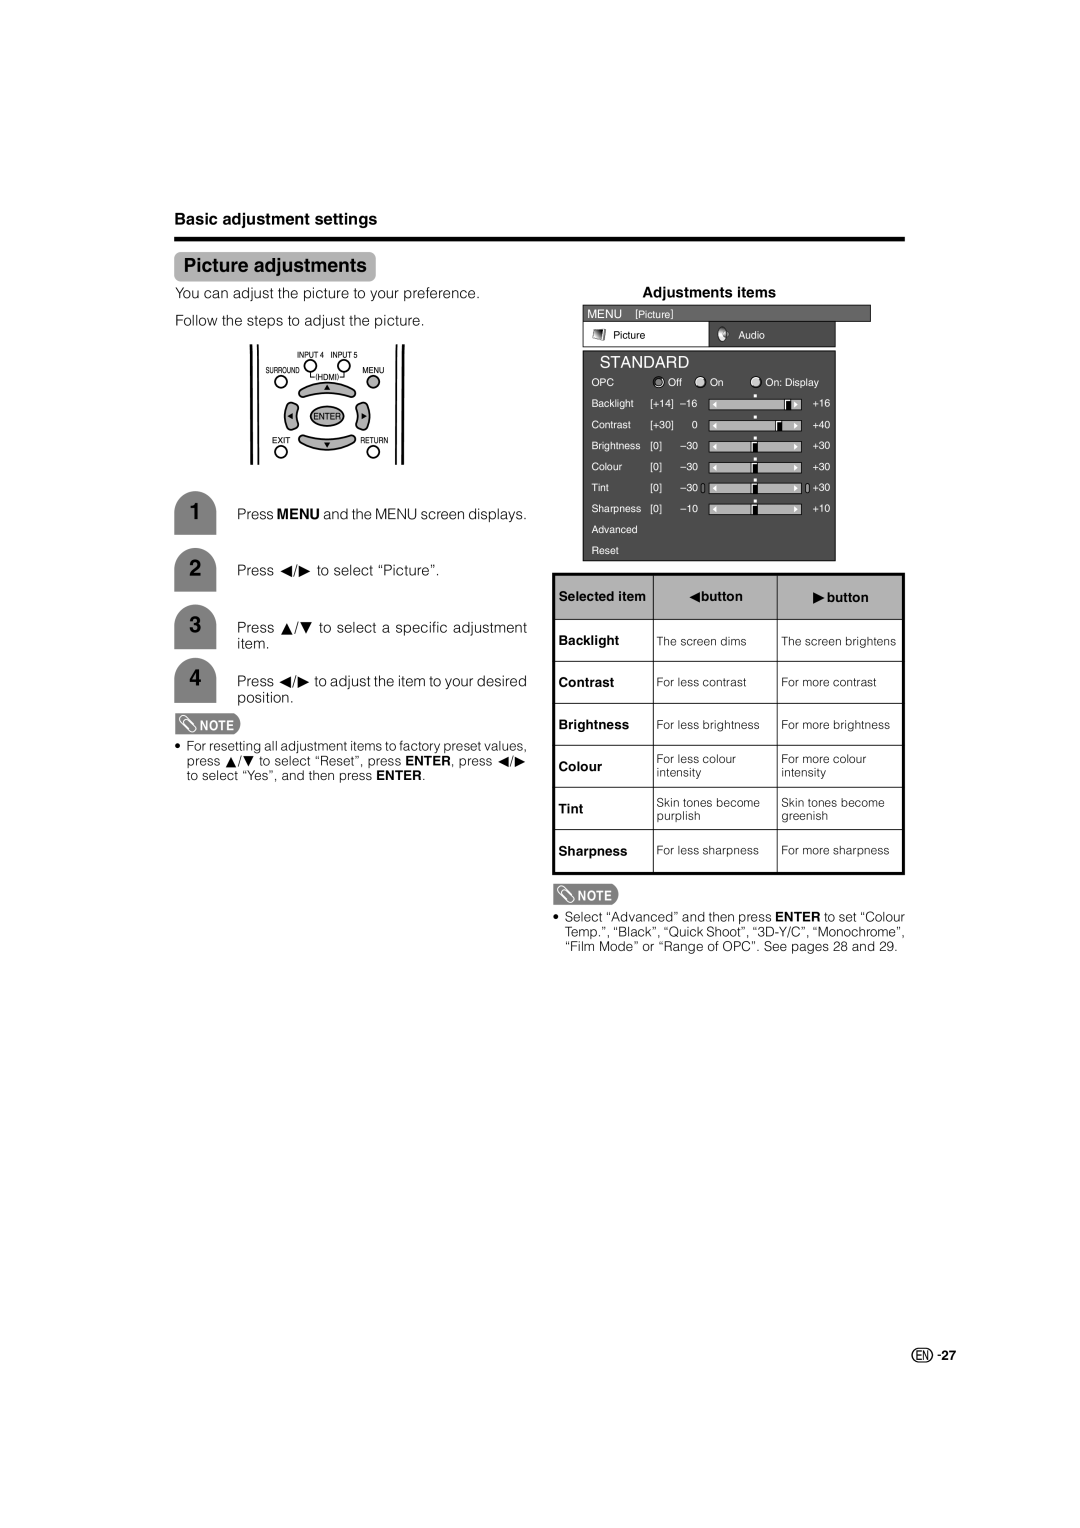
Adjustments items
MENU [Picture]
Picture | Audio |
| STANDARD |
|
|
|
|
|
|
| |||
| OPC |
| Off | On | On: Display |
| |||||
| Backlight | [+14] |
|
|
|
|
| +16 |
| ||
|
|
|
|
|
|
| |||||
| Contrast | [+30] | 0 |
|
|
|
|
| +40 |
| |
|
|
|
|
|
|
| |||||
| Brightness | [0] |
|
|
|
|
| +30 |
| ||
|
|
|
|
|
|
| |||||
| Colour | [0] |
|
|
|
|
| +30 |
| ||
|
|
|
|
|
|
| |||||
| Tint | [0] |
|
|
|
|
| +30 |
| ||
|
|
|
|
|
|
| |||||
| Sharpness | [0] |
|
|
|
|
| +10 |
| ||
|
|
|
|
|
|
| |||||
| Advanced |
|
|
|
|
|
|
|
|
|
|
| Reset |
|
|
|
|
|
|
|
|
|
|
|
|
|
|
|
|
|
|
|
| ||
Selected item |
|
| cbutton |
|
|
| dbutton | ||||
|
|
|
|
| |||||||
Backlight |
| The screen dims |
| The screen brightens | |||||||
|
|
|
|
| |||||||
Contrast |
| For less contrast |
| For more contrast | |||||||
|
|
|
|
| |||||||
Brightness |
| For less brightness |
| For more brightness | |||||||
|
|
|
|
|
| ||||||
Colour |
| For less colour |
| For more colour | |||||||
| intensity |
|
|
| intensity | ||||||
|
|
|
|
|
| ||||||
|
|
|
|
|
| ||||||
Tint |
| Skin tones become |
| Skin tones become | |||||||
| purplish |
|
|
| greenish | ||||||
|
|
|
|
|
| ||||||
|
|
|
|
| |||||||
Sharpness |
| For less sharpness |
| For more sharpness | |||||||
|
|
|
|
|
|
|
|
|
|
|
|
![]() NOTE
NOTE
•Select “Advanced” and then press ENTER to set “Colour Temp.”, “Black”, “Quick Shoot”,
![]()
![]() 27
27