Viewing the Connections
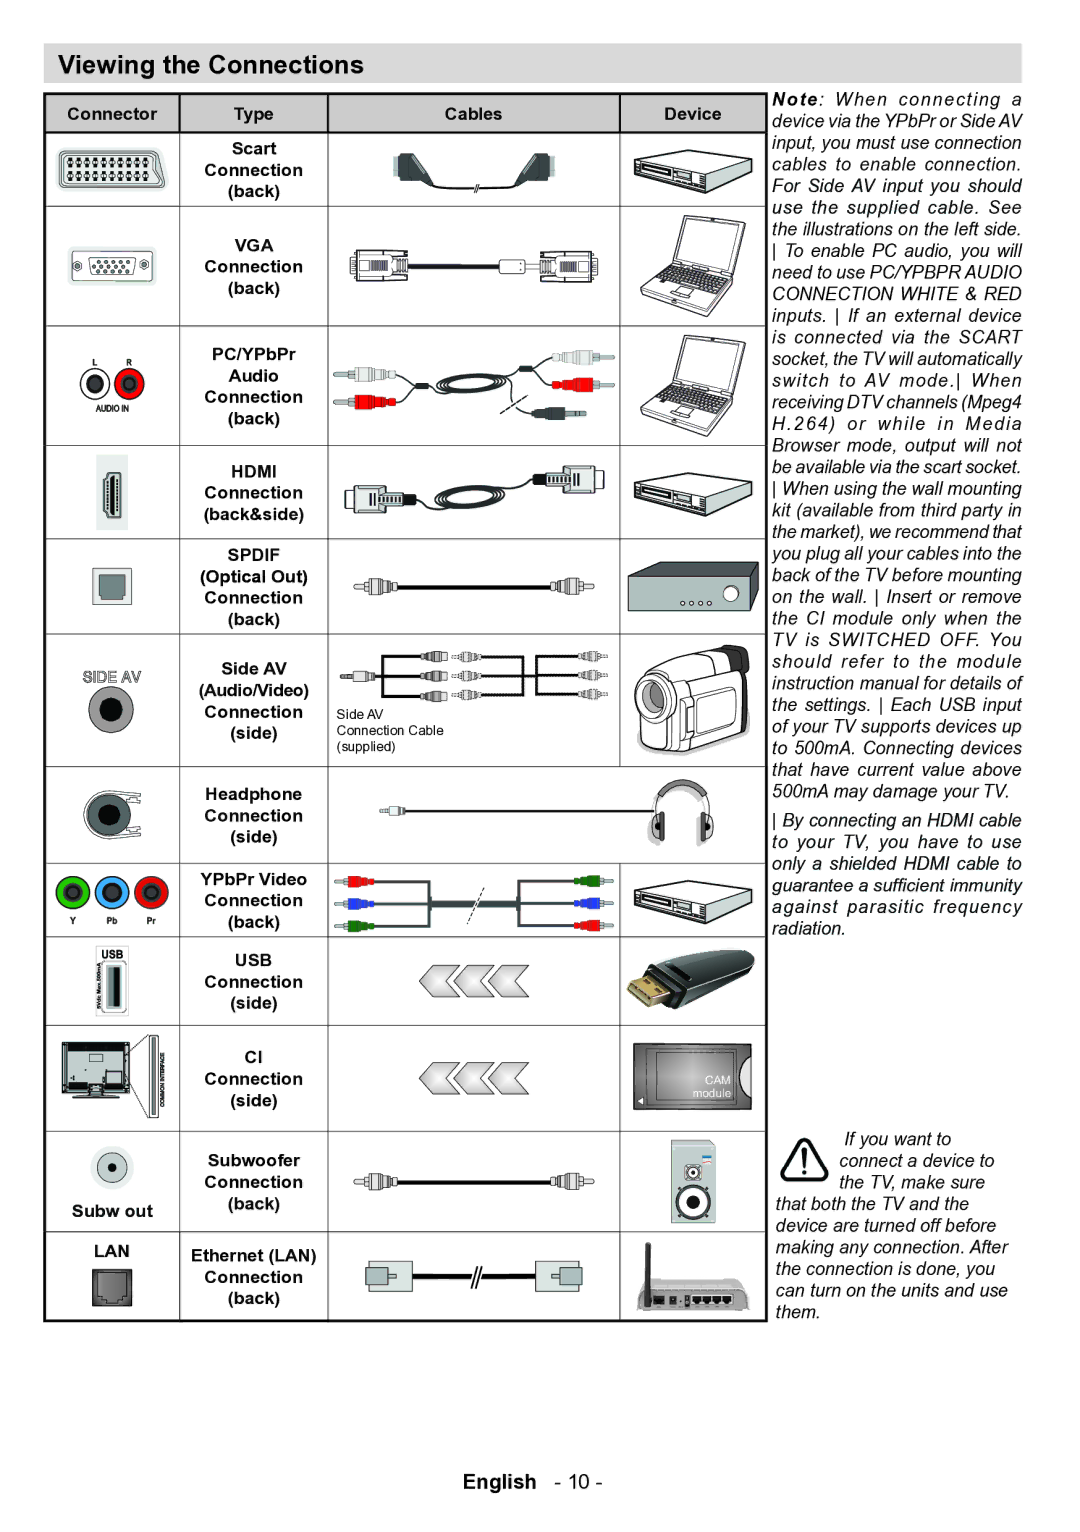
Connector | Type | Cables | Device |
| Scart |
|
|
| Connection |
|
|
| (back) |
|
|
| VGA |
|
|
| Connection |
|
|
| (back) |
|
|
| PC/YPbPr |
|
|
| Audio |
|
|
| Connection |
|
|
| (back) |
|
|
| HDMI |
|
|
| Connection |
|
|
| (back&side) |
|
|
| SPDIF |
|
|
| (Optical Out) |
|
|
| Connection |
|
|
| (back) |
|
|
| Side AV |
|
|
| (Audio/Video) |
|
|
| Connection | Side AV |
|
| (side) | Connection Cable |
|
|
| (supplied) |
|
| Headphone |
|
|
| Connection |
|
|
| (side) |
|
|
| YPbPr Video |
|
|
| Connection |
|
|
| (back) |
|
|
| USB |
|
|
| Connection |
|
|
| (side) |
|
|
| CI |
|
|
| Connection |
| CAM |
| (side) |
| module |
|
|
| |
| Subwoofer |
|
|
| Connection |
|
|
Subw out | (back) |
|
|
|
|
| |
LAN | Ethernet (LAN) |
|
|
| Connection |
|
|
| (back) |
|
|
|
| English | - 10 - |
Note: When connecting a device via the YPbPr or Side AV input, you must use connection cables to enable connection. For Side AV input you should use the supplied cable. See the illustrations on the left side. To enable PC audio, you will need to use PC/YPBPR AUDIO CONNECTION WHITE & RED inputs. If an external device is connected via the SCART socket, the TV will automatically switch to AV mode. When receiving DTV channels (Mpeg4 H.264) or while in Media Browser mode, output will not be available via the scart socket. When using the wall mounting kit (available from third party in the market), we recommend that you plug all your cables into the back of the TV before mounting on the wall. Insert or remove the CI module only when the TV is SWITCHED OFF. You should refer to the module instruction manual for details of the settings. Each USB input of your TV supports devices up to 500mA. Connecting devices that have current value above 500mA may damage your TV.
By connecting an HDMI cable to your TV, you have to use only a shielded HDMI cable to guarantee a sufficient immunity against parasitic frequency radiation.
If you want to connect a device to the TV, make sure
that both the TV and the device are turned off before making any connection. After the connection is done, you can turn on the units and use them.