Basic adjustment
TV | E When selecting “Yes” | Individual setting — Clock | ||||||||||||
Register a | ||||||||||||||
|
|
|
|
|
|
|
|
|
| |||||
|
|
|
|
|
|
|
|
|
| |||||
|
|
|
| function. |
|
|
|
|
|
| ||||
| View setting |
|
| View setting |
|
|
| |||||||
|
| 1 | Press c/dto select “Yes”, and then press ;. |
|
|
|
| |||||||
| Quick start |
|
| Clock setup |
|
| ||||||||
|
| 2 | Enter the |
|
|
| ||||||||
|
|
|
|
|
|
|
|
|
| |||||
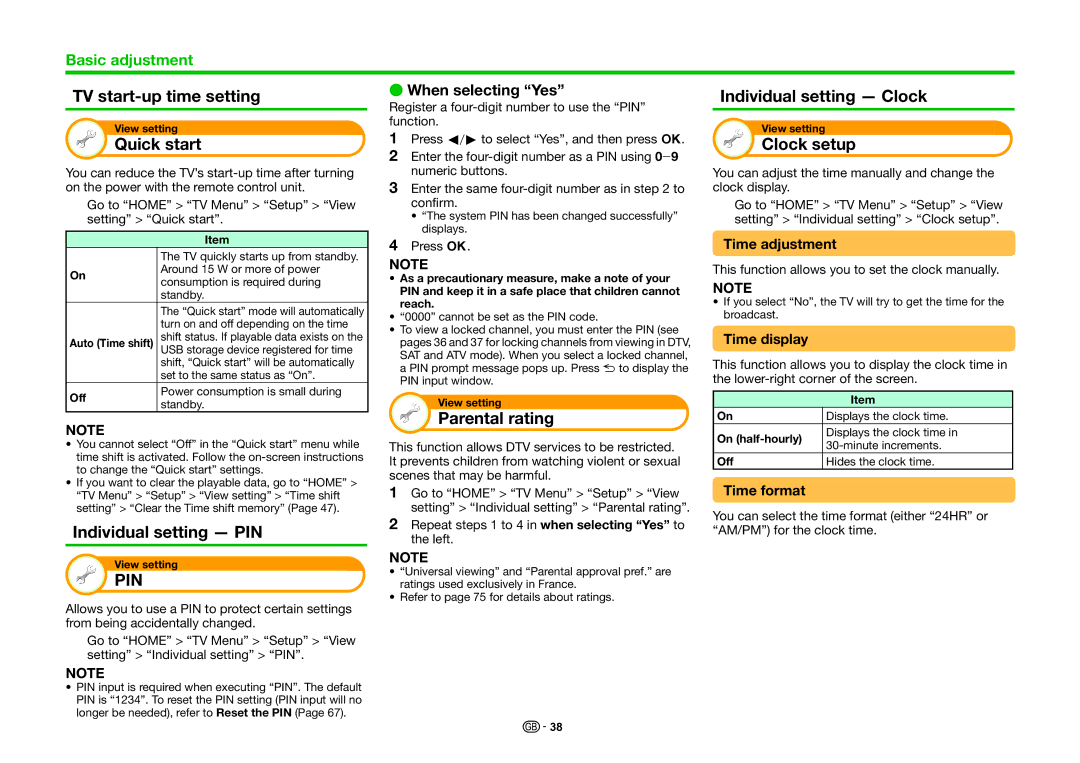
You can reduce the TV’s | 3 | numeric buttons. | You can adjust the time manually and change the | |||||||||||
on the power with the remote control unit. | Enter the same | clock display. |
|
|
| |||||||||
Go to “HOME” > “TV Menu” > “Setup” > “View |
| confirm. | Go to “HOME” > “TV Menu” > “Setup” > “View | |||||||||||
setting” > “Quick start”. |
| • “The system PIN has been changed successfully” | setting” > “Individual setting” > “Clock setup”. | |||||||||||
|
|
|
|
| displays. |
|
|
|
|
|
| |||
|
| Item | 4 | Press ;. | Time adjustment | |||||||||
|
| The TV quickly starts up from standby. | ||||||||||||
|
| NOTE | This function allows you to set the clock manually. | |||||||||||
On | Around 15 W or more of power | |||||||||||||
• As a precautionary measure, make a note of your | ||||||||||||||
consumption is required during | NOTE |
|
|
| ||||||||||
|
|
| PIN and keep it in a safe place that children cannot |
|
|
| ||||||||
|
| standby. |
|
|
|
| ||||||||
|
|
| reach. | • If you select “No”, the TV will try to get the time for the | ||||||||||
|
| The “Quick start” mode will automatically |
| |||||||||||
|
| • “0000” cannot be set as the PIN code. | broadcast. |
|
|
| ||||||||
|
| turn on and off depending on the time |
|
|
| |||||||||
|
| • To view a locked channel, you must enter the PIN (see |
|
|
|
|
|
| ||||||
|
| shift status. If playable data exists on the | Time display |
|
|
| ||||||||
Auto (Time shift) |
| pages 36 and 37 for locking channels from viewing in DTV, |
|
|
| |||||||||
USB storage device registered for time |
|
|
|
|
|
|
| |||||||
|
| shift, “Quick start” will be automatically |
| SAT and ATV mode). When you select a locked channel, | This function allows you to display the clock time in | |||||||||
|
|
| a PIN prompt message pops up. Press 6 to display the | |||||||||||
|
| set to the same status as “On”. |
| PIN input window. | the | |||||||||
Off | Power consumption is small during |
| ||||||||||||
|
|
|
|
|
|
|
|
|
| |||||
|
| View setting |
|
|
|
| Item |
| ||||||
standby. |
|
|
|
|
|
|
| |||||||
|
|
|
|
|
| Parental rating |
| On |
| Displays the clock time. |
| |||
NOTE |
|
|
| |||||||||||
|
|
|
|
| On |
| Displays the clock time in |
| ||||||
|
|
|
|
|
|
|
| |||||||
• You cannot select “Off” in the “Quick start” menu while | This function allows DTV services to be restricted. |
|
| |||||||||||
|
|
|
| |||||||||||
time shift is activated. Follow the | It prevents children from watching violent or sexual | Off |
| Hides the clock time. |
| |||||||||
to change the “Quick start” settings. |
|
| ||||||||||||
scenes that may be harmful. |
|
|
|
|
|
| ||||||||
• If you want to clear the playable data, go to “HOME” > |
|
|
|
|
|
| ||||||||
1 | Go to “HOME” > “TV Menu” > “Setup” > “View | Time format |
|
|
| |||||||||
“TV Menu” > “Setup” > “View setting” > “Time shift |
|
|
| |||||||||||
|
|
|
| |||||||||||
setting” > “Clear the Time shift memory” (Page 47). |
| setting” > “Individual setting” > “Parental rating”. | You can select the time format (either “24HR” or | |||||||||||
Individual setting — PIN | 2 Repeat steps 1 to 4 in when selecting “Yes” to | |||||||||||||
“AM/PM”) for the clock time. | ||||||||||||||
| the left. | |||||||||||||
|
|
|
|
|
|
|
|
|
|
| ||||
|
|
|
| NOTE |
|
|
|
|
|
| ||||
| View setting |
|
|
|
|
|
|
| ||||||
|
| • “Universal viewing” and “Parental approval pref.” are |
|
|
|
|
|
| ||||||
| PIN |
|
|
|
|
|
|
|
| |||||
|
|
|
| ratings used exclusively in France. |
|
|
|
|
|
| ||||
• Refer to page 75 for details about ratings.
Allows you to use a PIN to protect certain settings from being accidentally changed.
Go to “HOME” > “TV Menu” > “Setup” > “View setting” > “Individual setting” > “PIN”.
NOTE
•PIN input is required when executing “PIN”. The default PIN is “1234”. To reset the PIN setting (PIN input will no longer be needed), refer to Reset the PIN (Page 67).
![]()
![]() 38
38
