COMPACT DISC OPERATION
■CD playback
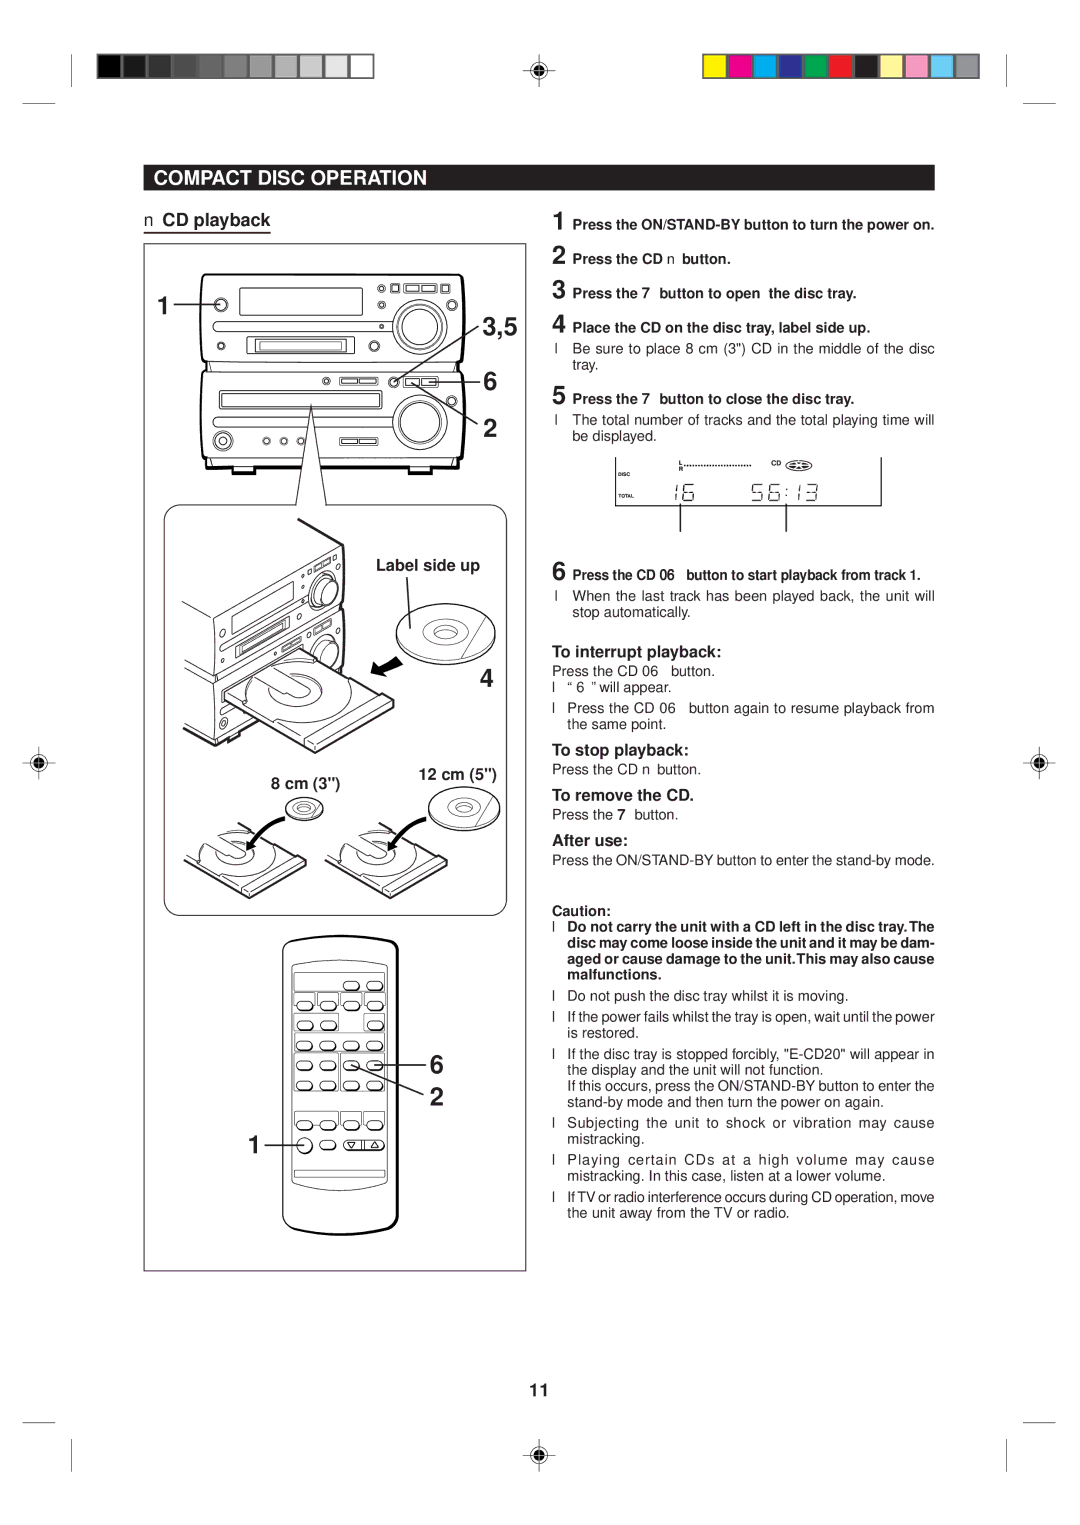
1 | 3,5 |
| |
| 6 |
| 2 |
| Label side up |
| 4 |
8 cm (3") | 12 cm (5") |
| |
| 6 |
| 2 |
1 |
|
1 Press the
2 Press the CD ■ button.
3 Press the 7 button to open the disc tray.
4 Place the CD on the disc tray, label side up.
●Be sure to place 8 cm (3") CD in the middle of the disc tray.
5 Press the 7 button to close the disc tray.
●The total number of tracks and the total playing time will be displayed.
Total number of tracks Total playing time
6 Press the CD 06 button to start playback from track 1.
●When the last track has been played back, the unit will stop automatically.
To interrupt playback:
Press the CD 06 button.
●“ 6 ” will appear.
●Press the CD 06 button again to resume playback from the same point.
To stop playback:
Press the CD ■ button.
To remove the CD.
Press the 7 button.
After use:
Press the
Caution:
●Do not carry the unit with a CD left in the disc tray. The disc may come loose inside the unit and it may be dam- aged or cause damage to the unit.This may also cause malfunctions.
●Do not push the disc tray whilst it is moving.
●If the power fails whilst the tray is open, wait until the power is restored.
●If the disc tray is stopped forcibly,
If this occurs, press the
●Subjecting the unit to shock or vibration may cause mistracking.
●Playing certain CDs at a high volume may cause mistracking. In this case, listen at a lower volume.
●If TV or radio interference occurs during CD operation, move the unit away from the TV or radio.
11
